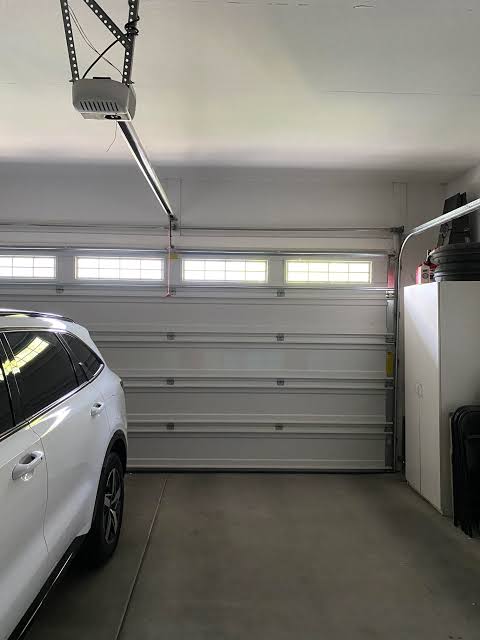
It can be incredibly frustrating when you press the button to close your garage, only to watch it reverse right after touching the floor. If you’re thinking, “My Garage Door Closes All The Way Then Opens,” you are not alone, and this common issue is usually easy to fix.
Reasons Why “My Garage Door Closes All The Way Then Opens”
When your garage door hits the floor and immediately reverses, the opener’s logic board interprets this action as hitting a physical obstruction.
Modern garage door openers are legally required to have an automatic reverse mechanism to prevent accidents. However, several specific maintenance issues can trigger this safety feature falsely.
According to the International Door Association (IDA), over 70% of garage door malfunctions stem from simple maintenance neglect. These include dirty sensors, misaligned tracks, or incorrect limit settings. By understanding the root cause, you can solve the problem quickly.
1. Misaligned or Dirty Safety Sensors
The most common culprit is the photoelectric safety sensors located near the floor on both sides of the door. These sensors shoot an invisible infrared beam across the door’s path.
If the beam is broken, blocked, or misaligned, the door will instantly reverse. Even a tiny spiderweb, a smudge of dirt, or a slight bump from a lawnmower can knock them out of alignment.
2. Incorrect Close Limit Switch Settings
The limit switch tells the motor exactly how far to travel before stopping. If it is set incorrectly, the door might think it has hit an object before it actually seals the floor. This is especially common after a power outage, which can reset the opener’s internal memory.
3. Binding Tracks or Dry Rollers
If the metal tracks are bent or the rollers are dry, the door encounters extra physical resistance. The motor senses this extra strain and assumes it is an obstruction. Over time, dust and grime build up inside the tracks, creating enough friction to stall the door.
4. Extreme Temperature Changes
Believe it or not, weather plays a massive role in how your garage door operates. Extreme cold can cause the metal tracks to contract slightly, increasing friction. Additionally, standard grease can thicken in freezing temperatures, making the moving parts sluggish.
“Nine times out of ten, a reversing garage door is just a sensor alignment issue or a dirty lens,” says Mark Davis, a certified garage door technician with over 15 years of field experience. “Homeowners often panic and call a pro, not realizing they can fix it themselves in five minutes.”
5. Logic Board or Remote Interference
Sometimes, the issue isn’t mechanical at all. A failing logic board can send mixed signals to the motor, causing it to stop and reverse randomly.
Additionally, certain LED bulbs installed in the opener can cause radio frequency interference with the remote or sensors. Try removing the LED bulbs temporarily to see if the issue resolves.
DIY vs. Professional Repair: Which Should You Choose?
Before grabbing your tools, it is important to assess the situation. Here is a quick comparison to help you decide whether to tackle the issue yourself or call an expert.
| Factor | DIY Repair | Professional Repair |
|---|---|---|
| Cost | Low ($0 – $20 for cleaners/tools) | Higher ($100 – $300 for service call) |
| Time | 30 minutes to 2 hours | 1 hour (requires scheduling) |
| Risk Level | Moderate (electrical/spring danger) | Low (handled by trained experts) |
| Best For | Sensor cleaning, limit adjustments | Broken springs, motor replacement |
Real-World Case Study: The Mystery of the Reversing Door
Consider the case of Sarah, a homeowner in Chicago, who experienced this exact issue during a harsh winter. Every evening, her garage door would close, touch the concrete, and immediately bounce back up. She assumed the motor was broken and prepared to spend hundreds on a replacement.
However, after following a troubleshooting guide, she discovered the root cause. The freezing temperatures had caused her metal tracks to contract slightly, while the standard lithium grease she used had frozen solid. The motor was working overtime to push the door down, triggering the auto-reverse.
By simply cleaning the tracks with a degreaser and applying a cold-weather silicone lubricant, Sarah fixed the issue in under 20 minutes for less than $10. This proves that environmental factors and simple maintenance often hold the key to solving complex-looking mechanical problems.
Step-by-Step Tutorial: How to Fix the Issue
If you are ready to solve the problem yourself, follow these concrete steps. Always ensure the area is clear of people and pets before testing the door.
Step 1: Clean and Realign the Safety Sensors
- Grab a clean microfiber cloth and gently wipe the small LED lenses on both sensors.
- Check the indicator lights. Usually, one sensor has a green light (sending) and the other has an amber or red light (receiving).
- If the receiving light is blinking or completely off, loosen the wing nut on the bracket just enough to allow movement.
- Gently adjust the sensor horizontally and vertically until the LED glows solid.
- Tighten the wing nut by hand while holding the sensor perfectly still.
- Press the wall button to test the door.
Step 2: Adjust the Close Limit Switch
- Locate the limit adjustment screws on the back or side of the motor unit. They are usually clearly labeled “Down” or “Close.”
- Using a flathead screwdriver, turn the “Close” screw exactly 1/4 turn clockwise.
- Press the wall button to test the door’s travel distance.
- Repeat this process in small increments until the door closes fully and stays closed without reversing. Never turn the screw more than 1/2 turn at a time.
For more technical background on how these mechanisms operate, you can read about the Garage door opener on Wikipedia.
Step 3: Lubricate and Inspect the Tracks
- Inspect the metal tracks on both sides for dents or bends.
- Use a level to ensure the tracks are perfectly plumb. If they are bent, gently tap them back into place with a rubber mallet.
- Clean the inside of the tracks with a household degreaser and a rag to remove built-up grime.
- Apply a silicone-based lubricant to the rollers, hinges, and track. Avoid using WD-40, as it attracts more dust and can gum up the mechanism.
Step 4: Check the Force Settings
- Locate the force adjustment dials on the motor unit, usually labeled “Up Force” and “Down Force.”
- If the door is reversing because it thinks it hit an obstacle, it might need more downward force to push through the weatherstripping.
- Turn the “Down Force” dial slightly clockwise (about 1/8 of a turn).
- Test the door. If it still reverses, increase it by another 1/8 turn.
- Warning: Do not set the force too high, or the door will not reverse if it actually hits a person or object, creating a dangerous safety hazard.
Pros and Cons of Sensor Realignment
Pros:
- Completely free to perform.
- Takes less than 5 minutes.
- Solves the vast majority of reversing issues.
Cons:
- Requires getting down on the garage floor.
- Brackets can be rusty and difficult to loosen.
Frequently Asked Questions (FAQ)
Q1: How do I know if my garage door sensors are bad? A1: Look at the small LED lights on the sensor units. If the light on the receiving sensor is blinking or completely off, the sensors are misaligned, dirty, or broken. A solid light indicates they are working perfectly.
Q2: Can extreme weather cause my garage door to reverse? A2: Yes. In freezing temperatures, metal tracks can contract and lubricants can thicken, causing the door to bind. The motor senses this resistance and triggers the auto-reverse feature. Applying a silicone-based lubricant in winter can prevent this.
Q3: How much does it cost to fix a garage door that won’t stay closed? A3: If it is a simple sensor realignment or limit switch adjustment, it costs $0 if you do it yourself. If you hire a professional, expect a service call fee ranging from $100 to $250, depending on your location and the specific part needed.
Q4: Is it safe to force my garage door to stay closed? A4: Never try to force the door closed by holding the wall button or bypassing the sensors. This disables crucial safety features and poses a severe crushing hazard to children, pets, and objects. Always fix the underlying issue instead.
Q5: Why does my garage door only reverse when I use the remote? A5: This usually points to an issue with the travel limits or a weak remote battery. When using the remote, the logic board might interpret a slight hesitation differently than when using the hardwired wall button. Check your limit switches first.
Q6: How often should I maintain my garage door to prevent this issue? A6: You should perform a basic visual inspection and clean the sensors every three months. A full lubrication of the rollers, hinges, and tracks should be done at least twice a year—once before the harsh winter cold and once before the humid summer heat. Regular maintenance is the best way to prevent unexpected breakdowns.
Conclusion
Dealing with a garage door that refuses to stay shut is a hassle, but it rarely requires a total system replacement. By systematically checking your sensors, adjusting the limit switch, and maintaining your tracks, you can restore smooth operation in an afternoon.
Not only will this save you money on professional repairs, but it will also ensure your home remains secure against the elements and intruders.
If you found this guide helpful, please share it on your social media channels to help friends and family who might be struggling with the exact same issue!
Leave a Reply