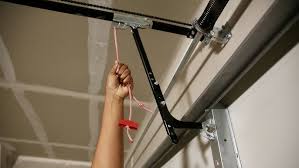
It is incredibly frustrating when you press the remote, but nothing happens until you realize you have to hold down garage door button to close it properly. Don’t worry, this common issue is usually a quick fix related to your safety sensors or limit switches, and we are here to help you solve it today.
Why Do I Have To Hold Down Garage Door Button To Close?
When your garage door refuses to close automatically, it is almost always a built-in safety feature doing exactly what it was designed to do. In 1993, the federal government mandated that all automatic garage door openers must include photoelectric safety sensors. If the system detects an obstruction, a misalignment, or a fault in the sensor circuit, it will refuse to close automatically to prevent the door from crushing a person, pet, or object.
However, the system includes a “constant pressure” bypass. If you manually hold the wall button down, the door will close regardless of the sensor status. This is why you find yourself in a situation where you have to hold down garage door button to close the door.
According to the Consumer Product Safety Commission (CPSC), these auto-reverse and sensor features prevent thousands of entrapment injuries every year. While the feature is a lifesaver, a glitchy sensor can be a massive headache. The good news? In 90% of cases, the problem is minor and can be fixed in under ten minutes without calling a professional.
How to Check and Align Your Garage Door Safety Sensors
The most common culprit for this issue is misaligned or dirty safety sensors. These are the small black boxes located near the floor on both sides of the garage door tracks. They shoot an invisible infrared beam across the door opening. If the beam is broken, the door won’t close.
Here is a step-by-step tutorial to fix them:
- Observe the LED Lights: Look at the sensors. Typically, one sensor has a yellow or amber light (the sending eye), and the other has a green or red light (the receiving eye). If the receiving eye is blinking, the beam is blocked or misaligned. If both are solid, your sensors are likely fine.
- Clean the Lenses: Over time, dust, spider webs, and dirt can block the infrared beam. Take a clean, dry microfiber cloth and gently wipe the small glass lenses on both sensors.
- Check for Physical Obstructions: Ensure that no trash cans, brooms, or cobwebs are interrupting the path between the two sensors.
- Realign the Brackets: If the lights are still blinking, the sensors have likely been bumped out of alignment. Loosen the wingnut on the bracket of the blinking sensor just enough so you can move it.
- Adjust the Angle: Gently tilt the sensor until the blinking light turns solid. They must face each other perfectly straight. You can use a small level to ensure they are at the exact same height (usually 4 to 6 inches off the ground).
- Tighten and Test: Once the light is solid, tighten the wingnut securely. Press the garage door remote to test if it closes automatically.
What If the Sensors Are Fine? Check the Travel Limit Switch
If your sensor lights are perfectly solid and the door still requires you to hold the button, the issue might be your travel limit switch. This switch tells the motor exactly how far to move when opening and closing. If the “down limit” is set incorrectly, the motor thinks the door has hit an obstacle (the floor) before it actually has, causing it to reverse and refuse to close automatically.
Here is how to adjust it:
- Locate the Limit Screws: Look at the back or side of your garage door motor head (the main box hanging from the ceiling). You will see two plastic adjustment screws. One is labeled “Up” or “Open,” and the other is labeled “Down” or “Close.”
- Identify the Down Limit: Focus on the screw labeled “Down” or “Close.” Next to it, there are usually arrows indicating which direction increases or decreases the travel distance.
- Make a Micro-Adjustment: Using a flathead screwdriver, turn the “Down” limit screw in the direction of the arrow that increases travel distance. Turn it just a quarter-turn (about 15 degrees).
- Test the Door: Press the wall button to close the door. Watch how it seals against the floor rubber.
- Fine-Tune: If it still reverses, turn it another quarter-turn. If it slams into the floor too hard and bounces back, you have turned it too far—adjust it back slightly.
Note: Always make small adjustments. A quarter-turn can change the travel distance by several inches.
DIY vs. Professional Garage Door Repair: A Quick Comparison
When dealing with garage door issues, it is important to know when to grab your tools and when to pick up the phone. Here is a quick comparison to help you decide.
| Feature | DIY Repair (Sensors & Limits) | Professional Technician |
|---|---|---|
| Cost | $0 (Requires only basic tools) | $100 – $250 (Service call + labor) |
| Time Required | 10 – 20 minutes | 1 – 2 hours (Scheduling + repair) |
| Best For | Misaligned sensors, dirty lenses, limit adjustments. | Broken springs, snapped cables, fried logic boards. |
| Risk Level | Very Low (Safe for beginners) | High (Requires specialized training) |
When Should You Call a Professional?
While sensor alignment and limit switches are perfectly safe for beginners to handle, some garage door problems require a trained expert. If you have cleaned the lenses, perfectly aligned the sensors, adjusted the limit screws, and you still have to hold down garage door button to close the door, the issue may lie deeper in the system.
The problem could be a damaged wire running from the motor to the sensors, a failing logic board, or a faulty wall control panel. Furthermore, if your door is making loud grinding noises, shaking violently, or if the heavy springs look damaged, stop immediately. Garage door torsion springs are under extreme tension and can cause severe injury if handled incorrectly.
For a deeper understanding of the mechanical components and safety standards of these systems, you can review the comprehensive technical breakdown of a garage door on Wikipedia. If you suspect an electrical or spring issue, always hire a licensed and insured garage door repair specialist.
Frequently Asked Questions (FAQ)
1. Why does my garage door only close when I hold the wall button?
Your garage door is designed to stop and reverse if it detects an obstruction. When the safety sensors are misaligned, dirty, or blocked, the system thinks there is an invisible object in the way. Holding the wall button engages a manual override (constant pressure mode) that forces the door to close, bypassing the sensor safety check.
2. How do I know if my garage door sensors are definitely broken?
Look at the LED lights on the sensor eyes. If the sending eye (usually amber) is lit, but the receiving eye (usually green or red) is completely dark or blinking rapidly even after cleaning and realignment, the sensor itself may have suffered internal water damage or a short circuit and might need replacement.
3. Can sunlight interfere with my garage door sensors?
Yes, surprisingly! Direct, intense sunlight hitting the receiving sensor lens can actually blind the infrared receiver, making it think the beam is broken. If this happens only at specific times of the day, try swapping the sending and receiving sensors (so the sun hits the sender, not the receiver) or build a small cardboard shield around them.
4. How much does it cost to fix a garage door that won’t close?
If the issue is simply misaligned sensors or a limit switch adjustment, it is completely free to fix yourself. If you hire a professional to come out and realign the sensors or adjust the limits, expect to pay a standard service call fee ranging from $80 to $150. If a sensor needs actual replacement, the total cost is usually between $150 and $200.
Conclusion
Dealing with a stubborn garage door doesn’t have to ruin your day. As we have explored, when you find that you have to hold down garage door button to close the door, it is almost always a simple fix. By taking a few minutes to clean the sensor lenses, ensure they are perfectly aligned, and check your travel limit settings, you can restore your garage door’s automatic functionality safely and for free.
Leave a Reply