Dealing with a garage door that refuses to stay shut is incredibly frustrating, especially when you are just trying to secure your home for the night.
If you find yourself asking, “Why does my garage door close and then reopen?”, please know you are not alone in this annoying predicament.
Let’s explore the most common culprits and how you can easily fix this issue yourself.
Why Does My Garage Door Close And Then Reopen? (Top Causes)
Modern garage doors are equipped with mandatory safety features designed to prevent injuries and property damage.
According to the Consumer Product Safety Commission, these auto-reverse mechanisms have significantly reduced garage door-related accidents since 1993.
However, these highly sensitive systems can sometimes trigger falsely. When your garage door touches the ground and immediately bounces back up, it thinks it has hit an obstacle.
The primary reasons for this behavior include:
- Misaligned safety sensors: The most common culprit by far.
- Dirty sensor lenses: Dust or spider webs blocking the infrared beam.
- Incorrect travel limits: The motor doesn’t realize the door has reached the floor.
- Track obstructions: Excessive friction making the door work too hard.
How Do Dirty or Misaligned Safety Sensors Cause This?
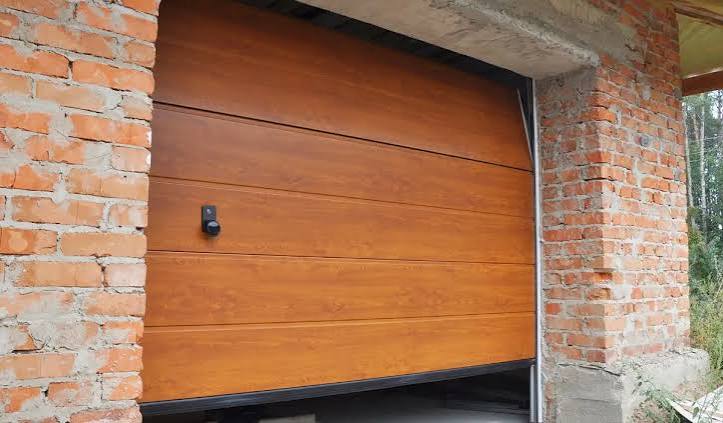
If you are wondering why your door reverses instantly, look at the small plastic eyes near the bottom of your door tracks.
These photo-eye sensors shoot an invisible infrared beam across the bottom of the door. If the beam is broken, the door will not close.
John Davis, a certified garage door technician with over 15 years of experience, notes, “In my career, 8 out of 10 reverse-door service calls are solved just by cleaning the sensor lenses with a microfiber cloth and realigning the brackets.”
Step-by-Step Sensor Fix:
- Locate the sensors: Find the two small plastic units on both sides of the door track, about 6 inches off the ground.
- Check the LED lights: One sensor should have a steady green light (receiving), and the other a steady amber or red light (sending).
- Clean the lenses: Gently wipe the sensor lenses with a clean, dry microfiber cloth to remove dust or cobwebs.
- Realign the brackets: Loosen the wing nut on the misaligned sensor just enough to move it.
- Adjust the angle: Gently nudge the sensor until the blinking light turns solid.
- Tighten and test: Secure the wing nut and test your door using the wall button.
What Happens When the Travel Limits Are Set Incorrectly?
The travel limit settings tell your garage door opener exactly how far to move when opening and closing.
If the “down limit” is set too short, the motor will stop before the door actually seals against the floor. This triggers the safety reverse mechanism.
Step-by-Step Limit Switch Adjustment:
- Find the adjustment screws: Look on the back or side of the motor unit hanging from your ceiling. You will see screws labeled “Down Limit” and “Up Limit”.
- Identify the issue: If the door reverses right after touching the floor, the down limit needs to be increased.
- Make a micro-adjustment: Using a flathead screwdriver, turn the “Down Limit” screw clockwise by exactly one-quarter turn (this typically translates to about 1.5 inches of additional travel).
- Test the door: Press the close button and observe the movement.
- Repeat if necessary: If it still reverses, turn the screw another quarter-turn clockwise. Never turn it more than half a turn at a time to avoid damaging the motor.
Are the Open and Close Force Settings Adjusted Properly?
Aside from travel limits, your garage door opener has force settings that dictate how much power the motor uses.
If the close force is set too low, the motor will give up and reverse the door at the slightest hint of resistance. This could be a small pebble in the track or stiff weather stripping.
Step-by-Step Force Adjustment:
- Locate the force dials: Find the “Close Force” and “Open Force” dials on the back of the motor unit. They are usually numbered from 1 to 10.
- Test the current force: Close the door using the wall button. Place a standard 2×4 piece of wood flat on the ground under the center of the door.
- Observe the reaction: When the door touches the wood, it should immediately reverse.
- Increase the close force: If the door struggles to close on an empty driveway, turn the “Close Force” dial clockwise by a half-inch increment (or one number on a 1-10 scale).
- Retest safely: Always test the auto-reverse feature with the 2×4 wood block after adjusting the force. If the door crushes the wood without reversing, the force is dangerously high. Turn the dial counter-clockwise immediately.
Can Weather Stripping or Track Obstructions Trigger Reversal?
Sometimes the issue isn’t electronic at all; it is purely physical.
If your garage door encounters too much resistance, the motor’s force settings will interpret this as an obstruction. It will then reverse the door to prevent damage.
Quick Diagnosis Table: Garage Door Reversal
| Symptom Observed | Most Likely Cause | Difficulty Level | Estimated Fix Time |
|---|---|---|---|
| Door reverses immediately | Misaligned or dirty sensors | Easy | 5–10 minutes |
| Door reverses after hitting floor | Down limit switch too short | Moderate | 10–15 minutes |
| Door struggles and reverses halfway | Lack of lubrication or track debris | Easy | 15–20 minutes |
| Door reverses only in winter | Stiff weather stripping or frozen track | Moderate | 20–30 minutes |
To fix physical resistance, inspect the metal tracks on both sides. Look for dents, debris, or rust.
Use a vacuum with a brush attachment to clean the tracks thoroughly. Next, apply a silicone-based lubricant (not WD-40) to the rollers, hinges, and track springs.
For more detailed mechanical specifications and the history of automated door systems, you can review the comprehensive overview on Garage door opener at Wikipedia.
How Do Extreme Temperatures Affect Garage Door Operation?
Believe it or not, the weather plays a massive role in how your door operates.
During the summer, heat can cause the photo-eye sensors to malfunction due to direct sunlight interference. The sun’s infrared rays can overpower the sensor’s beam.
Conversely, in the winter, cold temperatures can cause the bottom rubber weather stripping to freeze to the concrete. It can also make the metal tracks and springs extremely stiff.
When the rubber seal is frozen to the ground, the door meets immense physical resistance. The motor senses this strain and triggers the auto-reverse feature.
To prevent this, apply a thin layer of non-silicone based lubricant, like a spray lock de-icer or a light coat of car wax, to the bottom rubber seal before the first freeze of the season.
Could a Faulty Logic Board Be the Culprit?
In rare cases, if you have cleaned the sensors, adjusted the limits, and lubricated the tracks, the issue might lie within the opener’s logic board.
The logic board is the brain of your garage door opener. It processes signals from the remote controls, wall panels, and safety sensors.
If the board is suffering from power surges or age-related degradation, it can send mixed signals to the motor. This causes it to reverse randomly.
If you suspect this is the case, try unplugging the entire garage door opener from the ceiling outlet for exactly 60 seconds.
This hard reset can clear temporary memory glitches in the logic board. If the problem persists after a hard reset, you may need to consult a professional for a logic board replacement.
Frequently Asked Questions
1. How do I reset my garage door close limit? To reset the close limit, locate the “Down Limit” adjustment screw on the side of the motor head. Turn it clockwise in small quarter-turn increments using a screwdriver. Test the door after each adjustment until it closes completely and stays shut without reversing.
2. Why does my garage door reverse when it hits the floor? When the door hits the floor and bounces right back up, it usually means the down travel limit is not set far enough. The motor stops pushing down before the door is fully seated, confusing the safety system into thinking it hit an obstacle. Adjusting the down limit screw clockwise will fix this.
3. Can cold weather cause my garage door to reopen? Yes, absolutely. Cold weather can cause the bottom weather stripping to freeze to the concrete driveway. It can also make the metal tracks and springs stiff, increasing the physical resistance the motor feels. If the resistance exceeds the motor’s force limit, the door will automatically reverse.
4. How much does it cost to fix a garage door that won’t stay closed? If it is a simple sensor alignment or limit adjustment, it will cost you $0 in DIY labor. If you hire a professional, a standard service call typically ranges from $100 to $150. If a sensor is physically broken and needs replacement, expect to pay between $150 and $200 for parts and labor.
5. Is it safe to force my garage door to stay closed? No, you should never try to force the door closed or bypass the safety sensors. These features are legally mandated to prevent severe injuries, particularly to children and pets. If the door is reversing, it is detecting a real or perceived safety hazard that needs to be properly diagnosed and fixed.
Conclusion
Fixing a garage door that refuses to stay closed is usually much simpler than you might think.
By checking your safety sensors, adjusting the travel limits, and keeping the tracks clean, you can restore smooth operation in no time.
Not only will this save you the cost of a professional service call, but it will also give you peace of mind knowing your home is secure.
If you found this guide helpful and finally got your door to stay shut, please share this article on your social media to help out a friend who might be dealing with the exact same frustrating issue!
Leave a Reply