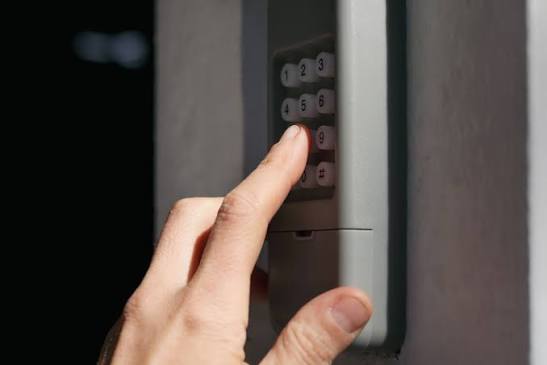
Have you ever stood in your driveway, rain pouring down, frantically pressing buttons on your garage door keypad only to hear silence? It is one of the most frustrating moments for any homeowner. You just replaced the battery, expecting instant relief, but instead, you are facing a Liftmaster garage door keypad not working after changing battery scenario. You are not alone; this is a common issue that often stems from simple synchronization errors rather than hardware failure.
In this guide, we will walk you through every possible solution, from basic reprogramming to advanced signal interference checks. By the end of this article, you will have your garage door responding to your command again, saving you the cost of a professional service call.
Why Does My Liftmaster Keypad Fail After a Battery Swap?
Before diving into the fixes, it is crucial to understand why this happens. Many users assume that swapping the battery is like changing a lightbulb—instant and seamless. However, garage door openers operate on radio frequencies (usually 315 MHz or 390 MHz) that require precise digital handshakes.
When you remove the old battery, the keypad loses power completely. In some models, this can cause a minor memory glitch or a loss of synchronization with the main opener unit. Additionally, if the new battery is not seated perfectly, or if the contacts are corroded, the device may appear “on” but fail to transmit a strong enough signal.
According to general principles of radio frequency communication detailed on Wikipedia, signal integrity is vital for remote devices. A weak power source or a disrupted connection can break this link, leaving your keypad unresponsive despite having fresh energy.
Step-by-Step Fixes for a Non-Responsive Keypad
Here are the most effective methods to resolve the issue, ordered from the easiest to the most technical.
1. Verify Battery Orientation and Type
It sounds trivial, but it is the number one cause of post-change failures.
- Check the Polarity: Ensure the positive (+) and negative (-) ends match the diagram inside the battery compartment. Even a slight misalignment can prevent power flow.
- Use the Right Battery: Liftmaster keypads typically require a 9V alkaline battery. Do not use rechargeable NiMH batteries unless specified, as they often output 8.4V instead of the required 9V, which may be insufficient for the transmitter.
- Inspect Contacts: Look for white or green corrosion on the metal terminals. If present, clean them gently with a cotton swab dipped in rubbing alcohol.
2. Perform a Hard Reset of the Keypad
Sometimes, the keypad’s internal software needs a fresh start.
- Remove the new battery.
- Press and hold any button on the keypad for 10–15 seconds. This drains any residual capacitor charge.
- Wait for 30 seconds.
- Reinsert the battery firmly.
- Wait for the LED light to blink (if equipped), indicating it is ready.
3. Reprogram the Keypad to the Opener
If the reset does not work, the keypad may have lost its “pairing” with the motor unit. You will need to re-sync it. This process varies slightly by model, but the general steps are:
- Locate the Learn Button: Find the “Learn” or “Smart” button on your garage door motor unit (usually hanging from the ceiling). It is often colored yellow, purple, or red.
- Clear Old Codes (Optional): If you suspect interference, press and hold the Learn button until the indicator light turns off (about 6 seconds). Note: This erases all remotes and keypads, so you will need to reprogram everything.
- Enter Programming Mode: Press the Learn button once briefly. The indicator light will turn on or blink.
- Input Your PIN: Within 30 seconds, go to your keypad and enter your desired 4-digit PIN, followed immediately by the “Enter” or “Send” button.
- Confirm Success: The motor unit’s light should blink or click, confirming the code has been accepted. Test the door immediately.
4. Check for Signal Interference
Modern homes are filled with devices that can jam garage door signals.
| Potential Interferer | Impact Level | Solution |
|---|---|---|
| LED Light Bulbs | High | Replace garage opener bulbs with standard incandescent or RF-shielded LEDs. |
| Wi-Fi Routers | Medium | Move the router away from the motor unit. |
| Baby Monitors | Medium | Change the channel on the monitor if possible. |
| Neighboring Openers | Low | Use a unique PIN and ensure your antenna is hanging down. |
If you recently changed to LED bulbs in your garage opener, this is likely the culprit. Cheap LEDs emit electromagnetic noise that blocks the 315/390 MHz signal. Try temporarily unscrewing the light bulbs and testing the keypad. If it works, buy high-quality, RF-shielded LED bulbs.
5. Inspect the Antenna
The motor unit has a small wire antenna hanging down. Ensure it is:
- Fully extended and hanging vertically.
- Not wrapped around metal brackets or buried in insulation.
- Not damaged or broken.
A bent or obstructed antenna significantly reduces range and reliability.
Common Mistakes to Avoid
- Using Old or Expired Batteries: Even if unused, batteries degrade over time. Check the expiration date.
- Not Pressing “Enter”: Some users type the PIN but forget to press the final “Enter” or “Send” button.
- Ignoring Weather Seals: If the keypad is outdoors, ensure the cover is closed tightly. Moisture can cause short circuits even with a new battery.
FAQ Section
Q1: How long should I wait after inserting the battery before testing?
Wait at least 10–15 seconds. The keypad needs a moment to initialize its internal circuitry and establish a stable voltage reading.
Q2: Can I use a lithium 9V battery instead of alkaline?
Yes, lithium batteries are actually superior for extreme temperatures. They last longer and perform better in cold winters or hot summers. However, ensure it is a standard 9V size.
Q3: My keypad lights up but the door doesn’t move. What does this mean?
This indicates the keypad has power but is not communicating with the opener. This is almost always a programming/sync issue. Follow the reprogramming steps in Section 3 above.
Q4: Is there a limit to how many times I can reprogram my keypad?
No, you can reprogram your Liftmaster keypad as many times as needed. There is no finite limit to the number of sync cycles.
Q5: What if none of these steps work?
If you have verified the battery, cleaned contacts, reset the device, and reprogrammed it without success, the keypad itself may be faulty. Internal components can fail due to age or moisture damage. Consider contacting Liftmaster support or replacing the keypad.
Q6: Does cold weather affect keypad performance?
Yes. Extreme cold can reduce battery efficiency and stiffen internal components. Using a lithium battery and ensuring the keypad cover is sealed can mitigate this.
Conclusion
Dealing with a Liftmaster garage door keypad not working after changing battery is stressful, but it is rarely a disaster. In most cases, the issue is a simple matter of poor contact, incorrect battery type, or a lost synchronization signal. By following the steps outlined above—checking polarity, performing a hard reset, and reprogramming the device—you can restore functionality in under 10 minutes.
Remember, prevention is key. Use high-quality alkaline or lithium batteries, keep the antenna clear, and avoid cheap LED bulbs in your opener unit.
Did this guide help you get back into your garage? Share this article with your neighbors or on social media to help others avoid the same frustration. Stay secure and stay connected!
Leave a Reply