Introduction
There are few things more frustrating than pulling into your driveway in the rain, only to realize you still have to fumble for a visor clip or dig through your center console for a bulky remote. If you are wondering how to program a LiftMaster garage door to my car, you are taking the first step toward seamless, keyless entry and improved home security. This process is simpler than most homeowners expect, but it requires specific steps depending on whether your vehicle uses the integrated HomeLink system or a universal aftermarket remote.
In this comprehensive guide, we will walk you through every method safely and accurately, ensuring you get back to enjoying the convenience of modern automation without the headache of trial and error.
Understanding Your System Compatibility
Before pressing any buttons, it is vital to understand that “programming to your car” usually refers to one of two distinct technologies. Identifying which one applies to you saves time and prevents frustration.
Integrated HomeLink vs. Universal Remotes
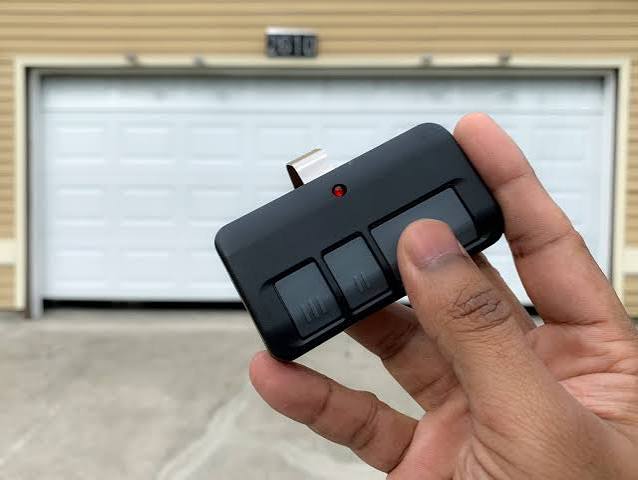
Most modern vehicles (post-2000) come equipped with HomeLink, a built-in transceiver typically located on the rearview mirror, overhead console, or sun visor. However, older vehicles may require a standalone universal remote clipped to the visor.
| Feature | Integrated HomeLink | Universal Visor Remote |
|---|---|---|
| Location | Built into mirror/visor | Clips onto sun visor |
| Power Source | Vehicle electrical system | 9V or coin cell battery |
| Compatibility | Rolling Code & Fixed Code | Varies by model |
| Aesthetics | Seamless/OEM look | Visible accessory |
| Programming Steps | Requires “Learn” button sync | Often dip-switch matching |
Expert Note: According to industry standards, over 85% of new vehicles sold in North America include HomeLink as standard or optional equipment. Always check your owner’s manual first to confirm your vehicle has this feature before attempting programming.
Step-by-Step: How to Program HomeLink to a LiftMaster Opener
This is the most common scenario for users searching how to program a LiftMaster garage door to my car. LiftMaster openers manufactured after 1993 utilize Security+ rolling code technology, which requires a specific synchronization sequence.
Phase 1: Clear Previous Codes (If Applicable)
If you bought a used car or previously programmed these buttons, start fresh.
- Locate the three HomeLink buttons in your vehicle.
- Press and hold the two outer buttons simultaneously.
- Hold for approximately 20 seconds until the indicator light flashes rapidly.
- Release both buttons. The memory is now cleared.
Phase 2: Train the HomeLink Button
- Turn your vehicle’s ignition to the ON/RUN position (engine does not need to be running, but power must be active).
- Hold your original LiftMaster handheld remote 1–3 inches away from the HomeLink buttons.
- Simultaneously press and hold the desired HomeLink button AND the button on your handheld remote.
- Watch the HomeLink indicator light. It will flash slowly at first, then rapidly/solidly when trained. This typically takes 10–30 seconds.
- Release both buttons once the light changes.
Phase 3: Sync with the LiftMaster Motor Unit
This step is mandatory for rolling-code LiftMaster openers.
- Go to your garage ceiling motor unit. Locate the “Learn” or “Smart” button. It is usually yellow, orange, red, purple, or green and located near the antenna wire or light lens.
- Press and release the Learn button. The LED next to it will illuminate or blink, indicating a 30-second programming window.
- Return to your vehicle within those 30 seconds.
- Press and hold the newly programmed HomeLink button for 2 seconds, then release. Repeat this press-hold-release cycle up to three times if necessary.
- Test the system. The garage door should activate via the car button.
For detailed technical specifications regarding radio frequency protocols and rolling code encryption standards, refer to the Wikipedia article on Garage Door Openers, which provides excellent background on the safety mechanisms involved in this synchronization.
Programming Older LiftMaster Models (DIP Switches)
If your LiftMaster opener was manufactured before 1993, it likely uses DIP switches rather than a Learn button. These are less secure but still functional.
- Open the back panel of your existing handheld remote to reveal the tiny sliding switches.
- Match the switch positions exactly inside your vehicle’s HomeLink module (if accessible) or universal remote.
- Use a small flathead screwdriver or pen tip to adjust the switches.
- Test immediately. If it fails, verify each switch is fully seated in the ON or OFF position; partial contact causes failure.
Safety Warning: Pre-1993 openers lack photoelectric safety sensors. If your door reverses on obstruction, upgrade the opener immediately. Programming a car remote to an unsafe unit perpetuates risk.
Troubleshooting Common Programming Failures
Even professionals encounter hiccups. Here are data-backed solutions for the top issues.
The Light Flashes But Door Doesn’t Move
- Cause: Frequency mismatch or weak signal.
- Fix: Replace the battery in your handheld remote before training. A weak source signal corrupts the clone. Also, ensure your vehicle is parked outside the garage during programming to avoid signal interference from the metal door tracks.
HomeLink Works Intermittently
- Cause: Rolling code desynchronization.
- Fix: Repeat Phase 3 (Learn button sync). Some LiftMaster units require holding the car button for a full 5 seconds during the final sync rather than quick presses.
Learn Button Won’t Activate
- Cause: Logic board lockout or LED burnout.
- Fix: Unplug the opener for 60 seconds to reset the logic board. Plug back in and retry within 5 minutes. If the Learn LED never illuminates, the capacitor or board may need replacement.
Vehicle-Specific Quirks
Some European and Asian vehicles require the ignition to be in ACC rather than ON. Others require the driver’s door to be open during programming. Consult your vehicle’s HomeLink supplement guide for model-specific variations.
FAQ: How To Program A LiftMaster Garage Door To My Car
1. Can I program multiple cars to the same LiftMaster opener?
Yes. Most LiftMaster openers support up to 30 remote devices, including car HomeLinks, keypads, and handheld remotes combined. Each vehicle simply needs to go through the Learn button sync process individually. There is no limit to how many cars specifically, only total device slots.
2. Why does my HomeLink work for lights but not the garage door?
This indicates successful RF transmission but failed rolling code authentication. The opener recognizes the signal but rejects it as unauthorized. Re-perform the Learn button synchronization (Phase 3 above). Ensure you complete the press-hold cycle within 30 seconds of pressing the Learn button on the motor unit.
3. Do I need a special adapter for newer LiftMaster models?
Generally, no. LiftMaster’s Security+ 2.0 (yellow Learn button) is compatible with HomeLink natively. However, some very early HomeLink systems (pre-2000) may require a compatibility bridge for newer openers. Check the HomeLink website’s compatibility tool using your vehicle’s year/make/model and your opener’s Learn button color.
4. Is it safe to program my car while the garage door is closed?
It is recommended to program with the door open or disconnected from the trolley. Accidental activation during programming can cause the door to cycle unexpectedly, potentially damaging components or causing injury. Safety first: keep the area clear and maintain visual line-of-sight to the door during all testing.
5. How often do I need to reprogram my car to the LiftMaster?
Under normal conditions, never. Programming is permanent unless you clear the opener’s memory or replace the logic board. However, if you change your vehicle’s battery or the opener experiences a power surge, occasional resyncing may be required. Keep your handheld remote as a backup for such events.
6. What if my car doesn’t have HomeLink at all?
You have two options: purchase a universal visor-mount remote compatible with LiftMaster frequencies (315 MHz or 390 MHz), or install an aftermarket HomeLink retrofit kit. Retrofit kits cost $150–$300 installed but provide OEM-level integration. Universal remotes are cheaper ($20–$40) but less elegant.
Conclusion
Learning how to program a LiftMaster garage door to my car transforms daily convenience and enhances your home’s accessibility. Whether you’re syncing a modern HomeLink system or configuring a legacy DIP-switch remote, the key is patience, correct sequencing, and respecting safety protocols. Remember: clear old codes first, train the car button with a strong source signal, and always complete the Learn button synchronization for rolling-code units.
Now that your vehicle is seamlessly connected, enjoy the simplicity of hands-free entry! Found this guide helpful? Share it on Facebook, X (Twitter), or Pinterest to help fellow homeowners ditch the cluttered visor clips forever! Your friends will thank you next time they pull in during a downpour. Safe programming, and welcome to smarter living!
Leave a Reply