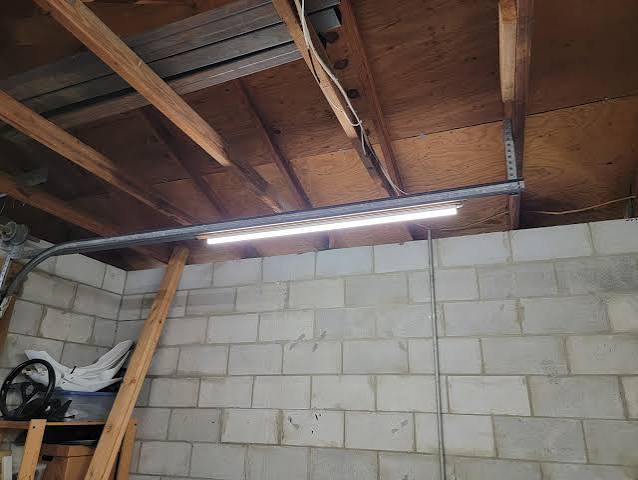
Walking into a pitch-black garage with your hands full of heavy groceries is a frustrating experience that nobody wants to deal with after a long, exhausting day. If you are searching for the best way on How To Make Garage Lights Come On When Door Opens, you are in the right place to solve this everyday problem permanently. Let’s dive into a simple, beginner-friendly solution that brings modern smart home convenience directly to your driveway!
How To Make Garage Lights Come On When Door Opens: Understanding Your Options
When planning your garage lighting upgrade, you need to understand the hardware involved. The most reliable method to achieve this automation is by pairing a smart light switch with a garage door tilt sensor.
Magnetic contact sensors, commonly referred to as reed switches, are the hidden heroes of home automation. They detect the physical opening of a door and send an immediate signal to your smart home hub.
By using this method, your overhead LED lights will instantly illuminate the moment your garage door begins to lift. This solves the problem of walking into a dark space while ensuring the lights only turn on when you actually enter.
Comparing the Best Solutions
Before grabbing your tools, it is crucial to choose the right hardware. Below is a quick comparison to help you decide which setup fits your home best.
| Feature | Smart Switch | Smart Bulb | Motion Sensor |
|---|---|---|---|
| Best For | Hardwired overhead lights | Standard lamps | Quick, wireless setups |
| Reliability | High (Hardwired) | Medium (Wi-Fi dependent) | Low (Triggers on spiders/pets) |
| Cost | Moderate ($25–$45) | Low ($10–$20) | Moderate ($30–$50) |
| Aesthetics | Uses existing wall switch | Bulb might look bulky | Visible sensor on ceiling |
As you can see, a Smart Switch paired with a door sensor offers the most reliable, professional-looking result for a garage environment.
Step-by-Step Guide: Wiring a Smart Switch
Installing a smart switch might seem intimidating, but it is highly manageable if you follow the exact measurements and safety protocols.
According to the U.S. Department of Energy, lighting accounts for about 9% of a typical home’s electricity use. Automating your garage lights ensures they are never left on accidentally for hours, significantly reducing wasted energy and lowering your utility bills.
Here is your comprehensive tutorial to get the job done right.
Step 1: Prioritize Safety and Preparation
Before touching any wires, locate your main electrical panel and turn off the breaker that controls your garage lights. Wait for at least 15 minutes to ensure any residual electrical charge in the capacitors dissipates completely.
Ensure your workspace is well-lit, ideally at 500 lux, and keep the ambient temperature between 68–72°F (20–22°C) for comfortable DIY work.
Step 2: Remove the Old Wall Switch
Unscrew the existing wall plate and carefully pull the old switch out of the electrical box. You will typically see three to four wires connected to it.
- Line Wire (Black): Brings power from the breaker.
- Load Wire (Red/Black): Sends power up to the ceiling lights.
- Neutral Wire (White): Completes the circuit (crucial for smart switches).
- Ground Wire (Bare Copper): For safety.
Step 3: Prep and Connect the Wires
Use a professional wire stripper to expose exactly 1/2 inch of copper on the end of each wire. This precise measurement prevents exposed live wire while ensuring a solid connection inside the terminal.
Connect the Line wire to the “Line” terminal on your new smart switch. Next, connect the Load wire to the “Load” terminal. Finally, attach the Neutral and Ground wires to their respective ports, tightening the screws firmly.
Step 4: Configure the Automation App
Once the physical installation is complete and the breaker is turned back on, download your smart switch’s companion app.
Add your new switch to the app and ensure it connects to your 2.4GHz Wi-Fi network. Next, add your wireless garage door tilt sensor to the same ecosystem (like SmartThings, Hubitat, or a native brand app).
Step 5: Create the “If This, Then That” Routine
Navigate to the “Automations” or “Routines” tab in your app. Create a new rule with the following logic:
- IF: Garage Door Tilt Sensor changes to “Open”
- THEN: Turn ON Garage Smart Switch
- EXCEPTION: Only run this automation between sunset and sunrise (optional, but saves daytime energy).
“Automating your overhead lights using a door tilt sensor prevents the lights from turning on just because a stray cat or spider crawled past a motion detector,” explains Sarah Jenkins, a certified smart home automation specialist. This targeted approach guarantees the lights only serve you, not the local wildlife!
Expert Tips for a Flawless Garage Lighting Setup
To ensure your new setup lasts for years, consider these professional tips:
- Check for a Neutral Wire: Older homes built before the 1980s might lack a neutral wire in the switch box. If you do not have a bundle of white wires in the back of your electrical box, you must purchase a “No-Neutral” smart switch.
- Use High-Lumen LEDs: Garages require bright light for safety and tasks. Swap out old bulbs for LED tubes that output at least 4,000 to 5,000 lumens with a color temperature of 4000K (Daylight White) for maximum visibility.
- Secure the Tilt Sensor: Mount the door tilt sensor on the top panel of the garage door, at least 12 inches away from the motor to avoid signal interference.
Frequently Asked Questions (FAQ)
1. Do I need a neutral wire for a smart garage switch?
Most standard smart switches require a neutral wire to stay powered on and maintain their Wi-Fi connection while the lights are turned off. If your switch box lacks a neutral wire, look for specialized “no-neutral” models like the Lutron Caséta series, though they require a proprietary hub.
2. Will the lights turn off automatically when I close the garage door?
Yes, if you program the routine correctly! Simply add a second command to your app’s automation: IF Tilt Sensor changes to “Closed”, THEN Turn OFF Smart Switch. You can also add a 5-minute delay before they turn off so you have light while you finish unpacking your car.
3. Can I use a regular motion sensor instead of a door sensor?
You can, but it is not recommended. Motion sensors trigger based on infrared heat signatures. A garage is full of temperature fluctuations, and a motion sensor will frequently turn your lights on and off due to passing cars outside, pets, or even changes in ambient temperature. A door tilt sensor is vastly superior for intent-based lighting.
4. What if my garage door opener already has built-in lights?
Many modern garage door openers (like Chamberlain or LiftMaster) have built-in lighting that turns on via the remote control. However, these lights often shut off automatically after 4 minutes and 30 seconds. Adding a dedicated smart switch to your main overhead fixtures provides much brighter, continuous, and fully customizable lighting.
5. Is it safe to install a smart switch myself without an electrician?
If you are comfortable identifying basic household wiring and strictly follow the safety protocol of turning off the breaker, this is a very safe DIY project. However, if you open your wall box and see frayed wires, burn marks, or an confusing mess of cables, stop immediately and hire a licensed electrician.
Conclusion
Learning How To Make Garage Lights Come On When Door Opens is one of the most rewarding smart home upgrades you can tackle this weekend. By combining a smart switch with a simple door tilt sensor, you eliminate the annoyance of dark spaces, improve your home security, and cut down on wasted electricity.
Did you find this DIY tutorial helpful? Share this guide on Facebook or Pinterest to help your friends and family upgrade their homes with smart, effortless lighting!
Leave a Reply