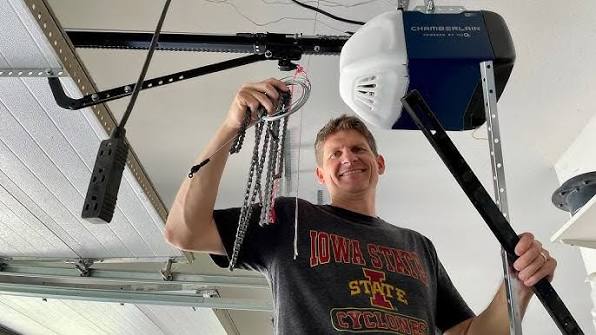
Introduction
Replacing or installing a new garage door opener can feel intimidating, especially when you are worried about safety and proper alignment. However, learning how to install a Chamberlain chain drive garage door opener is a manageable weekend project that can save you hundreds of dollars in professional labor fees while giving you complete control over your home’s entry point. This comprehensive guide breaks down the process into safe, actionable steps so you can enjoy reliable, quiet operation without the stress of guesswork.
Why Choose a Chain Drive System?
Before diving into the installation, it is helpful to understand why this specific mechanism remains the industry standard for residential homes. According to data from the International Door Association, chain drive openers account for nearly 60% of all residential installations due to their exceptional durability and lifting power.
Unlike belt drives, which use rubber-reinforced belts for silence, chain drives utilize a metal chain similar to a bicycle chain. While they are slightly noisier, they offer superior torque, making them ideal for heavy wooden doors or uninsulated steel doors common in older US homes. Furthermore, the mechanical simplicity means fewer parts to fail over a 15-to-20-year lifespan. For a deeper understanding of the engineering evolution behind these systems, you can review the history of automated door mechanisms on Wikipedia.
Pre-Installation Safety and Tool Checklist
Safety must be your primary concern before touching any hardware. Garage door springs store immense kinetic energy; never attempt to adjust or repair torsion springs yourself during this installation. Focus solely on the opener unit and rail assembly.
Essential Tools Required
- Stepladder (6-foot minimum)
- Power drill with 1/4″ and 3/8″ bits
- Adjustable wrench set and socket set
- Locking pliers (Vise-Grips)
- Level (24-inch)
- Tape measure
- Safety glasses and work gloves
- Helper (strongly recommended for rail assembly)
Critical Safety Warning
Always disconnect power to the existing opener if replacing one. Ensure the garage door is properly balanced before installation; an unbalanced door will destroy a new opener within months. If the door does not stay in place when lifted halfway manually, hire a spring specialist first.
Step-by-Step: Assembling the Rail and Trolley
The most common mistake DIYers make occurs during rail assembly. Taking your time here ensures smooth travel later.
- Lay Out Components: Clear a flat workspace on the garage floor. Identify the front idler sprocket, rear trolley tube, and rail sections per the manual.
- Connect Rail Sections: Slide the rail sections together using the provided bolts. Do not fully tighten yet. Allow slight movement for final alignment.
- Install the Trolley: Thread the trolley onto the rail before securing the end caps. Verify the trolley moves freely by hand.
- Attach the Idler Sprocket: Secure the front idler plate to the rail end. This component guides the chain and maintains tension.
- Final Tightening: Once assembled, go back and torque all rail bolts to the manufacturer’s specification (typically 18–22 ft-lbs). Over-tightening can warp the rail and cause binding.
Mounting the Header Bracket and Motor Unit
Proper header bracket placement dictates the entire system’s longevity. The bracket must be mounted to a structural support, never just drywall.
- Locate Center: Find the vertical centerline of the garage door opening. Mark this on the header board above the door.
- Determine Height: Measure the highest point of door travel. Add 2 inches to this measurement to mark the bottom of the header bracket. This clearance prevents the rail from contacting the door at peak travel.
- Secure the Bracket: Use 3/8″ x 2″ lag screws driven into solid wood framing. Test stability by applying downward pressure; it should not flex.
- Position the Motor: With a helper supporting the motor unit, slide the rail into the header bracket. Temporarily secure with locking pliers while you verify level.
- Hang the Motor: Attach the hanging straps to ceiling joists above the motor. Adjust strap length until the rail is perfectly level side-to-side and has the correct 1/4″ per foot upward pitch toward the motor. A level rail causes premature wear; always maintain proper pitch.
Installing the Chain and Electrical Connections
This phase requires precision. An improperly tensioned chain is the leading cause of noise and failure.
- Route the Chain: Feed the chain through the rail channel, around the trolley sprocket, and over the motor drive sprocket. Connect the master link at the trolley attachment point.
- Set Initial Tension: Tighten the adjustment nut on the trolley until the chain sits 1/2 inch above the rail base at midpoint. Note: The chain will appear loose initially; this is normal.
- Wire Safety Sensors: Mount sending and receiving eyes 4–6 inches above the floor on both door tracks. Run wires along the wall to the motor head. Never bypass sensors; they prevent entrapment injuries.
- Connect Wall Control: Install the multi-function wall panel near the service door at 5 feet height. Use bell wire staples every 12 inches to secure wiring.
- Power Up: Plug in the unit. The LED lights should illuminate. If not, check GFCI outlet functionality and circuit breaker status.
Programming Limits and Force Settings
Modern Chamberlain units use electronic limit setting rather than mechanical cams. Follow this exact sequence:
- Enter Programming Mode: Press and hold the “Up” button until the blue LED flashes. Release.
- Set Open Limit: Press “Up” again to move door to desired open position. Press the square stop button to lock.
- Set Close Limit: Press and hold “Down” button until door touches floor firmly. Press stop button.
- Force Adjustment Test: Place a 2×4 board flat on the floor under the door center. Activate close cycle. The door must reverse upon contact. If it crushes the board, reduce down force immediately. Repeat test monthly as seasons change.
Pros vs. Cons: Chain Drive Reality Check
| Feature | Advantage | Consideration |
|---|---|---|
| Lifting Power | Handles doors up to 550 lbs easily | Excess power unnecessary for lightweight aluminum doors |
| Durability | Metal chain resists stretching | Requires annual lubrication with white lithium grease |
| Cost | Most affordable drive type ($180–$280 avg) | Higher long-term maintenance vs. belt drive |
| Noise Level | Acceptable for detached garages | Not recommended for bedrooms above garage |
| Cold Weather | Performs reliably below 0°F | Belt drives may stiffen in extreme cold |
Frequently Asked Questions
How long does it take to install a Chamberlain chain drive opener?
For a first-time DIYer with basic tools, expect 4–6 hours including cleanup. Experienced installers typically complete the job in 2–3 hours. Allocate extra time for troubleshooting sensor alignment or electrical issues in older homes.
Do I need to replace my existing garage door springs during installation?
Not necessarily, but you must verify balance. Disconnect the opener and lift the door manually to waist height. It should stay in place with minimal effort. If it drops or rises uncontrollably, the springs require professional adjustment before opener installation proceeds.
Why is my new chain drive opener so loud?
Initial noise often indicates improper chain tension or lack of lubrication. After 30 days of operation, recheck tension and apply Chamberlain-specific chain lubricant. Also verify that the motor mounting brackets are tight against ceiling joists; vibration transfer amplifies perceived noise significantly.
Can I reuse old safety sensors with a new Chamberlain unit?
Generally, no. Safety sensor technology has evolved, and mixing brands or generations creates unreliable reversal performance. Always use the sensors included in the box. The $20 savings from reusing old sensors is never worth the liability risk.
What maintenance does a chain drive opener require annually?
Perform three tasks yearly: lubricate chain and sprockets with white lithium grease, test auto-reverse sensitivity with a 2×4 block, and inspect rail bolts for loosening. Avoid WD-40 or silicone spray, as these attract dust and degrade components over time.
Is professional installation worth the extra cost?
Professional installation averages $150–$300 and includes warranty validation. If you lack electrical experience, have high ceilings requiring scaffolding, or own an unbalanced door, hiring a certified technician protects both your safety and equipment warranty.
Conclusion
Mastering how to install a Chamberlain chain drive garage door opener empowers you with valuable home maintenance skills and immediate cost savings. By following these detailed steps, prioritizing safety protocols, and respecting the mechanical nuances of chain drive systems, you ensure decades of dependable service. Remember that patience during installation pays dividends in reduced callbacks and extended equipment life.
Did this guide help you tackle your garage door project confidently? Share your installation success story or tips with fellow DIY enthusiasts on Facebook, Pinterest, or X! Your experience could save another homeowner from costly mistakes. Happy building!
Leave a Reply