Is your car packed with groceries, but your garage door refuses to budge? It is incredibly frustrating when you cannot figure out how do you open a Liftmaster garage door opener remote during a busy day. Do not worry, as this friendly guide will walk you through every simple step to get your door moving again!
How Do You Open A Liftmaster Garage Door Opener Remote: The Basics
Before we dive into the technical fixes, let us understand what is actually happening. When you press the button, the remote sends a radio frequency signal to the motor unit.
If the door stays shut, the issue usually lies in three areas: dead batteries, misaligned safety sensors, or a lost sync code. Understanding these basics will save you a lot of time and unnecessary stress.
Why Is My Liftmaster Remote Not Working?
Let us look at the most common culprits behind a stubborn garage door. According to the International Door Association (IDA), routine maintenance prevents up to 80% of major garage door failures.
However, remote issues are mostly related to simple power and signal problems. Here are the primary reasons your remote might be unresponsive:
- Dead Battery: This is the most common issue by far.
- Dirty Battery Contacts: Corrosion can block the power flow inside the casing.
- Outdated Code: The remote may have lost its programming sync with the motor.
- Signal Interference: Certain LED bulbs or new Wi-Fi routers can block the signal.
Step-by-Step: How to Open the Remote Casing for Battery Replacement
If you are wondering how to physically open the remote to change the battery, follow these exact steps. Most modern Liftmaster remotes (like the 890MAX or 375UT) feature a sleek, single-piece design.
- Identify your model: Check the back of your remote to confirm the model number.
- Locate the battery door: Look for a small sliding latch or a tiny groove on the back or bottom edge of the device.
- Slide or pry gently: For models with a latch, slide it down using your thumb. For sealed models, insert a small flathead screwdriver into the bottom groove and gently twist to pop the cover open.
- Remove the old battery: Use a toothpick or a non-metallic tool to gently pop out the old coin cell battery.
- Insert the new battery: Most Liftmaster remotes use a 3V CR2032 coin cell battery. Ensure the positive (+) side faces up according to the diagram inside the compartment.
- Test the remote: Press the main button. The small LED light on the remote should flash brightly, indicating it has power.
How to Program and Sync Your Liftmaster Remote
If changing the battery did not solve the problem, you need to re-sync the remote to the motor. This process is surprisingly easy if you follow the exact timing.
- Locate the ‘Learn’ button: Use a step ladder to safely reach your garage door motor unit. Look for a colored button (usually yellow, orange, purple, or red) on the back or side panel.
- Clear old codes: Press and hold the ‘Learn’ button for exactly 6 to 10 seconds until the indicator LED turns off. This wipes the memory clean and prevents old codes from interfering.
- Initiate learning mode: Press the ‘Learn’ button once briefly and release it. The LED will light up or blink, indicating it is ready. You have exactly 30 seconds to complete the next step.
- Sync the remote: On your handheld remote, press and hold the button you want to use. Hold it down until the motor unit’s lights blink or you hear a distinct double click.
- Test the system: Press the remote button once normally. The garage door should activate immediately.
DIY Battery Replacement vs. Calling a Professional
Sometimes it is hard to decide whether to fix it yourself or call for help. Here is a quick comparison to help you decide.
| Feature | DIY Approach | Professional Service |
|---|---|---|
| Cost | $5 – $10 (Battery cost) | $85 – $150 (Service call fee) |
| Time Required | 5 to 15 minutes | 1 to 3 days (scheduling wait) |
| Skill Level | Beginner friendly | Expert technician |
| Warranty | None | Usually 90 days on labor |
“Ninety percent of the time a homeowner thinks their remote is broken, it is simply a dead coin cell battery or a tripped safety sensor blocking the signal,” says Mark Johnson, a certified garage door technician with over 15 years of industry experience.
For more historical context on how these radio frequency systems evolved over the decades, you can read about the Garage door opener on Wikipedia.
Troubleshooting: What If the Motor Light Flashes?
If you press the remote and the lights on the motor unit flash, but the door does not move, do not panic. This usually means the motor is receiving the signal, but a safety feature is stopping the movement.
You must check your photo-eye sensors. These are the small plastic “eyes” located near the floor on both sides of the metal door track.
- Check for blockages: Ensure no trash cans, tools, or leaves are blocking the invisible beam between the two sensors.
- Clean the lenses: Dirt and spider webs can block the signal. Wipe them gently with a soft, dry microfiber cloth.
- Verify the alignment: Look closely at the sensors. The small LED light on both the sending and receiving eye must glow solidly. If one is blinking, gently adjust the bracket until both lights are solid.
Is the ‘Lock’ Button Accidentally Pressed?
This is a very common mistake that catches many homeowners off guard. Most Liftmaster wall control panels have a dedicated “Lock” button.
If this button is activated, it cuts the power to all wireless remotes to prevent unauthorized entry. The remote will flash, but the door will not move.
Simply look at your indoor wall panel. If the lock light is illuminated, press and hold the lock button for 2 to 3 seconds to deactivate it. Your remotes will instantly start working again!
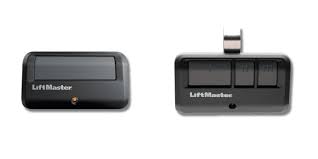
Understanding Different LiftMaster Remote Models
Not all remotes are built exactly the same. Knowing your specific model can make opening the casing much easier.
- Standard 3-Button Remotes (e.g., 893MAX): These usually have a visible battery door on the back that slides open without any tools.
- Visor Clip Remotes (e.g., 974LM): These feature a sun-visor clip on the back. You must slide the clip off first to reveal the battery compartment screws.
- Keychain Mini-Remotes (e.g., 375UT): These are sealed tightly to withstand weather. You will definitely need a small flathead screwdriver to pry the two halves apart.
Frequently Asked Questions
How often should I replace the battery in my Liftmaster remote?
Typically, you should replace the battery every 1 to 2 years. If you notice the LED light on the remote is dim, or you have to stand unusually close to the door for it to work, it is definitely time for a new CR2032 battery.
Can I use a universal remote for my Liftmaster garage door?
Yes, you can use a universal remote as long as it is compatible with LiftMaster’s Security+ or Security+ 2.0 technology. Always check the packaging for a compatibility list before purchasing to ensure it will sync properly.
Why does my remote only work when I am very close to the door?
This is a classic sign of a dying battery or severe signal interference. First, try installing a fresh battery. If that fails, check for new LED bulbs in your motor unit, as certain non-certified LED bulbs can emit radio frequencies that block the remote’s signal.
What do I do if the ‘Learn’ button on my motor is not lighting up?
If the Learn button has no light at all, the logic board inside the motor might be faulty, or the unit is not receiving power. Check your home’s main electrical panel to ensure the garage circuit breaker has not tripped.
Can extreme weather affect my garage door remote?
Absolutely. Extreme cold can drain battery life significantly faster than normal. Additionally, heavy snow or ice can physically block the photo-eye sensors near the floor, preventing the door from closing or opening.
Conclusion
Mastering how to maintain and troubleshoot your garage system saves you time, money, and unnecessary stress. By simply knowing how to change the battery, re-sync the remote, and check the safety sensors, you are fully equipped to handle 90% of common issues. You no longer have to feel stuck in your driveway!
Leave a Reply