Is your old garage door opener sounding like a jet engine taking off? Or perhaps you are tired of the constant maintenance and jerky movements of a chain-driven system? You are not alone. Thousands of homeowners across the US are switching to quieter, smoother alternatives. Learning how to install a belt drive garage door opener is the perfect solution for a peaceful home and reliable access. This guide will walk you through the process safely and efficiently.
Why Choose a Belt Drive System?
Before we dive into the tools and screws, let’s understand why this upgrade is worth your time. Unlike chain drives that use metal links, belt drives use a steel-reinforced rubber belt. This simple change makes a massive difference in performance.
The Noise Factor
The primary reason people choose belt drives is silence. If your garage is attached to your house or located beneath a bedroom, noise matters. Chain drives can produce up to 70 decibels of noise. Belt drives typically operate below 50 decibels. That is the difference between a loud conversation and a quiet library.
Durability and Maintenance
Metal chains stretch over time. They require regular lubrication to prevent rust and squeaking. Belts do not stretch significantly and never need oiling. This means less mess and fewer trips to the hardware store. According to industry standards, high-quality belt drives can last 15–20 years with minimal care.
| Feature | Chain Drive | Belt Drive |
|---|---|---|
| Noise Level | Loud (High Vibration) | Quiet (Smooth Operation) |
| Maintenance | Regular Lubrication Needed | Virtually Maintenance-Free |
| Cost | Lower Initial Cost | Slightly Higher Initial Cost |
| Durability | Prone to Stretching | High Tensile Strength |
Tools and Safety Gear You Will Need
Safety is non-negotiable when working with heavy garage doors. A standard single-car garage door can weigh between 130 and 150 pounds. Double doors can exceed 350 pounds. Never attempt this job alone if you are unsure about lifting heavy objects.
Gather these items before you start:
- Stepladder: A sturdy 6-foot ladder is ideal.
- Power Drill: With assorted bits for wood and metal.
- Wrench Set: Adjustable wrenches and socket sets (typically 7/16″ and 9/16″).
- Screwdrivers: Both flathead and Phillips head.
- Locking Pliers: To hold components in place while tightening.
- Safety Glasses: To protect eyes from dust and debris.
- Helper: Strongly recommended for holding the rail assembly.
Pro Tip: Always disconnect the power to the existing opener before starting. If you are replacing an old unit, unplug it and lock out the circuit breaker if possible.
Step 1: Remove the Old Opener
If you are replacing an existing unit, removal is the first hurdle. Do not rush this step.
- Disconnect the Door: Pull the emergency release cord to disconnect the trolley from the door. This allows you to move the door manually.
- Support the Door: Use C-clamps or locking pliers on the track below the bottom roller. This prevents the door from falling if the springs fail. Warning: Garage door springs are under extreme tension. Do not touch or adjust them.
- Unplug the Unit: Cut the power supply.
- Detach the Rail: Unscrew the rail from the header bracket above the door. Have your helper support the weight of the motor unit.
- Remove the Motor: Unbolt the motor unit from the ceiling mounting brackets. Lower it carefully.
Dispose of the old unit according to local electronic waste regulations. Many hardware stores offer recycling programs for old motors.
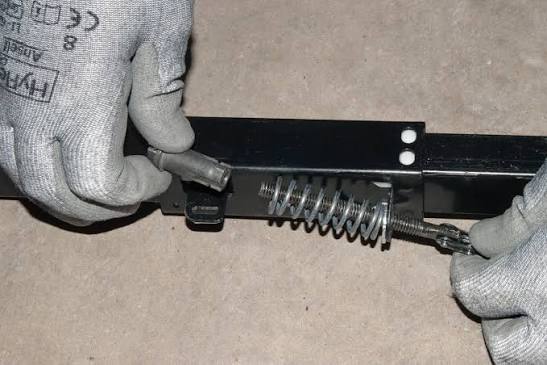
Step 2: Assemble the New Rail
Most belt drive openers come with a pre-assembled rail, but some require minor setup. Check your manufacturer’s manual specifically for this step.
- Lay the rail on a flat surface.
- Attach the trolley to the belt. Ensure the belt is not twisted.
- Secure the idler pulley at the end of the rail.
- Tighten all bolts securely. A loose rail will cause vibration and noise, defeating the purpose of a belt drive.
For more detailed technical specifications on garage door mechanisms, you can refer to general engineering principles on Wikipedia.
Step 3: Install the Header Bracket
The header bracket holds the front end of the rail. It must be secure.
- Close the garage door completely.
- Measure the height of the door. Mark a point on the wall above the door, typically 2–4 inches above the highest point of the door travel.
- Use a level to ensure your mark is straight.
- Drill pilot holes into the wooden header above the door. Do not mount directly into drywall. You must hit solid wood or use heavy-duty lag shields.
- Bolt the header bracket firmly in place.
Step 4: Mount the Motor Unit
Now, lift the motor unit into position. This is where your helper is essential.
- Position the motor unit on the ceiling, aligning it with the center of the door.
- Use the provided mounting straps or angle irons to secure the motor to the ceiling joists.
- Ensure the motor is level. An uneven motor will cause the belt to wear unevenly.
- Tighten all mounting bolts. The unit should not wobble when pushed gently.
Step 5: Connect the Rail to the Motor and Header
- Attach the front of the rail to the header bracket you installed earlier.
- Connect the rear of the rail to the motor unit’s output shaft.
- Insert the belt into the motor sprocket. Ensure it sits correctly in the grooves.
- Tension the belt according to the manual. Most units have a spring-loaded tensioner. It should feel firm but not guitar-string tight.
Step 6: Install the Door Bracket and Arm
- Open the garage door halfway.
- Attach the curved door arm to the top section of the door. Use the provided U-bracket.
- Connect the straight arm to the trolley on the rail.
- Join the two arms together with the pin and clip.
- Ensure the connection is smooth. The door should move freely without binding.
Step 7: Electrical Wiring and Sensors
Safety sensors are required by law in the US for all residential garage door openers manufactured after 1993.
- Mount Sensors: Install the sending and receiving eyes on each side of the door, no higher than 6 inches from the floor.
- Align Sensors: Ensure the LED lights are solid (not blinking). Misaligned sensors will prevent the door from closing.
- Wire the Wall Console: Run the wire from the motor to the wall button location. Staple the wire neatly along the joists.
- Connect Power: Plug the unit into a grounded outlet. Do not use an extension cord permanently.
Step 8: Programming and Testing
- Set Limits: Use the up and down arrows on the motor unit to set the travel limits. The door should close fully and seal against the weather stripping. It should open high enough to clear your vehicle.
- Set Force: Adjust the force settings so the door reverses if it hits an obstruction. Test this by placing a 2×4 piece of wood on the floor in the door’s path. The door should reverse upon contact.
- Program Remotes: Follow the manual to sync your remote controls and keypad.
- Final Test: Operate the door several times. Listen for unusual noises. The belt should run smoothly without slipping.
Frequently Asked Questions
Q: Can I install a belt drive opener on a heavy wooden door?
A: Yes, but check the horsepower rating. Standard 1/2 HP openers handle most single-car doors. For heavy double-car wooden doors, opt for a 3/4 HP or 1 HP belt drive model to ensure longevity and smooth operation.
Q: How often do I need to replace the belt?
A: High-quality steel-reinforced belts rarely need replacement. They can last the lifetime of the opener (15+ years). Inspect it annually for cracks or fraying, but replacement is uncommon compared to chain stretches.
Q: Is a belt drive opener compatible with smart home systems?
A: Most modern belt drive openers come with Wi-Fi capability or can be paired with a smart hub. This allows you to control the door via smartphone apps, integrate with Alexa or Google Home, and receive alerts if the door is left open.
Q: What if my garage has low headroom?
A: Look for a “low-headroom” kit. These specialized tracks allow the door to open horizontally closer to the ceiling, requiring as little as 10 inches of clearance above the door track. Standard installations usually require 12–15 inches.
Q: Why does my new opener make a grinding noise?
A: Grinding usually indicates misalignment. Check that the rail is straight and the belt is properly seated in the sprocket. Also, ensure the motor unit is securely bolted to the ceiling. Loose mounts cause vibration that sounds like grinding.
Leave a Reply