Introduction
Have you ever pulled the red emergency release cord on your garage door and suddenly realized you have no idea how to lock it manually? You’re not alone — thousands of homeowners face this exact problem every year, especially during power outages or opener malfunctions. In this complete guide, we’ll show you exactly how to lock garage door after pulling red cord, step by step, so your home stays secure no matter what.
What Exactly Happens When You Pull the Red Cord?
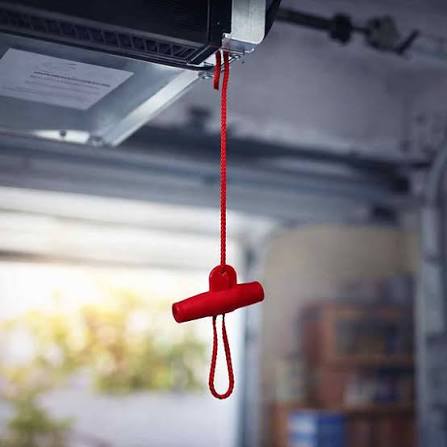
Before we dive into the locking process, it’s important to understand what the red cord actually does. The red cord is officially called the emergency release cord (or quick-release cord), and it’s attached to the trolley mechanism of your automatic garage door opener
www.precisiondoor.net.
When you pull this cord, you disconnect the door from the motorized opener carriage, allowing the door to move freely by hand
www.garagedoorspokane.com. This is incredibly useful during power outages or when the opener malfunctions, but it also means your automatic locking mechanism is no longer engaged.
According to Wikipedia, a garage door is designed to open either manually or via a motorized opener — and when you pull the red cord, you’re switching it to manual mode
en.wikipedia.org. The problem? Most automatic openers don’t automatically lock the door when disengaged.
Key takeaway: Pulling the red cord gives you manual control, but it leaves your garage completely vulnerable unless you take additional steps to secure it.
Why You Must Lock Your Garage Door After Using the Emergency Release
You might be wondering, “Can’t I just push the door shut and call it a day?” The short answer is no. Here’s why locking your garage door is absolutely critical:
Alarming Garage Security Statistics
Let’s look at some eye-opening data that should convince you to take garage security seriously:
- 9% of burglars specifically target the garage door as their primary entry point into a home www.thezebra.com.
- Homes without a security system are 300% more likely to be burglarized, according to FBI Uniform Crime Reporting Statistics store.geniecompany.com.
- Approximately 40% of non-forced residential entries happen through open or unsecured garage doors, based on Tempe Police Department data garagehawk.com.
- A staggering 61% of U.S. households now own at least one security camera, up from 52% in 2024, showing how seriously people take home security www.safehome.org.
Real-World Consequences
Imagine this scenario: You pull the red cord during a storm, close the garage door manually, and go to bed. Without a proper lock, an intruder can simply slide a coat hanger through the top seal, trip the emergency release from outside, and lift the door open in under 30 seconds.
According to a study by the Center for Problem-Oriented Policing at ASU, many garage burglaries are “crimes of opportunity” — meaning a simple lock could have prevented them entirely
popcenter.asu.edu.
“The garage is often called ‘the forgotten front door’ because homeowners focus on securing their main entrance but leave the garage wide open.” — RJ Garage Door Service security analysis
rjgaragedoorservice.com
.
Types of Manual Garage Door Locks: Which One Is Right for You?
Now that we understand why you need to lock your garage door, let’s explore how to do it. There are several types of manual locks available, each with its own pros and cons.
Quick Comparison Table
| Lock Type | Security Level | Installation Difficulty | Cost Range | Best For |
|---|---|---|---|---|
| T-Handle Lock | High | Moderate | $15–$40 | Standard sectional doors |
| Side Lock (Slide Lock) | Very High | Easy | $10–$25 | Maximum security |
| Floor Lock | High | Difficult | $20–$50 | Heavy wooden doors |
| Clamp Lock (C-Clamp) | Moderate | Very Easy | $5–$15 | Temporary solutions |
| Smart Lock | Very High | Moderate | $80–$200 | Tech-savvy homeowners |
1. T-Handle Lock (Most Popular)
The T-handle lock is the most common manual garage door lock in the United States
www.lathamssteeldoors.co.uk. It features a T-shaped handle on the outside that you turn with a key, and a latch mechanism on the inside that secures the door to the track.
Pros:
- Affordable and widely available at hardware stores
- Works with most sectional garage doors
- Provides key-based security
Cons:
- Requires drilling holes in your door
- Can freeze in extremely cold climates
2. Side Lock (Slide Lock)
A side lock (also called a slide lock) is a simple but incredibly effective metal bar that slides horizontally into a track mounted on the door frame
www.movingupgaragedoors.com.
Pros:
- Extremely difficult to force open
- No keys to lose
- Very affordable
Cons:
- Can only be operated from inside the garage
- Not convenient for frequent entry/exit
3. Clamp Lock (Temporary Solution)
If you need a quick, temporary fix right now, a standard C-clamp or locking pliers can secure the door to the track. Just place the clamp on the track below the bottom roller on both sides of the door.
Warning: This is only a temporary measure. For long-term security, invest in a proper lock.
How To Lock Garage Door After Pulling Red Cord: Step-by-Step Guide
Now let’s get to the heart of the matter. Here’s exactly how to lock garage door after pulling red cord using the most common methods.
Method 1: Using a T-Handle Lock (Recommended)
Tools Needed:
- T-handle lock kit (available at Home Depot, Lowe’s, or Amazon)
- Power drill with 3/16″ and 1/8″ drill bits
- Screwdriver
- Measuring tape
- Pencil
- Safety glasses
Step-by-Step Instructions:
Step 1: Close the Garage Door Completely Make sure the door is fully closed and sitting flush on the ground. If you’ve already pulled the red cord, lower the door manually by hand until it’s completely shut.
Step 2: Determine Lock Placement Measure and mark the center point of the garage door, approximately 36 to 42 inches from the ground. This is the standard height for most T-handle locks and makes it comfortable to reach
ddmgaragedoors.com.
Step 3: Mark the Drill Holes Hold the lock mechanism against the inside of the door at your marked height. Use a pencil to mark the three screw hole locations through the mounting plate
ddmgaragedoors.com.
Step 4: Drill the Holes Put on your safety glasses. Using a 3/16″ drill bit, carefully drill through the inner steel panel at your marked points
ddmgaragedoors.com. Then, switch to a larger bit to drill through the outer skin of the door for the lock cylinder to pass through.
Step 5: Install the Lock Cylinder Insert the lock cylinder and T-handle assembly through the hole from the outside. From the inside, attach the mounting plate and secure it with the provided screws
ratolock.com.
Step 6: Attach the Latch Mechanism Connect the internal latch to the lock cylinder. Make sure the latch engages properly with the door track when you turn the key.
Step 7: Test the Lock Insert the key and turn it. The latch should smoothly slide into the track. Test it several times to ensure smooth operation.
Total time: Approximately 30–45 minutes for a DIY installation.
Method 2: Using a Side Lock (Slide Lock)
Tools Needed:
- Side lock kit
- Power drill
- Screwdriver
- Measuring tape
- Wrench
Step-by-Step Instructions:
Step 1: Position the Lock Mount the slide lock on the inside of the door, centered horizontally, about 12 inches above the bottom of the door.
Step 2: Mark and Drill Mark the mounting holes and drill pilot holes using a 1/8″ bit. Secure the lock body to the door with the provided screws.
Step 3: Install the Track Guide On the door frame (not the door itself), install the metal guide that the lock bar will slide into. This should be positioned so the bar slides smoothly when the door is closed.
Step 4: Test the Slide Close the door completely, then slide the lock bar into the track guide. It should fit snugly with no wobble.
Step 5: Add a Padlock (Optional) Many side locks have a small hole where you can add a padlock for extra security.
Method 3: Emergency Temporary Lock (C-Clamp Method)
If you need to lock your garage right now and don’t have a proper lock installed, follow these steps:
Step 1: Close the garage door completely.
Step 2: Locate the metal tracks on both sides of the door, just below the bottom roller.
Step 3: Place a heavy-duty C-clamp or locking pliers on the track on each side of the door, clamping tightly so the bottom roller cannot move upward.
Step 4: Test by trying to lift the door from the inside. It should not budge.
Note: This method only works from the inside and should be replaced with a permanent lock as soon as possible.
Expert Tips for Maximum Garage Security
Locking your door after pulling the red cord is just the beginning. Here are pro-level tips from security experts to make your garage virtually impenetrable:
1. Never Leave the Emergency Release Cord Accessible from Outside
A common mistake is leaving the red cord hanging within reach of the top of the garage door. Intruders can use a wire hanger through the top seal to pull the cord and disengage the opener
garagehawk.com. Solution: Use a zip tie or cord shield to keep the red cord out of reach, or install a release cord guard.
2. Upgrade to a Smart Garage Door Opener
Modern smart openers let you monitor and control your garage door remotely. According to 2026 market data, about 74.9 million U.S. homes now have smart home security devices
www.safehome.org.
Benefits:
- Get instant alerts when the door opens or closes
- Lock and unlock remotely via smartphone
- Set schedules for automatic closing
3. Install Motion-Sensor Lighting
Burglars hate light. Install motion-activated LED lights on both sides of your garage. A well-lit garage entrance is one of the simplest and most effective deterrents.
4. Reinforce the Door Itself
If you have an older, lightweight garage door, consider upgrading to a steel-reinforced model. Thicker doors are much harder to kick in or pry open.
5. Use a Garage Door Security Bar
A security bar (like the “Garage Hawk” or similar products) braces against the floor and the inside of the door, making it physically impossible to lift from the outside.
Common Mistakes to Avoid When Locking Your Garage Door
Even with the best intentions, homeowners often make these critical errors:
❌ Mistake #1: Forgetting to Re-engage the Opener
After locking the door manually, many people forget to pull the red cord back toward the motor to reconnect the trolley
www.overheaddoorcompanyofhuntsville.com. When you try to use the automatic opener later, it won’t work.
Fix: Always reconnect the opener by pulling the release cord back toward the motor until you hear a distinct click
www.justanswer.com.
❌ Mistake #2: Using a Flimsy Padlock on the Track
A cheap padlock can be cut with bolt cutters in seconds. If you’re going to use a padlock, invest in a hardened steel shackle lock rated for outdoor use.
❌ Mistake #3: Leaving the Door Partially Open
Even a 6-inch gap is enough for a determined intruder to insert tools and manipulate the release mechanism. Always close the door completely before locking.
❌ Mistake #4: Ignoring the Interior Door to Your House
Your garage door might be Fort Knox, but if the door between your garage and your house is unlocked, the garage lock is pointless. Always lock the interior door as well.
❌ Mistake #5: Not Testing the Lock Regularly
Locks can freeze, rust, or break over time. Test your garage door lock at least once a month to make sure it still works properly.
FAQ Section
Q1: Can I lock my garage door from the outside after pulling the red cord?
A: Yes, but you need the right hardware. A T-handle lock with a keyed cylinder allows you to lock and unlock the door from the outside using a key
help.idealinc.com. A side lock (slide lock), on the other hand, can only be operated from inside the garage. If you frequently need exterior locking, invest in a keyed T-handle lock or a smart garage lock with remote access.
Q2: Will pulling the red cord damage my garage door opener?
A: No. The emergency release cord is specifically designed to be pulled whenever needed — during power outages, opener malfunctions, or manual operation
raynordoorauthority.com. It does not damage the opener in any way. However, you must properly reconnect the trolley to the carriage after you’re done, or the automatic opener won’t function
www.justanswer.com.
Q3: How do I reconnect the garage door opener after pulling the red cord?
A: Reconnecting is simple. First, make sure the door is fully closed. Then, pull the red emergency release cord back toward the motor unit (the direction it came from) until you hear a loud click
www.overheaddoorcompanyofhuntsville.com. This click indicates the trolley has re-engaged with the carriage. Test the opener with your remote or wall button to confirm it’s working
www.garagedoorspokane.com.
Q4: Is a C-clamp strong enough to secure my garage door overnight?
A: A heavy-duty C-clamp can serve as a temporary overnight solution, but it’s not a long-term fix. A determined intruder could potentially remove the clamp with tools. For anything longer than a night or two, install a proper T-handle lock or side lock.
Q5: What’s the most secure type of garage door lock?
A: For maximum security, experts recommend a combination approach: a keyed T-handle lock for convenience, a side lock (slide lock) for heavy-duty security, and a smart garage door monitor for remote alerts
goabode.com. Adding a security bar that braces against the floor provides an additional physical barrier that’s extremely difficult to defeat.
Q6: How much does it cost to install a manual garage door lock?
A: The cost varies by lock type:
- C-clamp (temporary): $5–$15
- Side lock (slide lock): $10–$25
- T-handle lock kit: $15–$40
- Professional installation: $75–$150 (if you hire a technician)
Most homeowners can install a T-handle or side lock themselves in under an hour with basic tools, saving the labor cost entirely.
Leave a Reply