Introduction
Is your garage freezing in the winter or letting in dust and pests during the summer? You are not alone; many homeowners struggle with an unsealed garage that compromises their home’s comfort and energy efficiency. If you are wondering how do you put weather stripping on a garage door, this comprehensive guide will walk you through the process safely and effectively. By dedicating just an afternoon to this project, you can significantly reduce energy bills and create a cleaner, more comfortable space.
Why Proper Weather Stripping Matters for Your Garage
Before diving into the installation, it is crucial to understand why this maintenance task is vital. According to the U.S. Department of Energy, air leaks can account for 25% to 40% of heating and cooling costs in a typical home. The garage door is often the largest opening in your house, making it a primary source of thermal loss.
Proper sealing does more than just regulate temperature. It acts as a barrier against:
- Moisture and Water Damage: Preventing rain and snowmelt from ruining stored items.
- Pests and Rodents: Blocking entry points for mice, insects, and snakes.
- Dust and Debris: Keeping your workspace or storage area clean.
- Noise Pollution: Dampening street noise and mechanical sounds.
For a deeper understanding of how thermal insulation works in building envelopes, you can refer to the Insulation article on Wikipedia.org, which explains the science behind reducing heat transfer.
What Tools and Materials Do You Need?
Gathering the right supplies before starting ensures a smooth installation. Here is a checklist of essential items:
| Tool/Material | Purpose | Estimated Cost |
|---|---|---|
| Vinyl or Rubber Weather Seal | Bottom threshold seal | $15–$30 |
| Top/Side Jamb Seals | Side and top perimeter sealing | $20–$40 |
| Tape Measure | Accurate measurement of door width | $5–$10 |
| Utility Knife | Cutting seals to size | $5–$10 |
| Cordless Drill & Screws | Securing retainers (if needed) | N/A |
| Flathead Screwdriver | Removing old hardware | N/A |
| Silicone Spray/Lubricant | Easing seal insertion | $5–$8 |
| Safety Glasses & Gloves | Personal protection | $5–$10 |
Expert Tip: Always measure twice and cut once. Purchase seals that are at least 2 inches longer than your door width to allow for trimming adjustments.
How Do You Put Weather Stripping On A Garage Door: Step-by-Step
This section directly answers the question: how do you put weather stripping on a garage door. Follow these detailed steps for a professional-grade result.
Step 1: Inspect and Clean the Area
Examine the existing bottom seal and side jambs. Look for cracks, brittleness, or gaps. Remove any old caulk, debris, or rust using a wire brush. A clean surface ensures the new seal seats properly and lasts longer. Wipe down the metal tracks and threshold with a damp cloth and let dry completely.
Step 2: Measure Your Garage Door Accurately
Use a steel tape measure to determine the exact width of your garage door. Standard residential doors are typically 8, 9, or 16 feet wide. Measure from the outside edge of the left track to the outside edge of the right track. Record this measurement to the nearest 1/8 inch. For height, measure from the floor to the top of the door frame if replacing side seals.
Step 3: Remove the Old Bottom Seal
Most garage doors have a retainer bracket at the bottom that holds the seal in place. Locate the screws or nails securing this bracket. Using your drill or screwdriver, carefully remove all fasteners. Slide the old vinyl or rubber seal out of the channel. If it is stuck, apply silicone spray to loosen it. Dispose of the old material responsibly.
Step 4: Install the New Bottom Weather Strip
Unroll your new bottom seal and align it with the retainer channel. Starting from one end, gently push the T-shaped or bulb portion into the groove. Work your way across slowly to avoid kinking. If resistance occurs, apply a small amount of silicone lubricant. Once fully inserted, trim excess material with a utility knife so it sits flush with the door edges. Reattach the retainer bracket using corrosion-resistant screws spaced every 6–8 inches.
Step 5: Seal the Sides and Top Perimeter
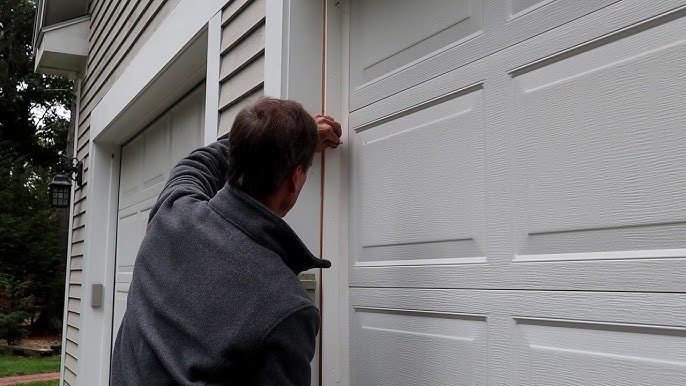
Side and top seals prevent lateral air infiltration. Peel off the adhesive backing (or use nails/screws for non-adhesive types) and press firmly against the door stop molding. Start at the bottom corner and work upward, ensuring no gaps exist at joints. For the top seal, install it horizontally across the header, overlapping side seals slightly to create a continuous barrier. Press firmly for 30 seconds per foot to activate adhesive bonds.
Step 6: Test the Seal Integrity
Close the garage door and inspect from inside with lights off. Any visible light indicates a gap needing adjustment. Perform the “dollar bill test”: close the door on a dollar bill at various points along the perimeter. If you can pull it out easily, the seal is too loose. Adjust tension or reposition seals as needed until resistance is consistent.
Common Mistakes to Avoid During Installation
Even experienced DIYers make errors when learning how do you put weather stripping on a garage door. Avoid these pitfalls:
- Ignoring Floor Unevenness: Concrete floors are rarely perfectly level. Choose a flexible bulb seal that compresses to accommodate low spots.
- Over-Tightening Retainers: Crushing the seal reduces its effectiveness. Snug screws securely but do not strip threads or deform the rubber.
- Skipping Lubrication: Dry installation causes tearing. Always use silicone-based lubricant—never petroleum products that degrade rubber.
- Neglecting Seasonal Timing: Install seals when temperatures are between 50°F and 80°F. Extreme cold makes vinyl brittle; extreme heat causes premature stretching.
FAQ: Everything About Garage Door Weather Stripping
How often should I replace garage door weather stripping?
Inspect seals annually and replace them every 3–5 years, or sooner if you notice cracking, tearing, or persistent drafts. Harsh climates accelerate wear, so biannual checks are recommended in regions with extreme temperature swings.
Can I install weather stripping on an automatic garage door myself?
Yes, most homeowners can complete this as a DIY project in 2–3 hours. However, always disconnect the automatic opener before working near moving parts. If your door has torsion springs, hire a professional—these components store dangerous tension levels.
What type of weather stripping is best for cold climates?
For sub-freezing temperatures, choose EPDM rubber or thermoplastic elastomer (TPE) seals. These materials remain flexible down to -40°F, unlike standard vinyl which hardens and cracks. Bulb-style bottom seals also perform better than flat flaps in snowy conditions.
Will new weather stripping fix a noisy garage door?
Partially. While seals dampen wind noise and vibration, mechanical noises usually stem from worn rollers, hinges, or springs. Combine weather stripping with roller replacement and hinge lubrication for comprehensive noise reduction.
How much does professional installation cost?
Professional installation typically ranges from $150 to $350, including materials and labor. This is worthwhile if your door requires track realignment, spring adjustment, or if you lack confidence in DIY skills. Get three quotes to ensure fair pricing.
Can weather stripping improve my home’s resale value?
Absolutely. Energy-efficient upgrades signal well-maintained property to buyers. Appraisers note sealed garages as positive attributes, especially in regions where attached garages impact HVAC loads. Document your improvement for listing disclosures.
Conclusion
Learning how do you put weather stripping on a garage door empowers you to enhance comfort, lower utility bills, and extend your door’s lifespan. With basic tools and careful attention to detail, this weekend project delivers year-round benefits. Remember to prioritize safety, choose climate-appropriate materials, and test thoroughly after installation.
Your garage deserves the same care as the rest of your home. Don’t let another season pass with drafts and debris invading your space. Take action today and enjoy the satisfaction of a job well done.
Found this guide helpful? Share it on Facebook, Pinterest, or X (Twitter) to help fellow homeowners tackle this essential maintenance task. Tag us with your before-and-after photos—we’d love to see your success! Together, we can build more energy-efficient communities, one garage at a time.
Leave a Reply