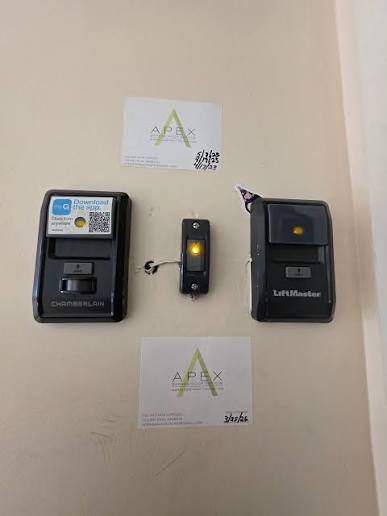
If you find yourself standing in your driveway, frustrated because you have to hold button down for garage door to close, you are not alone. This is one of the most common issues homeowners face, and while it can be alarming, it is usually a simple fix rather than a major mechanical failure. In this guide, we will walk you through exactly why this happens and how to resolve it safely and efficiently.
Understanding the Safety Mechanism
Before diving into repairs, it is crucial to understand why your garage door behaves this way. Modern garage door openers are equipped with mandatory safety features designed to prevent injury or property damage.
The primary culprit behind the “hold-to-close” behavior is almost always the photo-eye safety sensors. These small devices, located near the floor on either side of the garage door opening, create an invisible beam across the entrance. If this beam is interrupted, blocked, or misaligned, the opener assumes there is an obstacle in the path.
To protect you, the system reverses the door or refuses to close automatically. However, most openers allow you to override this safety feature by holding the wall button down. This tells the motor, “I am aware of the issue, and I am manually supervising the closure.” While this gets your door closed, it is not a long-term solution and indicates a fault that needs addressing.
1. Are Your Safety Sensors Misaligned?
The most frequent reason you have to hold the button down is that the safety sensors are out of alignment. Even a slight shift of a few millimeters can break the infrared beam connection.
How to Check Alignment
Look at the LED lights on both sensors (usually one sending unit and one receiving unit).
- Solid Light: Typically means the sensor is aligned and functioning.
- Blinking Light: Indicates misalignment or obstruction.
Step-by-Step Fix:
- Inspect the Brackets: Ensure the metal brackets holding the sensors are tight. Vibrations from the door operating can loosen screws over time.
- Adjust the Lens: Gently adjust the sensor head until the LED light turns solid. You may need a helper to watch the light while you make micro-adjustments.
- Check for Obstructions: Clean the lenses with a soft cloth. Dirt, spiderwebs, or even bright sunlight directly hitting the sensor can interfere with the beam.
Pro Tip: Use a level to ensure both sensors are at the exact same height. Even a quarter-inch difference can cause intermittent failures.
2. Is Something Blocking the Sensor Beam?
Sometimes the sensors are perfectly aligned, but something is physically blocking the infrared beam. This is especially common in garages used for storage or workshops.
Common Obstructions:
- Boxes or bins placed too close to the door track.
- Bicycles or lawn equipment leaning against the wall.
- Accumulated dust or cobwebs on the lens.
Quick Diagnostic Test:
Wave your hand slowly across the sensor beam while attempting to close the door. If the door stops or reverses immediately, the sensors are working correctly, but something may be partially blocking the beam when the door is down. Check the entire path from floor to ceiling for any hanging items or debris.
3. Could Damaged Wiring Be the Cause?
If alignment and obstructions are ruled out, the issue might lie in the wiring connecting the sensors to the motor unit. Rodents, age, or accidental snagging can damage these low-voltage wires.
What to Look For:
- Frayed Insulation: Exposed copper wires can short out.
- Loose Connections: Check where the wires plug into the back of the motor unit and the sensors.
- Staples or Nails: Ensure no staples were driven too close to the wire during installation, which can pierce the insulation over time.
If you find damaged wiring, it is best to replace the entire sensor wire kit. These are inexpensive and widely available at hardware stores. Always disconnect power before handling any electrical components.
4. Is the Travel Limit Set Incorrectly?
Garage door openers have “travel limits” that tell the motor how far to move up and down. If the down limit is set too far, the door may hit the ground with excessive force, triggering the safety reversal mechanism.
Symptoms of Incorrect Limits:
- The door closes but then immediately reverses.
- You hear a grinding noise when the door hits the floor.
- The door leaves a gap at the bottom if you stop it manually.
How to Adjust Travel Limits:
Most modern openers have adjustment screws or digital settings on the motor unit.
- Locate the “Down Limit” adjustment screw (often labeled with a down arrow).
- Turn the screw slightly in the direction indicated by the manual (usually clockwise to reduce travel).
- Test the door. It should close smoothly and seal against the weather stripping without excessive pressure.
Refer to your specific opener’s manual for precise instructions, as mechanisms vary by brand (LiftMaster, Chamberlain, Genie, etc.).
5. When to Call a Professional
While many issues can be resolved with DIY troubleshooting, some situations require professional assistance. According to the International Door Association, garage doors are under high tension and can be dangerous to repair without proper training.
Red Flags That Require a Pro:
- Broken Springs: If the door feels extremely heavy or the springs are visibly broken, do not attempt to fix it yourself. Torsion springs store significant energy and can cause severe injury.
- Damaged Cables: Frayed or snapped cables should only be handled by certified technicians.
- Motor Issues: If the motor hums but doesn’t move, or makes unusual grinding noises, the internal gears may be worn out.
- Persistent Problems: If you’ve tried all the above steps and still have to hold the button down, there may be a deeper electrical issue within the logic board.
Comparison: DIY Fixes vs. Professional Repair
| Issue | DIY Difficulty | Cost Estimate | Time Required |
|---|---|---|---|
| Sensor Alignment | Easy | $0 | 10–15 mins |
| Cleaning Lenses | Very Easy | $0 | 5 mins |
| Rewiring Sensors | Moderate | $15–$30 | 30–60 mins |
| Adjusting Limits | Easy | $0 | 15 mins |
| Spring Replacement | Dangerous | $150–$350 | N/A (Call Pro) |
| Motor Gear Replacement | Hard | $100–$200 + Labor | 2–4 hours |
FAQ Section
Q: Is it safe to keep holding the button down to close my garage door?
A: No, it is not recommended for long-term use. Holding the button bypasses the safety sensors, meaning the door will close even if an object, pet, or person is in the way. This poses a significant safety risk and should only be used as a temporary measure while you arrange for repairs.
Q: Why does my garage door close fine with the remote but not the wall button?
A: If the remote works but the wall button requires holding, the issue is likely with the wall button itself or its wiring. The button contacts may be worn out, or there could be a short in the wire running to the button. Try replacing the wall button, which is an inexpensive and easy fix.
Q: Can sunlight interfere with garage door sensors?
A: Yes, direct sunlight hitting the receiving sensor can overwhelm the infrared signal, causing the door to reverse or refuse to close. This is more common in the late afternoon. You can shield the sensors with a small piece of cardboard or adjust their angle slightly to avoid direct sun exposure.
Q: How often should I maintain my garage door sensors?
A: It is good practice to check your sensors every six months. Clean the lenses with a soft cloth and ensure they are securely mounted. Regular maintenance prevents unexpected failures and ensures your family’s safety.
Q: My sensors have solid lights, but I still have to hold the button. What now?
A: If the lights are solid but the problem persists, check the wiring for hidden breaks, inspect the motor unit’s logic board for error codes, or verify that the travel limits are correctly set. If these steps don’t resolve it, consult a professional technician.
Conclusion
Dealing with a garage door that requires you to have to hold button down for garage door to close is frustrating, but it is rarely a catastrophic failure. In most cases, a simple realignment of the safety sensors or cleaning of the lenses will restore normal operation. By understanding how these safety features work, you can troubleshoot effectively and keep your home secure.
Remember, safety should always come first. If you are unsure about any step, or if the issue involves springs or cables, please call a licensed professional. Don’t let a minor glitch compromise your convenience or safety.
Found this guide helpful? Share it with your neighbors or on social media to help others solve their garage door woes!
Leave a Reply