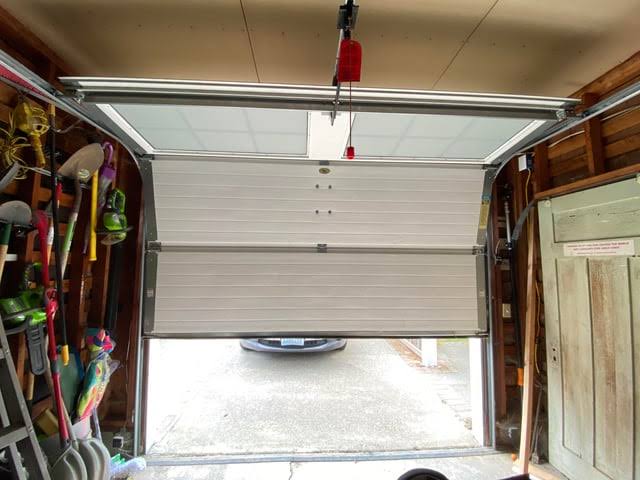
It is incredibly frustrating when you press the remote, but your garage door does not go all the way down and reverses instead. You are not alone in this annoying predicament, as it is one of the most common household headaches for homeowners. Fortunately, fixing this issue is usually straightforward, and we are here to help you get your door closing smoothly once again.
Why Your Garage Door Does Not Go All The Way Down
Understanding why your garage door does not go all the way down is the first step toward a permanent fix. Modern garage doors are equipped with mandatory safety features designed to prevent the door from crushing objects or people. If the system detects even a slight anomaly, it will automatically reverse.
According to industry data from the International Door Association, over 60% of garage door malfunctions stem from simple sensor misalignments or limit switch issues.
“A properly calibrated limit switch and perfectly aligned sensors are the heart of a smooth-closing garage door,” notes John Davis, a certified door technician with over 15 years of experience.
The three main culprits behind this issue are:
- Misaligned Safety Sensors: The photo-eye sensors near the floor are slightly off-axis.
- Incorrect Limit Switch Settings: The motor doesn’t know exactly when the door has reached the floor.
- Track Obstructions: Dirt, debris, or lack of lubrication creates too much friction.
Step-by-Step Guide: How to Fix the Close Issue
Let us dive right into the solution. Follow these concrete steps to troubleshoot and fix the problem safely.
Step 1: Check and Align the Safety Sensors
The photo-eye sensors are located on both sides of the door track, near the floor. They shoot an invisible infrared beam across the door’s path.
- Locate the small LED lights on both sensor units. If one is blinking, the beam is broken.
- Gently wipe the sensor lenses with a clean microfiber cloth to remove dust or spider webs.
- Loosen the wing nut on the misaligned sensor slightly.
- Adjust the bracket until the LED light glows solid. Ensure they are exactly 6 inches (15 cm) off the ground and perfectly parallel to each other.
- Tighten the wing nut and test the door.
Step 2: Adjust the Close Limit Switch
If the sensors are fine, the motor’s travel limits might be set incorrectly. The limit switch tells the motor when to stop.
- Locate the limit adjustment screws on the side or back of the motor head. They are usually labeled “Open” and “Close.”
- Find a flathead screwdriver. Locate the “Close” limit screw.
- Turn the close limit screw exactly 1/4 inch (about 6 millimeters) in the direction indicated by the arrow (usually clockwise).
- Test the door. If it still reverses, turn it another 1/8 inch (3 millimeters).
- Note: Never turn the screw more than half a turn at once, or the door might smash into the floor.
Step 3: Inspect and Lubricate the Tracks
Friction can trick the motor into thinking there is an obstruction.
- Visually inspect the metal tracks for dents or built-up grime.
- Wipe the inside of the tracks with a damp rag to remove old, sticky grease.
- Apply a silicone-based lubricant or white lithium grease to the rollers and hinges.
- Use exactly 3 to 4 short sprays per roller. Wipe away any excess drips to prevent dust accumulation.
Real-Life Case Study: Take the case of a homeowner in Ohio who experienced this exact issue every winter. By simply adjusting the limit switch by 1/4 inch and cleaning the sensors, they restored full functionality in under 20 minutes without spending a dime on a repair technician.
Track and Roller Maintenance for Smooth Operation
Keeping your door running smoothly requires regular maintenance. If your tracks are bent or your rollers are cracked, the door will bind and reverse.
- Steel Rollers: These are noisy and require frequent lubrication. If they are chipped, replace them immediately.
- Nylon Rollers: These are quieter and require less maintenance, but they can crack in extreme cold.
- Track Alignment: Use a level to ensure the vertical tracks are perfectly plumb. If they are leaning, loosen the mounting brackets, tap them gently into place with a rubber mallet, and retighten.
DIY vs. Professional Repair: Which is Right for You?
Not every issue requires a professional. Here is a quick comparison to help you decide.
| Feature | DIY Repair | Professional Repair |
|---|---|---|
| Cost | $0 – $20 (cleaning supplies/lubricant) | $100 – $250 (service call + parts) |
| Time Required | 30 – 60 minutes | 1 – 2 hours (including scheduling) |
| Safety Risk | Low (if following basic steps) | Zero (handled by trained experts) |
| Best For | Sensor alignment, limit switch tweaks | Broken springs, motor replacement |
If you want to understand the broader mechanics and history of these systems, you can read about the general components of a garage door on Wikipedia.
Warning: Never attempt to repair or adjust the torsion springs yourself. They are under extreme tension and can cause severe injury if handled incorrectly. Always call a pro for spring issues.
Frequently Asked Questions (FAQ)
1. Why does my garage door go down then back up?
This happens because the safety reversal system is triggered. The door thinks it has hit an obstruction. This is almost always caused by dirty or misaligned safety sensors, or an incorrectly calibrated close limit switch.
2. How do I know if my garage door sensors are bad?
Look at the LED lights on the sensor units. If the sending sensor has a solid light but the receiving sensor is blinking or completely dark, the beam is blocked. If cleaning and aligning them does not fix the blinking, the sensor itself might be burnt out and need replacement.
3. Can weather affect my garage door’s ability to close?
Yes, absolutely. Direct, bright sunlight can sometimes blind the infrared sensors, causing the door to reverse. Additionally, extreme cold can cause metal tracks to contract slightly, increasing friction and triggering the safety reversal mechanism.
4. How often should I lubricate my garage door?
You should lubricate the rollers, hinges, and track every 3 to 6 months. However, avoid lubricating the tracks themselves or any plastic parts, as this can attract dirt and cause more harm than good.
5. What does the limit switch actually do?
The limit switch controls the exact distance the motor travels. The “open” limit tells the motor when to stop raising the door, while the “close” limit tells it when the door has safely reached the floor.
Conclusion
Dealing with a garage door that refuses to close is a hassle, but it is rarely a disaster. By checking your safety sensors, tweaking the limit switch by tiny increments, and keeping your tracks clean, you can solve the problem quickly. Regular maintenance not only fixes current issues but also extends the lifespan of your entire system.
Did this guide help you get your garage door working perfectly again? Please share this article on your favorite social media platforms like Facebook or Pinterest to help out a friend who might be struggling with the exact same issue!
Leave a Reply