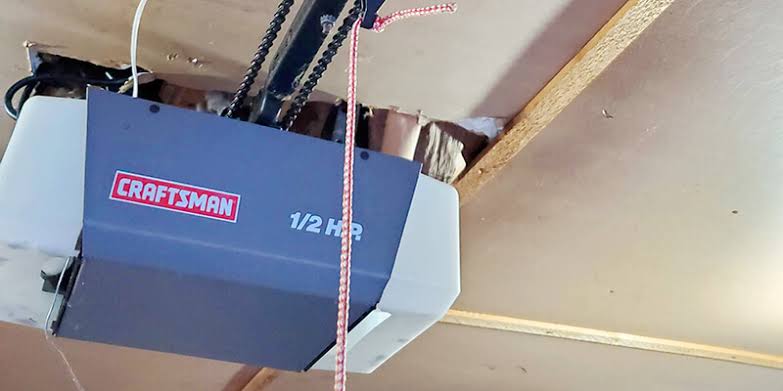
Have you ever stood in your driveway, rain pouring down, pressing the remote button only to hear… silence? It is a frustrating experience that millions of homeowners face. If you are asking, “Why is my Craftsman garage door opener not working,” you are not alone. This guide will help you diagnose and fix the most common issues quickly and safely, saving you time and money on unnecessary service calls.
1. Is the Power Source Actually Connected?
Before diving into complex mechanical diagnostics, we must address the most obvious yet frequently overlooked cause: power loss. It sounds simple, but a significant percentage of “broken” openers are simply unplugged or suffering from a tripped circuit breaker.
Check the Outlet and Circuit Breaker
First, verify that the unit is plugged in. Garage door openers are often plugged into outlets that are not easily visible. If it is plugged in, check your home’s main electrical panel. Look for any tripped breakers labeled “Garage” or “Outlet.” Reset them if necessary.
Inspect the Light Bulb
A surprising number of Craftsman models use the light bulb socket as part of the internal circuitry. If the bulb is burnt out or loose, it can sometimes interrupt the signal path or cause the logic board to malfunction. Try replacing the bulb with a new LED or incandescent bulb compatible with your model.
Pro Tip: If the outlet works with other devices (like a lamp) but the opener still won’t turn on, the issue likely lies within the opener’s internal power supply or logic board.
2. Are the Safety Sensors Aligned and Clean?
Modern garage door openers, including Craftsman models, are equipped with safety eyes (photo-electric sensors) near the floor on both sides of the door. These prevent the door from closing if an object, pet, or person is in the way. If these sensors are misaligned or dirty, the door will refuse to close—or sometimes even open.
Signs of Sensor Issues
- The door starts to close but immediately reverses.
- The LED lights on the sensors are blinking or off instead of solid.
- The remote works, but the wall button does not.
How to Fix Sensor Alignment
- Check the LEDs: Look at the small lights on each sensor. One should be green (power), and the other should be amber or red (receiving). If either is blinking, they are misaligned.
- Clean the Lenses: Wipe the lenses with a soft, dry cloth to remove dust, spider webs, or dirt.
- Realign the Brackets: Loosen the wing nuts on the sensor brackets slightly. Adjust the sensors until both LED lights glow steadily. Tighten the nuts carefully without moving the sensors.
According to the Consumer Product Safety Commission, garage door sensors are a critical safety feature mandated by federal law since 1993. Ensuring they function correctly is not just about convenience; it is about safety. For more technical details on how these infrared systems work, you can refer to Wikipedia’s article on Garage Door Openers.
3. Is the Remote Control Battery Dead or Unprogrammed?
If the wall switch works but the remote does not, the problem is isolated to the remote itself. This is one of the most common reasons users ask why their Craftsman garage door opener is not working.
Step-by-Step Remote Troubleshooting
- Replace the Batteries: Even if the remote light blinks, weak batteries may not send a strong enough signal. Use fresh alkaline batteries.
- Reprogram the Remote: Over time, remotes can lose their sync with the opener. Consult your manual for the specific “Learn Button” procedure for your model. Generally, you press the Learn button on the motor unit, then press the remote button within 30 seconds.
- Check for Interference: LED light bulbs in the garage can sometimes emit frequency interference that blocks remote signals. Try turning off the garage lights and testing the remote.
4. Are the Travel Limits Incorrectly Set?
Craftsman openers have adjustable travel limits that tell the motor how far to go up and down. If these settings drift due to temperature changes or wear, the door may stop halfway or reverse prematurely.
Adjusting Up and Down Limits
Most newer Craftsman models use digital buttons or dials on the back or side of the motor unit.
- Locate the “Up” and “Down” adjustment buttons.
- Press the “Down” button to increase the downward travel if the door doesn’t close fully.
- Press the “Up” button if the door doesn’t open all the way.
- Test the door after each small adjustment.
| Symptom | Likely Cause | Quick Fix |
|---|---|---|
| Door reverses before hitting floor | Down limit set too high | Increase down travel limit |
| Door hits floor hard | Down limit set too low | Decrease down travel limit |
| Door stops halfway up | Up limit set too low | Increase up travel limit |
5. Is the Gear and Sprocket Assembly Worn Out?
If you hear the motor running but the door does not move, the plastic gears inside the opener head may be stripped. This is a common wear-and-tear issue in Craftsman openers older than five years.
Identifying Gear Failure
- Grinding Noise: A loud grinding sound without movement indicates stripped gears.
- Motor Humms: The motor runs, but there is no mechanical action.
Replacement vs. Repair
Replacing the gear kit is cost-effective compared to buying a new opener. However, it requires disassembling the motor housing. If you are not comfortable with tools, this is a good time to call a professional. Note that Craftsman offers replacement gear kits for many popular models, which include the worm gear, spur gear, and lubricant.
6. Could the Logic Board Be Faulty?
The logic board is the brain of your garage door opener. If it fails, the unit may become completely unresponsive or behave erratically. Signs of a bad logic board include:
- No lights on the motor unit.
- Remote and wall switch both fail.
- Burnt smell coming from the motor housing.
Logic board replacement is possible but often costs nearly as much as a new unit. If your opener is over 10 years old, consider upgrading to a newer model with enhanced security features like rolling code technology.
FAQ Section
Q1: Why does my Craftsman garage door opener click but not move?
A: A clicking sound usually indicates that the relay on the logic board is trying to engage the motor, but power isn’t reaching it, or the motor capacitor is faulty. Check the power source first. If power is good, the capacitor or logic board may need replacement.
Q2: How do I reset my Craftsman garage door opener?
A: To reset most Craftsman openers, locate the “Learn” button on the motor unit. Press and hold it until the indicator light turns off (about 6–10 seconds). This clears all programmed remotes and keypads. You will need to reprogram all devices afterward.
Q3: Why does my garage door reverse when it touches the ground?
A: This is typically caused by the force sensitivity setting being too low. The door senses resistance (the ground) and thinks it has hit an obstacle. Increase the “down force” adjustment slightly using the dials on the motor unit.
Q4: Can I use any remote with my Craftsman opener?
A: No. You must use a remote compatible with your opener’s frequency and security protocol (e.g., Security+ 2.0). Check the model number of your opener and buy a universal remote specifically listed as compatible with Craftsman.
Q5: My garage door opens slowly. Is something wrong?
A: Slower operation can be due to lack of lubrication on the rollers and tracks, or worn-out gears. Clean and lubricate the moving parts with silicone-based lubricant. If the speed remains slow, the motor may be failing.
Conclusion
Dealing with a malfunctioning garage door is stressful, but understanding why your Craftsman garage door opener is not working empowers you to take control. Most issues stem from simple causes like dead batteries, misaligned sensors, or power interruptions. By following the steps outlined above, you can resolve many common problems without professional help.
Remember, regular maintenance—such as lubricating moving parts and testing safety sensors—can prevent future breakdowns. If you found this guide helpful, please share it with friends or family who might be struggling with their garage doors. Stay safe, and keep your garage running smoothly!
Leave a Reply