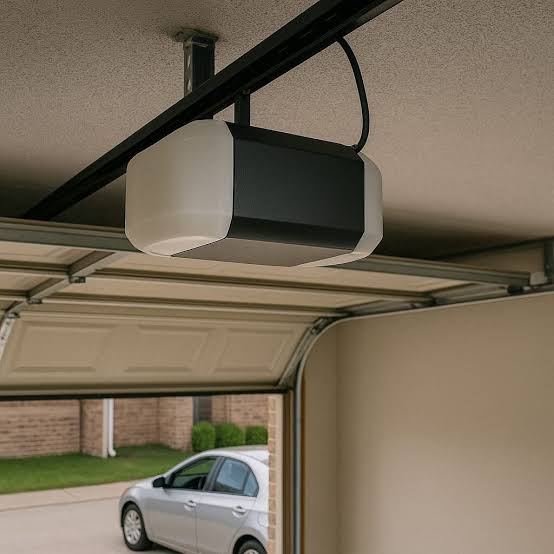
Have you ever struggled to manually lift a heavy garage door in the rain or darkness? It is a common frustration for many homeowners, but upgrading to an automatic system can solve this issue instantly. If you are wondering what does it cost to install a garage door opener, you are in the right place to find clear, actionable answers.
Understanding the Average Installation Costs
The total expense for installing a new garage door opener varies significantly based on the type of unit, the complexity of your existing door, and whether you hire a professional or do it yourself. On average, homeowners in the United States spend between $350 and $1,200 for a complete installation package that includes both the hardware and labor.
For a standard chain-drive opener with basic features, the cost typically lands on the lower end of that spectrum. However, if you opt for a high-end belt-drive model with smart home integration and battery backup, the price can easily exceed $1,500 when professional labor is included.
It is crucial to understand that the “sticker price” of the opener itself is only part of the equation. Labor costs, additional hardware like rail extensions or new safety sensors, and potential electrical upgrades all contribute to the final bill. Getting multiple quotes from licensed technicians is the best way to ensure you are paying a fair market rate for your specific situation.
Factors That Influence Installation Prices
Several key variables determine the final cost of your project. Knowing these factors helps you budget accurately and avoid unexpected surprises during the installation process.
Type of Drive Mechanism
The drive mechanism is the engine of your opener. There are three main types, each with different price points:
- Chain-Drive: The most affordable option, usually costing $150–$300 for the unit. They are durable but noisy.
- Belt-Drive: Quieter and smoother, these units range from $250–$450. They are ideal for garages attached to living spaces.
- Screw-Drive: A middle-ground option priced around $200–$350. They require less maintenance but can be sensitive to temperature changes.
Horsepower (HP) Requirements
The weight and size of your garage door dictate the necessary horsepower. A standard single-car door usually requires a 1/2 HP motor, while heavier double-car doors or insulated wood doors need 3/4 HP or 1 HP motors. Higher horsepower units cost more upfront but ensure longevity and reliable performance.
Smart Features and Add-Ons
Modern openers come with Wi-Fi connectivity, allowing you to control your door via smartphone apps. While convenient, these smart features add $50–$150 to the unit’s cost. Additional accessories like keypad entry systems, extra remote controls, or battery backup units also increase the total investment.
Labor and Geographic Location
Labor rates vary by region. In metropolitan areas with a higher cost of living, professional installation fees can range from $150 to $300 per hour. In rural areas, rates may be lower, but travel fees might apply. Always ask if the quoted price includes disposal of the old unit and cleanup.
DIY vs. Professional Installation: Which Is Better?
Deciding between doing it yourself and hiring a pro is a major cost factor. Here is a comparison to help you decide.
| Feature | DIY Installation | Professional Installation |
|---|---|---|
| Cost | $150–$500 (Unit only) | $350–$1,200+ (Unit + Labor) |
| Time Commitment | 4–8 hours | 2–4 hours |
| Skill Level Required | Intermediate to Advanced | None (Handled by tech) |
| Warranty | Manufacturer only | Manufacturer + Labor warranty |
| Safety Risk | Higher (Spring tension issues) | Low (Trained professionals) |
If you are comfortable using power tools and have experience with electrical wiring, DIY can save you hundreds of dollars. However, garage door springs are under extreme tension and can cause serious injury if mishandled. For most homeowners, the peace of mind and warranty protection offered by professional installation are worth the extra cost.
Step-by-Step Installation Overview
If you choose to hire a professional, knowing the process helps you verify that the job is done correctly. If you attempt DIY, follow these general steps strictly.
- Disconnect Power: Always unplug the existing opener and disconnect the power source before starting any work.
- Remove Old Unit: Detach the old opener from the ceiling bracket and the door arm. Carefully lower the unit and dispose of it properly.
- Assemble New Rail: Follow the manufacturer’s instructions to assemble the new rail and attach the motor head. Ensure all bolts are tightened securely.
- Install Header Bracket: Mount the header bracket above the garage door opening. Use a level to ensure it is perfectly straight.
- Hang the Opener: Lift the assembled unit and secure it to the ceiling joists using sturdy metal straps. Do not rely on drywall anchors.
- Attach Door Arm: Connect the trolley to the door bracket. Adjust the length so the door opens and closes smoothly without binding.
- Wire Safety Sensors: Install the photo-eye sensors near the floor on both sides of the door. They must be aligned perfectly to prevent the door from closing on objects.
- Test and Adjust: Plug in the unit and test the operation. Adjust the force and travel limits according to the manual. The door should reverse immediately if it hits an obstacle.
For detailed technical specifications and safety standards, you can refer to the Garage Door Opener Wikipedia page which provides comprehensive historical and mechanical context.
Maintenance Tips to Extend Lifespan
Once installed, proper maintenance ensures your opener lasts for years. Lubricate the chain or screw drive every six months with a silicone-based lubricant. Avoid using grease, as it attracts dust and debris. Test the safety reversal feature monthly by placing a roll of paper towels in the door’s path. If the door does not reverse, call a technician immediately. Keeping the tracks clean and aligned also reduces strain on the motor, preventing premature failure.
Frequently Asked Questions
How long does it take to install a garage door opener?
A professional technician typically completes the installation in 2 to 4 hours. A DIY project may take a full day, especially if you encounter wiring issues or need to reinforce ceiling joists.
Can I install a new opener on an old garage door?
Yes, in most cases. However, the door must be balanced and in good working condition. If the springs are broken or the tracks are bent, you should repair the door first. An unbalanced door can damage the new opener quickly.
What is the lifespan of a garage door opener?
Most quality openers last between 10 to 15 years. Regular maintenance and moderate use can extend this lifespan. Units in high-humidity areas may corrode faster, so consider a stainless steel chain or belt drive if you live near the coast.
Do I need a permit to install a garage door opener?
In most US jurisdictions, replacing an existing opener does not require a permit. However, if you are adding new electrical circuits or making structural changes to the garage, a permit may be necessary. Check with your local building department to be sure.
Why is my new opener making noise?
Some noise is normal, especially with chain-drive models. Excessive grinding or squeaking may indicate loose hardware, lack of lubrication, or misaligned rails. Tighten all bolts and apply lubricant. If the noise persists, contact the installer for a warranty check.
Conclusion
Understanding what does it cost to install a garage door opener empowers you to make a smart financial decision for your home. Whether you choose a budget-friendly chain-drive model or a premium smart belt-drive system, the convenience and security benefits are undeniable. By considering factors like horsepower, drive type, and labor costs, you can budget effectively and avoid overspending.
Remember, safety should always be your top priority. If you are unsure about any step of the installation process, hiring a licensed professional is the best choice. Share this guide with friends or family who are considering a similar upgrade, and help them navigate the process with confidence!
Leave a Reply