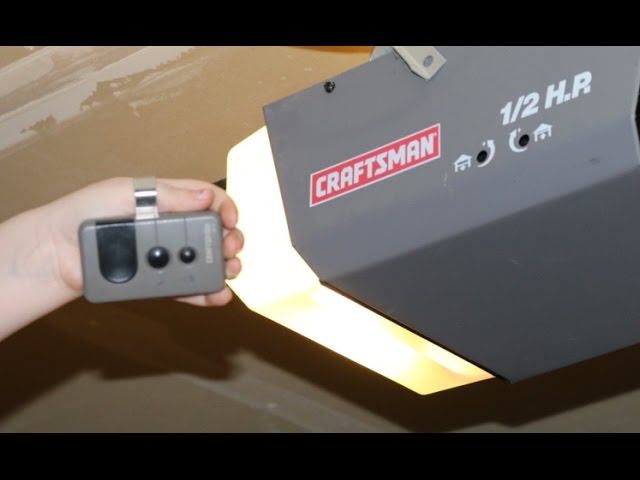
Are you struggling to find the right replacement for your Sears Craftsman 1 2 Hp Garage Door Opener Remote? We know how incredibly frustrating it is when your garage door refuses to open, especially after a long, exhausting day at work. Don’t worry, this comprehensive, step-by-step guide will help you identify, program, and troubleshoot your remote with absolute ease.
How to Choose the Right Sears Craftsman 1 2 Hp Garage Door Opener Remote
Choosing the correct remote is the most critical step in restoring your garage’s functionality. Not all remotes are created equal. Compatibility depends heavily on the manufacturing year and the radio frequency of your specific motor unit.
Most Sears Craftsman 1/2 HP openers manufactured between 1997 and 2005 operate on a 390 MHz frequency. These models feature early Security+ rolling code technology. Newer models, typically from 2005 onward, shifted to a 315 MHz frequency to avoid interference with nearby radio systems.
To guarantee a perfect match, locate the “Learn” button on your garage door motor unit. The color of this button is your ultimate compatibility cheat sheet:
- Orange or Red Learn Button: Requires a 390 MHz Security+ remote (common in 1997–2005 models).
- Purple Learn Button: Requires a 315 MHz Security+ remote (common in 2005–2014 models).
- Yellow Learn Button: Requires a Security+ 2.0 remote (common in 2011–present models).
Pro Tip: Avoid purchasing a remote based solely on the “1/2 HP” label. Always verify the Learn button color or the model number printed on the back of your old remote. For example, model numbers like 139.53753 require a 315 MHz remote, while 139.53718 requires a 390 MHz version.
Step-by-Step Guide to Programming Your Craftsman Remote
Programming your new remote is a straightforward process that takes less than two minutes. Follow these concrete steps to ensure a successful sync:
- Prepare Your Equipment: Ensure you have a fresh battery installed in the remote. Stand on a sturdy ladder to safely reach the motor unit mounted on your garage ceiling.
- Locate the Learn Button: Find the “Learn” or “Smart” button on the back or side of the motor unit. It is usually located near the hanging antenna wire.
- Activate Programming Mode: Press and firmly release the “Learn” button. The indicator light next to the button will illuminate and remain solid for exactly 30 seconds.
- Sync the Remote: Within that 30-second window, point your remote at the motor unit from a distance of 5 to 10 feet. Press and hold the desired button on the remote for 3 to 5 seconds.
- Confirm the Connection: Release the remote button when you see the motor unit’s indicator light blink, or when you hear a distinct mechanical click.
- Test the System: Step back to a distance of 15 to 20 feet and press the remote button again. The garage door should activate smoothly.
If the light on the motor unit does not blink, repeat the process. Ensure you are well within the 30-second time limit and that the remote battery is fresh.
Common Issues and Troubleshooting Tips
Even the most reliable systems encounter occasional hiccups. According to industry data from the International Door Association (IDA), over 60% of garage door service calls are related to simple remote control issues, such as dead batteries or minor programming errors, rather than actual motor failure.
Before calling a professional technician, run through this Quick Diagnostic Checklist:
| Issue | Probable Cause | Actionable Solution |
|---|---|---|
| Remote is completely unresponsive | Depleted battery | Replace with a fresh AAA or 9V battery (check your model’s specific requirement). |
| Works only when very close to the door | Weak battery or signal interference | Replace the battery. If the issue persists, check for nearby LED bulbs causing radio frequency interference. |
| Door reverses immediately after closing | Obstructed safety sensors | Clean the sensor lenses with a soft, dry cloth and ensure they are perfectly aligned at the same height. |
| Older remote with switches won’t sync | Mismatched DIP switches | Open both the remote and motor unit to ensure the 8–12 tiny switches match exactly. |
Real-Life Case Study: The LED Interference Mystery
In 2022, a homeowner in Ohio reported that his Sears Craftsman 1/2 HP opener remote suddenly stopped working from his driveway, though it worked perfectly up close. After replacing the battery and reprogramming the remote twice with no success, a technician discovered the culprit: a newly installed batch of cheap, non-shielded LED bulbs in the garage ceiling. These bulbs were emitting broad-spectrum electromagnetic interference on the 390 MHz band. Once the homeowner replaced them with garage-door-specific, shielded LED bulbs, the remote’s range instantly restored to over 100 feet. This highlights why checking your environment is just as important as checking your hardware.
Understanding Garage Door Remote Security Technology
It is also worth understanding how your remote keeps your home safe. Early garage door remotes used fixed DIP switch codes, which were highly vulnerable to “code grabber” devices.
Today, modern systems utilize advanced rolling code (code hopping) technology. According to Wikipedia, modern garage door openers use a frequency spectrum range between 300–400 MHz and rolling code technology to defeat code grabbers and prevent replay attacks by generating a new, encrypted sequence number with every single use. This means that even if a signal is intercepted, it cannot be reused to open your garage.
Best Practices for Maintaining Your Garage Door Remote
To extend the lifespan of your remote and avoid unexpected failures, follow these simple maintenance habits:
- Battery Care: If you plan to store a spare remote for more than a month, remove the battery to prevent corrosion.
- Physical Protection: Use a silicone keychain cover to prevent drop damage and protect the internal circuit board from shocks.
- Moisture Avoidance: Keep the remote out of direct rain, snow, or overly humid pockets to prevent internal short circuits.
Frequently Asked Questions (FAQ)
Q1: Can I use a universal remote for my Sears Craftsman 1 2 Hp Garage Door Opener?
A: Yes, absolutely. Many universal remotes are explicitly designed to be compatible with Craftsman openers. Just ensure the universal remote supports your specific frequency (315 MHz or 390 MHz) and Security+ generation.
Q2: How do I know if my remote is 315 MHz or 390 MHz?
A: The easiest way is to check the color of the “Learn” button on the motor unit (Purple = 315 MHz, Orange/Red = 390 MHz). Alternatively, you can open the battery compartment of the remote; the frequency is often printed on a small sticker inside.
Q3: Why does my remote only work when I am standing right next to the garage?
A: This is a classic symptom of either a dying battery or radio frequency interference. Recently, many homeowners have reported that certain energy-efficient LED light bulbs in their garage emit electromagnetic noise that blocks remote signals. Try turning off the garage lights to test this theory.
Q4: Can I program multiple remotes to one Craftsman 1/2 HP opener?
A: Yes. The motor unit’s memory board is designed to store multiple unique remote codes simultaneously. You can program remotes for every family vehicle without any conflict or signal degradation.
Q5: What should I do if I lost my only garage door remote?
A: If you can still access the interior of your garage, you can purchase a compatible replacement remote and program it using the “Learn” button on the motor unit. If you are locked out, you will need to use the manual release cord or contact a professional garage door technician.
Conclusion
Finding the right Sears Craftsman 1 2 Hp Garage Door Opener Remote doesn’t have to be a stressful experience. By identifying your motor unit’s Learn button color, following the precise programming steps, and performing basic troubleshooting, you can restore seamless, secure access to your garage in minutes. Remember, a well-maintained remote not only offers daily convenience but also ensures the rolling code security of your home remains intact.
Found this guide helpful? Don’t keep it to yourself! Share this article with your friends, family, or neighbors on Facebook, Twitter, or WhatsApp to help them troubleshoot their garage door issues too. Stay secure and drive safely!
Leave a Reply