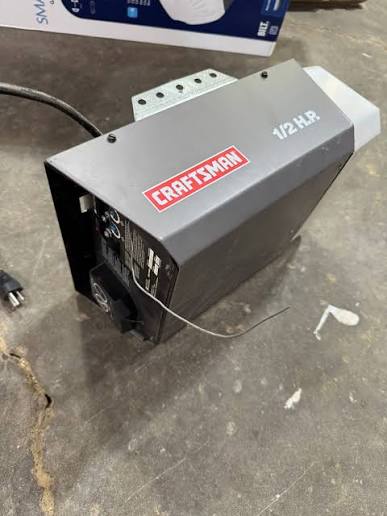
Is your reliable garage door suddenly acting up, leaving you stranded? Don’t worry, finding the right replacement parts for Craftsman 1 2 Hp garage door opener models is easier than you think, and we are here to help you get it running smoothly again. With the right guidance, you can save money and restore your home’s security in no time.
Essential Replacement Parts For Craftsman 1 2 Hp Garage Door Opener
When your garage door acts up, knowing which components to check is half the battle. A typical Craftsman 1/2 HP model is a workhorse, but like any mechanical system, it experiences wear and tear over time. In fact, with regular use and proper maintenance, these openers can last between 10 to 15 years
ohdbellingham.com.
However, specific components will inevitably need attention. If you are searching for a comprehensive Craftsman garage door opener parts list, focusing on the high-failure items first will save you time and money. Here are the most critical components you should keep on your radar:
- Gear and Sprocket Assembly (Part #41C4220A): This is the most frequently replaced component in 1/2 HP motor repair. The nylon gear is intentionally designed to strip before the motor burns out, acting as a sacrificial part to protect your overall investment www.ebay.com.
- Logic Board and Run Capacitor: If your opener hums but doesn’t move, or the lights flicker erratically, the 56 MFD run capacitor or the main logic board may be failing www.ebay.com. Garage door opener troubleshooting often starts here when power is present but motion is absent.
- Safety Reversal Sensors: Misaligned, obstructed, or dirty sensors are a leading cause of doors that refuse to close. The LED lights on the sensors will typically blink if they are misaligned.
- Remote Controls and Wall Consoles: Battery corrosion, worn-out buttons, or internal circuit fatigue can cause intermittent connectivity issues.
Step-by-Step Guide to Replacing the Gear and Sprocket Kit
Replacing the gear kit might sound intimidating, but with patience and the right tools, it is a highly manageable DIY project. Many homeowners successfully complete this repair in a single afternoon.
Follow these concrete steps to ensure a safe and successful repair:
- Disconnect the Power: Always unplug the opener from the wall outlet. Safety first—never work on a live electrical unit to avoid severe shock hazards.
- Release the Door: Pull the red emergency release cord to disconnect the door from the opener carriage. This allows you to move the door manually and relieves tension on the chain or belt.
- Remove the Motor Cover: Use a Phillips-head screwdriver to remove the screws securing the plastic housing. Keep these screws in a small magnetic tray so they do not get lost.
- Extract the Old Assembly: Carefully remove the motor shaft pin and slide out the worn gear and sprocket assembly. Pro tip: Take a photo with your phone before disassembly to remember the exact wiring and alignment.
- Clean and Prepare: Wipe away all old, hardened grease from the motor housing. Use a clean microfiber cloth and apply approximately 2 tablespoons of high-quality lithium grease at a room temperature of 22–28°C for optimal adhesion and smooth operation. Applying grease at this specific temperature ensures it spreads evenly without being too runny or too stiff.
- Reassemble and Test: Insert the new Craftsman gear kit 41C4220A, secure the motor shaft pin, and replace the cover. Plug the unit back in and test the operation with the wall console before re-engaging the door.
DIY Repair vs. Professional Service: Which Is Right for You?
Deciding whether to tackle the repair yourself or call a professional depends on your comfort level, budget, and the complexity of the issue. Below is a quick comparison to help you decide.
| Factor | DIY Replacement | Professional Repair |
|---|---|---|
| Cost | Low ($30–$80 for parts) | High ($150–$300+ with labor) |
| Time | 1–2 hours (plus research) | Same-day service (usually) |
| Skill Required | Basic mechanical aptitude | None (handled by expert) |
| Warranty | Parts-only warranty (90 days) | Full labor and parts warranty |
| Safety Risk | Moderate (requires caution) | Very Low (insured technicians) |
Expert Insight: “For simple wear-and-tear items like nylon gears or remote controls, DIY is highly encouraged. However, if the issue involves the main spring or complex logic board diagnostics, professional assistance is strongly recommended to avoid injury or further damage.”
How to Maximize Your Garage Door Opener’s Lifespan
Preventative maintenance is the secret to avoiding frequent repairs. According to established industry safety standards, all modern garage door openers must include an automatic reversal mechanism to prevent accidents [[https://en.wikipedia.org/wiki/Garage_door_opener]].
To keep your system in top shape, follow these best practices:
- Lubricate Moving Parts: Every six months, apply a silicone-based lubricant to the chain or belt, rollers, and hinges. Avoid standard WD-40, as it attracts dust and can gum up the mechanism over time.
- Test the Safety Sensors Monthly: Place a small object (like a roll of paper towels) in the door’s path. The door should immediately reverse upon contact.
- Tighten Hardware: The constant vibration of daily operation can loosen bolts and mounting brackets. Check and tighten them annually with a socket wrench.
- Keep the Area Clean: Dust and debris can infiltrate the motor housing. A quick vacuum around the unit goes a long way in preventing overheating.
Frequently Asked Questions (FAQ)
1. How do I find the exact model number for my Craftsman opener?
The model number is typically located on a sticker or stamped into the metal on the back or side of the motor housing. It usually starts with “139.” followed by a series of numbers (e.g., 139.53675SRT). Having this number is crucial when ordering replacement parts for Craftsman 1 2 Hp garage door opener systems to ensure 100% compatibility.
2. How often should the gear and sprocket kit be replaced?
Under normal residential use, the nylon gear and sprocket kit should last between 5 to 7 years. If you hear a distinct grinding noise or the motor hums but the chain doesn’t move, it is a strong indicator that the gear teeth have stripped and immediate replacement is necessary.
3. Is it safe to replace the logic board capacitor myself?
Yes, but with strict precautions. The capacitor stores an electrical charge even after the unit is unplugged. You must safely discharge it using an insulated screwdriver across the terminals before handling. If you are uncomfortable working with electrical components, it is best to replace the entire logic board or hire a professional.
4. Why does my Craftsman 1/2 HP opener make a grinding noise?
A grinding noise is almost always caused by a stripped nylon gear. As mentioned earlier, this gear is intentionally made of a softer material to act as a “sacrificial” component. This brilliant design protects the more expensive metal motor shaft from catastrophic damage during an obstruction or heavy load.
5. Are aftermarket replacement parts as good as OEM?
High-quality aftermarket parts can be a cost-effective alternative and often perform just as well as Original Equipment Manufacturer (OEM) parts. However, always check reviews and ensure the part number matches your specific model. For critical safety components like logic boards or sensors, sticking to OEM is generally the safest bet.
Conclusion
Maintaining your garage door doesn’t have to be a stressful or expensive endeavor. By knowing the right replacement parts for Craftsman 1 2 Hp garage door opener models, you can confidently tackle common issues, save on costly service calls, and extend the life of your system. Remember, regular maintenance and timely replacements are the keys to a safe, quiet, and reliable garage door.
Did you find this guide helpful? Share this article with your friends and family on Facebook, Twitter, or Pinterest to help them keep their garage doors running smoothly too! Don’t forget to bookmark this page for your future DIY repair reference.
Leave a Reply