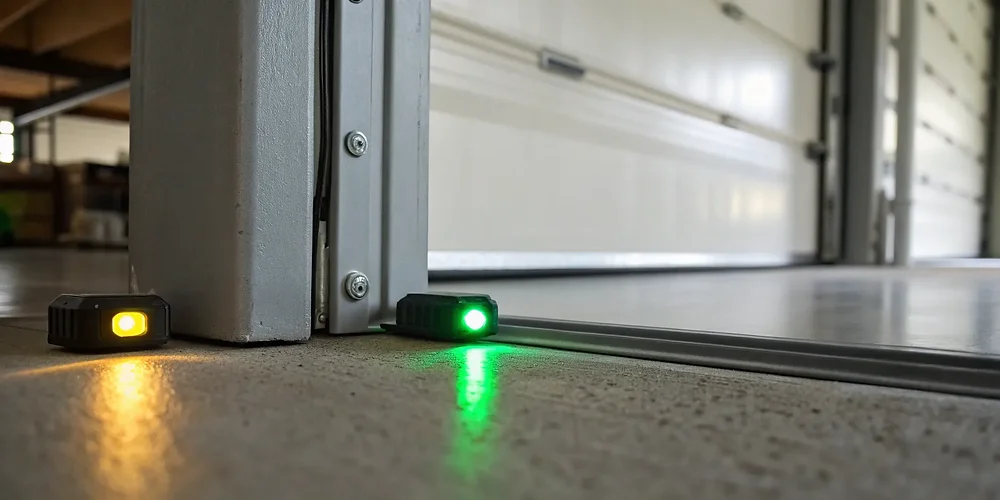
Have you ever stood in your driveway, pressed the remote, and watched your garage door refuse to close while staring at a confusing light show? It is a frustrating experience that many homeowners face, especially when one garage door sensor is yellow the other is green. This specific color combination usually indicates a communication breakdown between your safety eyes, preventing the door from operating for security reasons. Understanding what these lights mean is the first step toward restoring convenience and safety to your home.
Decoding the Lights: What Do Yellow and Green Mean?
Before you grab your toolbox, it is essential to understand the language of your garage door opener. Most modern garage door sensors use LED lights to communicate their status to the homeowner and the main motor unit. While brands like LiftMaster, Chamberlain, and Genie have slight variations, the general rule of thumb remains consistent across the industry.
Typically, the sending sensor (the one that emits the invisible infrared beam) has a steady amber or yellow light. This indicates that the unit is powered on and actively transmitting the signal. The receiving sensor (the one that catches the beam) should display a steady green light. This green light confirms that it is successfully receiving the uninterrupted beam from the sender.
When you see one garage door sensor is yellow the other is green, it often suggests that the system is partially functional but not fully aligned or connected. However, context is key. If the green light is blinking instead of steady, the issue is different than if it is solid. A solid yellow on the transmitter and a solid green on the receiver is actually the ideal state for many models. If your door still won’t close in this state, the issue might lie elsewhere, such as in the wiring or the logic board. Conversely, if the green light is off or blinking, the beam is broken.
| Sensor Light Status | Likely Meaning | Action Required |
|---|---|---|
| Yellow (Steady) + Green (Steady) | Normal Operation | Check remote batteries or wall button. |
| Yellow (Steady) + Green (Blinking) | Misalignment | Realign sensors to face each other directly. |
| Yellow (Off) + Green (Off) | No Power | Check wiring connections and outlet power. |
| Yellow (Blinking) + Green (Any) | Wiring Issue | Inspect wires for cuts or loose terminals. |
Why Is My Garage Door Not Closing With These Lights?
If your sensors are showing yellow and green but the door refuses to descend, you are likely dealing with a “false positive” alignment or an obstruction. Garage doors are equipped with safety reversal mechanisms mandated by federal law since 1993. These laws require that if the beam is interrupted, the door must stop and reverse to prevent injury to people or pets.
Even if the lights appear correct, microscopic misalignments can cause the receiver to detect a weak signal. Think of it like trying to hear a whisper in a noisy room; the sound is there, but it is not clear enough to be understood. The motor unit interprets this weak signal as an obstruction, keeping the door open to ensure safety.
Another common culprit is sunlight interference. During certain times of the day, direct sunlight can flood the receiving sensor’s lens, overpowering the infrared beam from the sender. This phenomenon is known as “sunlight washout.” If you notice the problem occurs only in the late afternoon or early morning, this is likely your issue. You can test this by shading the sensors with your hand or a piece of cardboard. If the door closes while shaded, you have identified the root cause.
Step-by-Step Guide to Fixing Sensor Misalignment
Fixing sensor issues does not always require a professional technician. In fact, most misalignment problems can be resolved in under ten minutes with basic household tools. Follow these precise steps to realign your sensors and restore functionality.
Step 1: Clean the Lenses
Dirt, spider webs, and dust can accumulate on the small plastic lenses of the sensors. Use a soft, dry microfiber cloth to gently wipe both the sending and receiving units. Avoid using chemical cleaners, as they can cloud the plastic over time.
Step 2: Check the Brackets
Locate the metal brackets holding the sensors to the garage door tracks. These brackets can bend if hit by a car, bike, or lawn mower. Visually inspect them to ensure they are straight and firmly attached to the track. If a bracket is bent, use a pair of pliers to gently straighten it back into position.
Step 3: Align the Sensors
Loosen the wing nuts or bolts on the sensor brackets just enough so that you can move the sensor heads by hand. Look at the receiving sensor (the one with the green light). Adjust its angle slowly until the green light becomes steady and bright. You may need an assistant to watch the light while you adjust the sensor. Once the light is steady, tighten the bolts securely.
Pro Tip: Use a level to ensure both sensors are at the exact same height. Even a difference of half an inch can cause the beam to miss the receiver entirely.
Step 4: Test the Door
Press the wall button to close the door. Watch the sensors as the door descends. If the lights remain steady and the door closes completely, you have successfully fixed the issue. If the door reverses again, repeat the alignment process with finer adjustments.
When to Call a Professional Technician
While DIY fixes are effective for minor misalignments, some scenarios require expert intervention. If you have realigned the sensors multiple times and the lights continue to blink or turn off, the issue may be internal. Damaged wiring inside the walls, a faulty logic board, or a broken sensor unit can mimic alignment issues.
According to the International Door Association, regular maintenance by certified professionals can extend the life of your garage door system by up to 50%. If you notice frayed wires, burn marks on the sensor housing, or if the motor unit makes unusual grinding noises, stop using the door immediately and contact a licensed technician. Attempting to repair electrical components without proper training can pose serious safety risks.
Frequently Asked Questions
1. Can I bypass the sensors to close my garage door?
Most garage door openers have a manual override feature, but it is strongly discouraged for regular use. Bypassing safety sensors removes a critical protection layer against injury and property damage. It should only be used in emergencies when the sensors are malfunctioning and you need to secure the garage temporarily. Always prioritize repairing the sensors over bypassing them.
2. Why does one sensor light blink while the other is steady?
A blinking light typically indicates that the sensor is receiving power but not the infrared beam. If the yellow light is steady and the green light is blinking, the receiver is not “seeing” the sender. This is almost always due to misalignment, an obstruction in the path, or dirty lenses. Check for objects blocking the path and clean the lenses before adjusting the alignment.
3. Do different brands use different color codes?
Yes, while yellow and green are common, some brands use amber and blue, or even two amber lights where one blinks to indicate status. Always refer to your specific owner’s manual for the exact color code definitions. However, the principle remains the same: one light indicates transmission, and the other indicates reception.
4. Can weather affect my garage door sensors?
Extreme temperatures, heavy rain, and humidity can impact sensor performance. Condensation can form inside the sensor housing, causing short circuits or foggy lenses. In winter, ice buildup on the lenses can block the beam. Using weatherproof covers or applying a silicone sealant around the wiring entry points can help protect your sensors from the elements.
5. How often should I check my garage door sensors?
It is recommended to visually inspect your sensors once a month. Look for dirt, misalignment, or physical damage. Additionally, test the safety reversal feature monthly by placing a roll of paper towels in the door’s path. The door should reverse immediately upon touching the object. Regular checks ensure your family’s safety and prevent unexpected failures.
Conclusion
Dealing with one garage door sensor is yellow the other is green can be puzzling, but it is rarely a catastrophic failure. By understanding the meaning behind these lights and following a systematic approach to cleaning and alignment, you can often resolve the issue yourself. Remember, a steady yellow and steady green is usually a sign of good health, while blinking lights signal a need for adjustment.
Regular maintenance not only saves you money on costly repairs but also ensures the safety of your loved ones and vehicles. If you found this guide helpful, please share it with your neighbors or on social media to help others troubleshoot their garage door woes. A well-functioning garage door is a happy garage door!
Leave a Reply