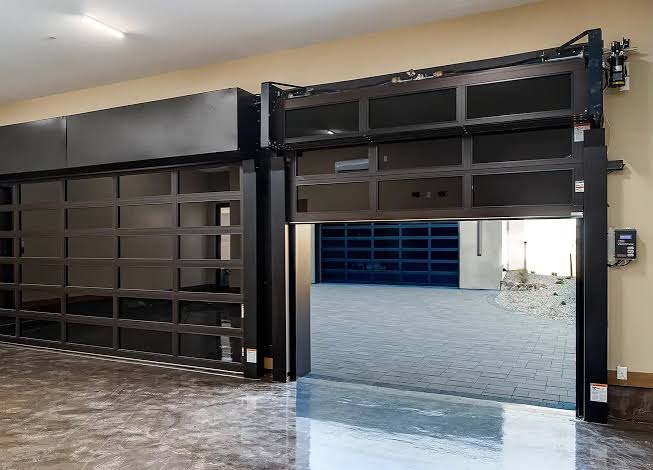
Is there anything more frustrating than pressing the remote button, watching your garage door descend, and then seeing it stop just inches from the ground? You are not alone. Thousands of homeowners face this exact issue every day, often left wondering if they need an expensive professional or if a simple tweak can solve the problem. If you find yourself thinking, “My garage door will not close all the way,” this guide is designed specifically for you. We will walk through the most common causes, safety checks, and DIY solutions to get your garage back to normal without breaking the bank.
Why Does My Garage Door Stop Before Closing?
Before diving into tools and screws, it is crucial to understand why this happens. Modern garage doors are equipped with sophisticated safety mechanisms designed to prevent injury or property damage. When these systems detect even a minor irregularity, they halt the door’s movement as a protective measure.
According to industry standards, over 80% of garage door issues are related to sensor misalignment or track obstructions rather than motor failure. Understanding this can save you from unnecessarily replacing expensive components.
The Role of Safety Sensors
The most frequent culprit is the photo-eye sensor system. These small devices, usually located near the floor on both sides of the garage door opening, emit an invisible beam. If this beam is interrupted—even by a spiderweb, dust, or slight misalignment—the door assumes an object is in the way and refuses to close completely.
Check and Clean Your Safety Sensors
If your garage door reverses immediately after touching the floor or stops a few inches above it, start here. This is the easiest fix and requires no tools.
- Locate the Sensors: Look for two small boxes mounted on the vertical tracks, about 6 inches off the ground. One will have a green light (power), and the other usually has an amber or red light (signal).
- Inspect the Lights: If the lights are blinking or off, the sensors are not aligned. If they are solid, they may still be dirty.
- Clean the Lenses: Use a soft, dry microfiber cloth to gently wipe the lens of each sensor. Remove any cobwebs, dirt, or grease.
- Realign the Brackets: Loosen the wing nuts slightly and adjust the sensors until both lights are solid. Tighten the nuts carefully without shifting the position.
Pro Tip: Ensure nothing is blocking the beam path. Even a leaf or a parked bicycle tire can trigger the safety reversal.
Inspect the Tracks for Obstructions and Damage
If the sensors are clean and aligned, the next step is to examine the physical path of the door. Garage doors rely on smooth metal tracks to guide the rollers. Any dent, bend, or debris can cause the door to jam or stop prematurely.
Step-by-Step Track Inspection
- Visual Check: Look for visible dents or gaps in the metal tracks.
- Debris Removal: Use a vacuum cleaner with a hose attachment to remove dirt, leaves, or hardened grease from the track channel.
- Roller Examination: Check if the rollers are cracked or chipped. Damaged rollers can catch on the track, causing the door to halt.
If you notice significant bends in the track, do not attempt to hammer them out yourself. This can weaken the metal and lead to catastrophic failure. For more detailed information on garage door mechanics and safety standards, you can refer to general engineering principles outlined on Wikipedia.
Adjust the Travel Limit Settings
Sometimes, the door is mechanically fine, but the opener’s “brain” is confused. The travel limit settings tell the motor how far to move up and down. If these settings drift due to vibration or temperature changes, the door may think it has hit the floor when it hasn’t.
How to Reset Travel Limits
Most modern openers have two adjustment screws or buttons labeled “Up” and “Down” or “Open” and “Close.”
- Identify the Controls: Locate the adjustment panel on the motor unit hanging from the ceiling.
- Adjust the Down Limit: Turn the “Down” or “Close” adjustment screw slightly (usually clockwise) to increase the travel distance. Make small adjustments—quarter turns are sufficient.
- Test the Door: Press the wall button to close the door. Watch closely. If it still stops short, adjust again. If it hits the floor hard and reverses, you have gone too far.
- Fine-Tune: The goal is for the door to seal tightly against the weather stripping without excessive force.
| Adjustment Direction | Effect on Door |
|---|---|
| Clockwise | Increases travel distance (door goes lower) |
| Counter-Clockwise | Decreases travel distance (door stops higher) |
Lubricate Moving Parts for Smooth Operation
Friction is the enemy of a smoothly operating garage door. Over time, lubricant dries out, causing rollers, hinges, and springs to stick. This increased resistance can trick the motor’s force sensitivity settings into thinking there is an obstruction.
Recommended Lubrication Routine
- Use the Right Product: Avoid WD-40 as it attracts dust. Instead, use a silicone-based spray or lithium grease.
- Target Areas: Apply lubricant to the rollers, hinges, and the spring (if it is a torsion spring). Do not lubricate the plastic parts of the track or the sensors.
- Frequency: Perform this maintenance every 6 months to ensure optimal performance.
When to Call a Professional
While many issues can be resolved with DIY efforts, some scenarios require expert intervention. Garage doors are under high tension, and improper handling can lead to severe injury.
Call a certified technician if:
- The springs are broken or snapped.
- The cables are frayed or loose.
- The motor makes grinding noises but does not move.
- You have adjusted limits and sensors, but the door still fails to close.
Attempting to repair broken springs without proper tools and training is extremely dangerous. Always prioritize safety over cost savings.
FAQ Section
1. Why does my garage door close halfway and then go back up?
This is typically a safety feature triggered by the photo-eye sensors. If the beam is blocked or misaligned, the door reverses to prevent crushing an object. Check for obstructions and ensure the sensor lights are solid.
2. Can weather affect my garage door’s ability to close?
Yes. Extreme cold can cause metal tracks to contract, while heat can expand them. Additionally, humidity can affect the wood of older doors, causing them to swell and stick. Regular maintenance helps mitigate these effects.
3. How do I know if my garage door springs are broken?
Look for a gap in the torsion spring above the door or a snapped extension spring on the side. You may also hear a loud bang. If the door feels extremely heavy when lifted manually, the springs are likely failed. Do not attempt to fix this yourself.
4. Is it safe to bypass the sensors to force the door closed?
No. Bypassing sensors removes critical safety protections, increasing the risk of injury or damage. It is also a violation of safety codes. Always troubleshoot the underlying issue instead.
5. How often should I maintain my garage door?
Perform a visual inspection monthly and lubricate moving parts every six months. A professional tune-up is recommended once a year to check springs, cables, and opener settings.
Conclusion
Dealing with a garage door that won’t close properly is stressful, but it is rarely a disaster. By systematically checking your sensors, clearing track obstructions, and adjusting travel limits, you can resolve most common issues safely and effectively. Remember, regular maintenance is key to preventing future problems.
If you found this guide helpful, please share it with friends or neighbors who might be struggling with their own garage doors. A well-functioning garage door provides security and convenience for your entire household. Stay safe, and keep your home running smoothly!
Leave a Reply