Introduction
There’s nothing quite as frustrating as watching your garage door reverse halfway down, leaving you stuck and confused. If my garage door keeps stopping on the way down, you’re not alone—this is one of the most common household maintenance issues in the United States. The good news? Most causes are simple to diagnose and fix without calling a professional. In this guide, we’ll walk you through every possible reason why this happens and provide clear, step-by-step solutions to get your door moving smoothly again.
Why Does My Garage Door Stop When Closing?
Understanding why your garage door behaves this way is the first step toward fixing it. Modern garage doors are equipped with multiple safety features designed to prevent injury and property damage. When any of these systems detect an obstacle or malfunction, the door automatically reverses direction.
According to the Consumer Product Safety Commission (CPSC), garage door-related injuries send thousands of Americans to emergency rooms each year. This is precisely why federal regulations mandate automatic reversal mechanisms on all residential garage door openers manufactured after 1993. Your door isn’t being difficult—it’s trying to keep you safe.
The most common culprits include misaligned safety sensors, obstructed tracks, incorrect force settings, or worn-out components. Let’s explore each possibility in detail so you can identify and resolve the issue efficiently.
Check and Clean the Safety Sensors First
The safety sensors (also called photo-eye sensors) are the number one reason garage doors stop mid-descent. These small devices sit near the floor on either side of your garage door opening and create an invisible beam across the doorway. If anything interrupts this beam—even something as tiny as a spider web—the door assumes there’s an obstacle and reverses.
How to Inspect Your Sensors:
- Look for the indicator lights. Most sensors have LED lights that glow steady green or amber when properly aligned. A blinking or off light indicates a problem.
- Check for obstructions. Remove any dirt, leaves, cobwebs, or debris from the sensor lenses using a soft, dry cloth.
- Verify alignment. Both sensors should face each other directly. If one has been bumped out of position, gently adjust it until the lights stabilize.
- Test the beam. Wave your hand between the sensors while attempting to close the door. If the door reverses, the sensors are working correctly—but may still need realignment.
If cleaning and realigning don’t solve the problem, the sensors themselves may be faulty and require replacement. Replacement sensor kits typically cost between $20 and $50 and can be installed with basic tools.
Inspect the Tracks for Obstructions and Damage
Garage doors glide along metal tracks mounted on both sides of the opening. Even minor dents, bends, or debris in these tracks can cause the door to jam and reverse.
Step-by-Step Track Inspection:
- Visual examination: Look closely at both vertical and horizontal track sections for dents, rust, or loose bolts.
- Remove debris: Use a vacuum cleaner or compressed air to clear out dirt, gravel, or hardened grease.
- Check rollers: Ensure the rollers move freely within the track. Replace any that are cracked, chipped, or excessively worn.
- Lubricate sparingly: Apply a silicone-based lubricant to the tracks and rollers. Avoid WD-40 or heavy grease, which attract more dirt.
For more detailed information on garage door mechanics and safety standards, you can refer to the Wikipedia article on garage doors.
Adjust the Force and Travel Limits
Your garage door opener has two critical settings that control its behavior: force sensitivity and travel limits. If the force setting is too low, the door interprets normal resistance as an obstruction and reverses. If the travel limit is set incorrectly, the door may think it has hit the floor before it actually has.
How to Adjust These Settings:
- Locate the adjustment screws. These are usually found on the back or side of the opener motor unit and labeled “Force” and “Travel” or “Up/Down Limit.”
- Increase downward force slightly. Turn the force adjustment screw clockwise in small increments (quarter-turns). Test the door after each adjustment.
- Reset the travel limit. Consult your opener’s manual for specific instructions, but generally, you’ll press and hold a button while manually moving the door to the fully closed position.
- Test repeatedly. Close the door several times to ensure it completes the cycle without reversing.
Warning: Never increase the force setting excessively. The door must still reverse when encountering a genuine obstacle. If you’re unsure, consult a professional technician.
Examine the Springs and Cables for Wear
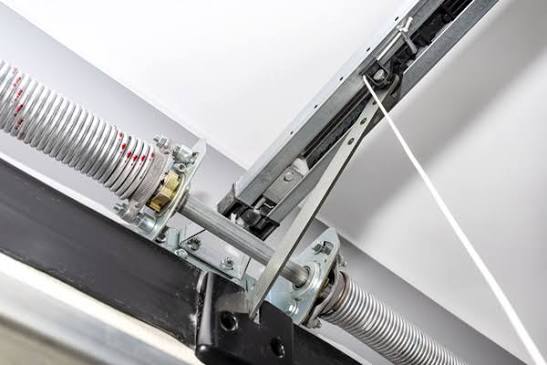
Torsion springs and lift cables bear the weight of your garage door. Over time, these components weaken, stretch, or break, causing uneven movement that triggers the safety reversal system.
Signs of Spring or Cable Problems:
| Symptom | Possible Cause |
|---|---|
| Door moves unevenly | Broken or stretched cable |
| Loud snapping noise | Failed torsion spring |
| Door feels extremely heavy | Worn-out springs |
| Visible gaps in spring coils | Spring fatigue |
Important Safety Note: Garage door springs are under extreme tension and can cause serious injury if handled improperly. If you suspect spring or cable damage, do not attempt DIY repairs. Contact a licensed garage door technician immediately.
According to industry estimates, torsion springs last approximately 10,000 cycles (one cycle equals one opening and one closing). For a typical family using their garage door twice daily, this translates to roughly 13–15 years of service.
Lubricate Moving Parts Regularly
Friction is the enemy of smooth garage door operation. Without proper lubrication, hinges, rollers, bearings, and springs create resistance that can confuse the opener’s safety systems.
Recommended Lubrication Schedule:
- Every 6 months: Apply silicone-based lubricant to rollers, hinges, and springs.
- Annually: Inspect and lubricate track sections and bearing plates.
- Avoid: Petroleum-based oils, WD-40, or thick grease, which attract dust and gum up mechanisms.
A well-lubricated door operates quietly, reduces wear on components, and minimizes the likelihood of unexpected reversals.
When to Call a Professional Technician
While many garage door issues are DIY-friendly, certain situations demand expert attention:
- Broken or damaged springs: High-tension components require specialized tools and training.
- Electrical problems: Faulty wiring or circuit board issues should be handled by licensed electricians.
- Persistent problems after troubleshooting: If you’ve tried all the above steps and the door still reverses, there may be an underlying mechanical or electronic fault.
- Older openers (15+ years): Consider replacing units that lack modern safety features or show signs of widespread wear.
The average cost for a professional garage door service call ranges from $75 to $150, with repairs typically adding $100 to $400 depending on complexity.
FAQ Section
Q1: Why does my garage door go down a few inches then reverse?
This is almost always caused by misaligned or dirty safety sensors. The beam between the sensors is interrupted, triggering the reversal mechanism. Clean the sensor lenses and ensure they’re perfectly aligned facing each other.
Q2: Can weather affect my garage door’s operation?
Yes. Extreme cold can stiffen lubricants and contract metal components, increasing friction. Heat can cause expansion and misalignment. Seasonal maintenance, including lubrication and inspection, helps mitigate weather-related issues.
Q3: How do I know if my garage door springs need replacement?
Look for visible gaps in spring coils, rust, or a door that feels unusually heavy when operated manually. If your door doesn’t stay balanced when lifted halfway, the springs are likely failing.
Q4: Is it safe to bypass the safety sensors?
Absolutely not. Bypassing safety sensors violates federal safety regulations and creates a serious hazard, especially for children and pets. Always address the root cause rather than disabling safety features.
Q5: How often should I perform garage door maintenance?
Perform a basic inspection and lubrication every six months. Conduct a full safety test monthly by placing a 2×4 board on the floor where the door closes—the door should reverse immediately upon contact.
Q6: What’s the lifespan of a typical garage door opener?
Most quality garage door openers last 10–15 years with regular maintenance. Newer models offer enhanced safety features, smartphone connectivity, and quieter operation, making replacement worthwhile for older units.
Conclusion
Dealing with a garage door that keeps stopping on the way down doesn’t have to be stressful or expensive. By systematically checking safety sensors, inspecting tracks, adjusting force settings, and maintaining moving parts, you can resolve most issues yourself. Remember, your garage door’s reversal feature exists to protect you—work with it, not against it.
If you found this guide helpful, please share it with friends and neighbors who might be struggling with similar problems. A well-functioning garage door isn’t just convenient—it’s a critical safety component of your home. Stay safe, stay informed, and keep your garage door running smoothly!
Leave a Reply