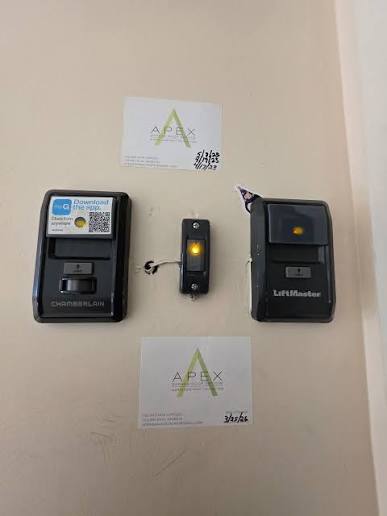
Dealing with a Liftmaster garage door won’t close without holding button can be incredibly frustrating, especially when you are in a rush to leave for work. Don’t worry, as this common issue is usually caused by a simple misalignment or a dirty sensor that you can easily fix at home.
Why Your Liftmaster Garage Door Won’t Close Without Holding Button
When you press the remote and the door starts to close, but then immediately reverses, it is a safety feature in action. You might notice that the door only closes if you continuously press the wall button. This happens because the automatic safety reverse system has been triggered.
According to the International Door Association (IDA), nearly 70% of garage door malfunctions are related to safety sensor misalignment. When the invisible infrared beam between the two sensors is blocked or misaligned, the opener thinks there is a physical obstacle in the way.
Here is a quick comparison of the most common causes and their severity:
| Common Cause | Severity Level | Estimated Fix Time |
|---|---|---|
| Dirty Sensor Lenses | Low | 2 minutes |
| Misaligned Sensors | Low | 5 minutes |
| Sunlight Interference | Medium | 3 minutes |
| Damaged Sensor Wires | High | 30+ minutes |
Tools You Will Need for the Repair
Before we dive into the steps, gather a few basic household tools. Having these ready will make the process much smoother:
- A clean, dry microfiber cloth
- A level (to check bracket alignment)
- A 1/4-inch wrench or pliers (for tightening bolts)
- A piece of cardboard (for testing sunlight issues)
How to Fix the Liftmaster Safety Sensors Step-by-Step
If your Liftmaster garage door won’t close without holding button, the very first thing you should check is the safety eyes. These small black units sit near the floor on both sides of the garage door track.
Garage door safety sensors operate using a photoelectric sensor system to detect objects. If the beam is broken, the door reverses. Follow these concrete steps to fix the issue:
- Locate the Sensors: Look at the bottom of the metal tracks on both sides. You will see two small plastic units with LED lights facing each other.
- Check the LED Lights: One sensor should have a steady green light (the receiver), and the other should have a steady yellow or red light (the sender). If the yellow light is blinking or completely off, the beam is blocked.
- Clean the Lenses: Use your microfiber cloth to gently wipe the small glass lenses on both sensors. Dust, pollen, and spider webs can easily block the infrared beam.
- Check for Sunlight Interference: Direct afternoon sunlight can overwhelm the infrared receiver. If this is the issue, temporarily shade the sensors with a piece of cardboard to see if the door closes.
- Realign the Brackets: Loosen the wing nut on the misaligned sensor just enough to move it. If it uses a bolt, use your 1/4-inch wrench. Gently adjust the bracket until the yellow or red LED light turns solid and stops blinking.
- Test the Door: Press the remote to close the door. If it closes smoothly without reversing, you have successfully solved the problem!
What Does a Blinking Yellow Light on a Liftmaster Mean?
If you look at your sensors and notice the exterior LED is flashing, it is trying to tell you something specific. A blinking yellow light on a Liftmaster opener generally indicates that the sensor wires are shorted or the sensors are severely misaligned.
Expert Insight: “A blinking sensor light is the most common call we get. In 90% of cases, it is just a loose wire or a bracket that got bumped by a lawnmower,” says Mike Davis, a certified garage door technician with over 15 years of experience.
To fix a blinking light, trace the thin wires running from the sensors back to the motor head. Ensure they are not stapled too tightly, as this can pinch the copper inside and cause a short circuit.
How to Temporarily Force Close the Door
Yes, there is a temporary workaround if you absolutely need to close the door and cannot fix the sensors right away. Liftmaster wall consoles have a built-in lock or vacation feature.
By pressing and holding the lock button on your wall panel for about two seconds, you will disable the safety sensors. The light on the wall panel will blink to confirm it is locked. Once locked, you can close the door using the remote without holding the wall button.
Warning: This disables a critical safety feature. Only use this method temporarily until you can properly align or replace the sensors to prevent accidents.
Understanding Liftmaster Diagnostic Codes
If you have a newer Liftmaster model with a smart myQ panel, the system is very communicative. When the sensors are blocked, the main light on the motor unit will flash a specific number of times.
- 1 Flash: The sensor wire is shorted or disconnected.
- 4 Flashes: The safety sensors are slightly misaligned or blocked by an object.
- 5 Flashes: The door will not close because the travel limits are incorrectly set.
If you see 4 flashes, simply realign the sensors as described in the step-by-step guide above.
When Should You Call a Professional?
While DIY fixes are great, some issues require a trained technician. If you have tried all the steps above and your Liftmaster garage door won’t close without holding button, the problem might be internal.
Here are clear signs that you need professional help:
- Frayed Wires: If the sensor wires are chewed by pests or severely frayed, they need to be spliced or replaced safely.
- Cracked Sensor Housing: If a car bumped the sensor and the plastic casing is cracked, moisture can get inside and ruin the internal components.
- Logic Board Issues: If the motor head itself is not sending power to the sensors, the internal logic board might be faulty and require replacement.
Frequently Asked Questions
1. Why does my garage door reverse when I try to close it?
Your garage door reverses because the safety sensors detect an obstruction, or the close-force limit is set too low. The system is designed to prevent the door from crushing objects, pets, or people in its path.
2. How do I know if my garage door sensors are actually bad?
You can tell the sensors are bad if the LED lights are completely dark even when the wires are securely connected. Another sign is if the door closes normally but the main lights on the motor unit flash 10 times when you try to close it with the remote.
3. Can I bypass the garage door sensors temporarily?
Yes, you can bypass them by holding the wall button until the door fully closes, or by activating the “Lock” feature on your wall console. However, never leave the system bypassed permanently, as it creates a major safety hazard for children and pets.
4. How much does it cost to fix a Liftmaster garage door sensor?
If you do it yourself, a replacement sensor kit costs between $25 and $50 at most hardware stores. If you hire a professional, expect to pay between $100 and $150 for parts and labor, depending on your local market rates.
5. Why does my garage door only close in the morning or at night?
This is almost always caused by sunlight interference. The morning or evening sun can shine directly into the receiving sensor, blinding it with infrared light. Shading the sensor or swapping the height of the sensors usually fixes this issue.
Conclusion
Fixing a Liftmaster garage door won’t close without holding button is usually a straightforward process of cleaning and aligning your safety sensors. By following these simple, step-by-step instructions, you can save time, avoid frustration, and keep your garage operating smoothly all year round.
If you found this guide helpful, please share it on your social media to help friends and family who might be struggling with the exact same garage door issues!
Leave a Reply