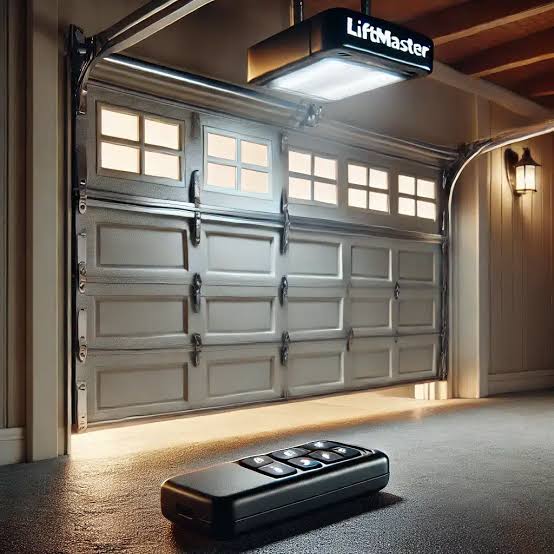
There is nothing quite as frustrating as standing in your driveway, rain pouring down, pressing the button on your Liftmaster garage door opener remote opens but does not close. You watch the lights flash, hear the motor hum for a split second, and then… silence. Or worse, the door starts to go down and immediately reverses back up. This common issue disrupts your daily routine and raises immediate safety concerns. If you are dealing with a Liftmaster remote that opens the door but refuses to close it, you are not alone. This guide will walk you through the exact steps to diagnose and fix the problem, ensuring your home remains secure and accessible.
Why Does My Liftmaster Remote Open But Not Close?
Before diving into tools and ladders, it is crucial to understand why this happens. Modern garage door openers are designed with multiple safety fail-safes. If any single sensor detects an obstruction, misalignment, or error, the system will prioritize safety over convenience by refusing to close the door.
According to industry standards, over 80% of “won’t close” issues are related to safety sensors or travel limit settings rather than mechanical failure. Understanding this helps you avoid unnecessary repairs. The most common culprits include:
- Misaligned Safety Eyes: The infrared beams are blocked or crooked.
- Travel Limit Errors: The door thinks it has already hit the floor.
- Remote Signal Issues: The remote is sending a weak or corrupted signal.
- Lock Mode Activation: The console is accidentally locked.
By addressing these areas systematically, you can often resolve the issue in under 30 minutes without calling a professional.
Check the Safety Sensors First
The number one reason a Liftmaster garage door opener remote opens but does not close is a problem with the safety reversal system. These are the small units mounted near the floor on both sides of your garage door tracks. They emit an invisible infrared beam. If this beam is interrupted, the door will not close to prevent crushing objects or people.
Step-by-Step Sensor Inspection
- Check the LED Lights: Look at the sensors. One should have a solid green light (sending), and the other should have a solid amber or red light (receiving). If either light is blinking or off, there is a power or alignment issue.
- Clean the Lenses: Use a soft, dry cloth to wipe the lenses. Dust, spiderwebs, or mud can block the infrared signal.
- Verify Alignment: Stand behind the sensors and look down the track. They must be pointing directly at each other. Even a millimeter of misalignment can break the connection. Loosen the wing nuts, adjust the brackets until the lights turn solid, and tighten them back.
- Check for Obstructions: Ensure no boxes, bikes, or trash cans are blocking the path between the two sensors.
If the lights are solid but the door still won’t close, try holding the wall button inside the garage. If the door closes using the wall button but not the remote, the issue is likely with the remote itself, not the sensors. However, if the door still won’t close with the wall button, the sensor issue persists.
Inspect the Travel Limits and Force Settings
If your sensors are working perfectly, the next likely culprit is the travel limit settings. These settings tell the motor how far to move the door up and down. If the “down” limit is set too high, the door may think it has hit an obstacle before it actually reaches the floor, causing it to reverse.
How to Adjust Travel Limits
Most modern Liftmaster models use a simple adjustment process:
- Locate the adjustment screws or buttons on the motor head unit. They are usually labeled “Up” and “Down” or have arrows.
- Press the “Down” adjustment button. The door will move slightly. Continue pressing until the door closes completely and seals against the ground.
- Test the door. If it reverses immediately upon touching the floor, you may need to adjust the force settings.
- Increase the down force slightly by turning the force adjustment dial clockwise. Caution: Do not increase this too much. The door should still reverse if it hits a solid object like a 2×4 piece of wood placed on the floor.
For older models with screw-driven limits, you may need a flathead screwdriver. Turn the down-limit screw in small increments (1/4 turn) until the door closes fully. Always test the safety reversal feature after making adjustments to ensure compliance with federal safety standards.
Troubleshoot the Remote Control Itself
Sometimes, the issue is not with the garage door opener but with the remote. A weak battery or corrupted signal can cause intermittent failures. While the remote might have enough power to send the “open” command, it may fail to maintain the connection for the “close” cycle, especially if the door is heavy or the motor is straining.
Quick Remote Fixes
- Replace the Battery: Even if the light on the remote blinks, the voltage may be too low for reliable operation. Use a fresh CR2032 or AA battery, depending on your model.
- Reprogram the Remote: Clear the remote’s memory and re-sync it with the opener. Refer to your manual for the specific “Learn” button procedure. Usually, this involves pressing the Learn button on the motor unit, then pressing the remote button within 30 seconds.
- Check for Interference: LED light bulbs in the garage can sometimes emit frequencies that interfere with remote signals. Try turning off the garage lights and testing the remote. If it works, consider switching to incandescent bulbs or shielded LEDs.
Is the Lock Feature Activated?
Many Liftmaster openers have a “Lock” or “Vacation” mode. When activated, this feature disables the remote controls to prevent unauthorized access while you are away. However, users often forget they turned it on.
To check this:
- Look at your wall-mounted control panel.
- If the lock icon is lit or the word “LOCK” is displayed, press and hold the lock button for 2–3 seconds to deactivate it.
- Test the remote again.
This is a simple fix that saves many homeowners from unnecessary troubleshooting. For more detailed information on garage door safety standards and mechanisms, you can refer to Wikipedia’s entry on Garage Door Openers, which provides historical context and technical specifications for various models.
When to Call a Professional
While most issues can be resolved DIY, some situations require expert attention. If you notice the following, stop troubleshooting and call a certified technician:
- Broken Springs: If the door feels extremely heavy or the springs are visibly snapped, do not attempt to operate it. Torsion springs are under high tension and can cause severe injury.
- Damaged Cables: Frayed or snapped cables are a major safety hazard.
- Motor Noise: Grinding, screeching, or burning smells indicate internal motor or gear failure.
- Persistent Issues: If you have checked sensors, limits, and remotes, and the door still won’t close, there may be a logic board failure requiring replacement.
FAQ: Common Questions About Liftmaster Remotes
1. Why does my Liftmaster door close with the wall button but not the remote?
This typically indicates a remote-specific issue. Check the battery, reprogram the remote, or check for signal interference from LED bulbs. It could also mean the remote was deleted from the opener’s memory.
2. What does it mean if the safety sensor light is blinking?
A blinking light usually means the sensors are misaligned or obstructed. Check that nothing is blocking the beam and that the sensors are facing each other directly. If the light continues to blink after alignment, there may be a wiring issue.
3. Can I bypass the safety sensors to close the door?
You can temporarily bypass the sensors by holding down the wall button until the door closes. However, this is not recommended for regular use as it disables critical safety features. Only use this method in emergencies and fix the sensor issue immediately.
4. How often should I replace the remote battery?
It is best to replace the battery once a year as preventive maintenance. If you notice the remote range decreasing or the light dimming, replace it immediately.
5. Why does my door reverse halfway down?
This is often due to excessive friction in the tracks or incorrect force settings. Lubricate the rollers and tracks with silicone-based lubricant, and adjust the down-force setting slightly higher. Ensure the tracks are clean and aligned.
6. Is it safe to adjust the travel limits myself?
Yes, adjusting travel limits is a standard user maintenance task. However, always test the safety reversal feature afterward by placing a 2×4 block on the floor in the door’s path. The door must reverse upon contact. If it does not, readjust the force settings or call a professional.
Conclusion
Dealing with a Liftmaster garage door opener remote opens but does not close can be stressful, but it is rarely a catastrophic failure. In most cases, the solution lies in checking the safety sensors, adjusting the travel limits, or simply replacing the remote battery. By following the steps outlined above, you can restore functionality to your garage door quickly and safely.
Remember, regular maintenance—such as cleaning sensors and lubricating tracks—can prevent these issues from recurring. If you found this guide helpful, please share it with friends or neighbors who might be struggling with their garage doors. A well-functioning garage door is key to home security and convenience, so don’t let a small glitch disrupt your day. Stay safe, and keep your garage moving smoothly
Leave a Reply