Introduction
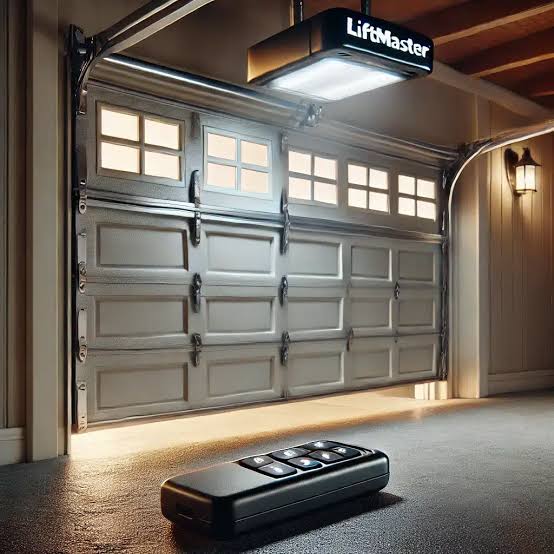
There is nothing quite as frustrating as pressing the button on your wall console, watching your garage door rise smoothly, and then seeing it refuse to come back down. You are left standing in the driveway, car idling, wondering if you need to call a professional or if you can handle it yourself. If your Liftmaster garage door opener opens but does not close, you are not alone; this is one of the most common service calls in the industry.
The good news is that in the vast majority of cases, this issue is not caused by a broken motor or a costly mechanical failure. Instead, it is usually triggered by safety features doing exactly what they were designed to do: preventing the door from crushing an object or person. In this guide, we will walk you through the step-by-step diagnostics to identify the root cause and get your garage door functioning safely and efficiently again.
Why Safety Sensors Are the Primary Culprit
Before you start unscrewing panels or checking gears, you must understand the role of photo-eye sensors. These small devices, located near the floor on either side of the garage door tracks, emit an invisible infrared beam. If this beam is interrupted, the opener assumes there is an obstacle in the path and refuses to close the door to prevent injury.
According to general safety standards outlined by organizations like Wikipedia, modern garage door openers are mandated to have these reversal mechanisms. When your Liftmaster opens but fails to close, the first thing you should check is the LED lights on these sensors.
How to Diagnose Sensor Issues
Look at the small LED lights on the sending and receiving units. Typically, one will be green (power) and the other amber or red (alignment).
- If the light is off: Check the wiring. Ensure the wires are securely connected to the back of the sensor and the motor head. Look for any cuts or chew marks from pests.
- If the light is blinking: This indicates misalignment. The two sensors must be pointing directly at each other. Even a deviation of a few millimeters can break the beam.
- If the light is solid but the door won’t close: The lens might be dirty. Wipe both lenses with a soft, dry cloth to remove dust, spiderwebs, or dirt.
Pro Tip: Try closing the door while holding down the wall button. If the door closes when you hold the button but reverses when you use the remote, it is almost certainly a sensor alignment issue. The wall button often bypasses the safety sensors for testing purposes.
Checking the Travel Limit Settings
If your sensors are aligned and clean, the next likely suspect is the travel limit settings. Your Liftmaster opener uses electronic limits to determine how far the door should travel up and down. Over time, temperature changes, humidity, and regular wear can cause the door’s position to shift slightly, confusing the opener’s internal logic.
When the down limit is set incorrectly, the opener may think the door has already hit the floor (or an obstacle) before it actually has, causing it to reverse immediately.
Step-by-Step Adjustment Guide
Most modern Liftmaster models feature yellow adjustment dials or buttons on the side or back of the motor unit.
- Locate the Down Limit Dial: Look for the dial marked with a downward arrow or labeled “Down.”
- Make Small Adjustments: Turn the dial slightly in the direction indicated by the arrows on the casing. Usually, turning it away from the motor increases the travel distance.
- Test the Door: Press the wall button to close the door. Watch closely.
- Repeat if Necessary: If it still reverses, adjust slightly more. If it hits the floor hard and strains, you have gone too far. Adjust back until the door seals gently against the weather stripping.
Note: Always refer to your specific model’s manual, as older chain-drive models may use screw-driven limits rather than dials.
Remote Control and Wall Console Batteries
It sounds simplistic, but weak batteries can cause intermittent signaling issues. While a weak battery usually prevents the door from opening or closing, some users report erratic behavior where the signal is strong enough to initiate the open cycle but fails to maintain communication during the close cycle, especially if interference is present.
Quick Battery Check Protocol
- Replace Batteries: Use fresh, high-quality alkaline batteries (usually 3V CR2032 for remotes). Avoid rechargeable batteries as they may not provide the consistent voltage required.
- Check the Wall Console: If your wall console is wireless, replace its batteries as well.
- Reprogram the Remote: Sometimes, the code sync becomes corrupted. Clear the memory of your opener and reprogram all remotes and keypads. This ensures a clean signal handshake between the device and the motor.
Mechanical Obstructions and Track Alignment
Even if the electronics are perfect, physical resistance can trigger the safety reversal mechanism. Liftmaster openers are equipped with force sensitivity settings. If the door encounters too much resistance while closing, the motor interprets this as an obstruction and reverses direction.
Inspecting the Tracks and Rollers
Walk along the length of your garage door tracks. Look for:
- Debris: Leaves, twigs, or rocks stuck in the track.
- Bends: Any dents or bends in the metal track can cause the rollers to jump or bind.
- Loose Hardware: Tighten any loose bolts connecting the tracks to the wall or ceiling.
Lubrication Matters
Friction is the enemy of smooth operation. If your rollers are dry, the motor has to work harder, potentially tripping the force limit.
- Use Silicone-Based Lubricant: Avoid WD-40 or grease, which attract dirt. Use a dedicated garage door silicone spray.
- Apply Sparingly: Spray the rollers, hinges, and springs lightly. Wipe away any excess drips.
Force Settings: A Delicate Balance
If you have checked the sensors, limits, and tracks, and the door still reverses, you may need to adjust the close force setting. This setting determines how much power the motor applies before it decides something is wrong.
Warning: Increasing the force setting should be a last resort. If the force is set too high, the door may not reverse if it actually hits a person or pet, creating a severe safety hazard.
How to Adjust Force Safely
- Find the “Close Force” dial on the motor unit.
- Turn it slightly toward the higher setting (usually clockwise).
- Test the door. It should close smoothly without slamming.
- Safety Test: Place a 2×4 piece of wood flat on the floor under the center of the door. Close the door. The door must reverse upon hitting the wood. If it does not reverse, lower the force setting immediately. This test is critical for compliance with federal safety standards.
Comparison: DIY Fixes vs. Professional Help
Knowing when to stop and call a pro is essential for your safety and wallet. Here is a quick breakdown to help you decide.
| Issue | DIY Difficulty | Risk Level | Recommended Action |
|---|---|---|---|
| Misaligned Sensors | Low | Low | Clean and realign manually. |
| Weak Remote Batteries | Very Low | None | Replace batteries. |
| Dirty Tracks/Rollers | Low | Low | Clean and lubricate. |
| Broken Springs | High | Extreme | Call a Professional. Do not attempt. |
| Circuit Board Failure | Medium | Medium | Consult a technician for replacement. |
| Cable Snap | High | Extreme | Call a Professional. Keep away from door. |
FAQ Section
Q: Why does my Liftmaster door close when I hold the wall button but not with the remote?
A: This is a classic sign of misaligned safety sensors. Holding the wall button typically bypasses the sensor check for diagnostic purposes. Realign your photo-eye sensors so that both LED lights are solid and not blinking.
Q: My garage door goes down halfway and then comes back up. What is wrong?
A: This usually indicates that the down travel limit is set too short, or there is an obstruction in the track causing resistance. Check the tracks for debris and adjust the down limit dial slightly to allow the door to travel further.
Q: Can cold weather affect my Liftmaster garage door opener?
A: Yes. Cold temperatures can cause metal tracks to contract and lubricants to thicken, increasing friction. This added resistance can trigger the safety reversal mechanism. Ensure your door is properly lubricated with cold-weather suitable silicone spray.
Q: How do I reset my Liftmaster garage door opener?
A: To reset the logic board, unplug the opener from the power source for 30 seconds. Plug it back in. This clears temporary glitches. To reset remote codes, locate the “Learn” button on the motor head, press and hold it until the LED turns off, then reprogram your remotes.
Q: Is it safe to adjust the force settings myself?
A: You can adjust them, but you must perform the safety reversal test afterward. If the door does not reverse when it hits a 2×4 block of wood, the force is too high and poses a danger. If you are uncomfortable performing this test, hire a certified technician.
Conclusion
Dealing with a Liftmaster garage door opener that opens but does not close can be stressful, but it is rarely a catastrophic failure. By systematically checking your safety sensors, travel limits, and mechanical tracks, you can resolve the issue in most cases without spending a dime on repairs. Remember, safety is paramount; never bypass safety features permanently, and always test the reversal mechanism after any adjustment.
If you found this guide helpful, please share it with your neighbors or on social media to help others troubleshoot their garage door woes. A functioning garage door provides peace of mind and security for your home—don’t let a simple sensor misalignment keep you stranded in the driveway!
Leave a Reply