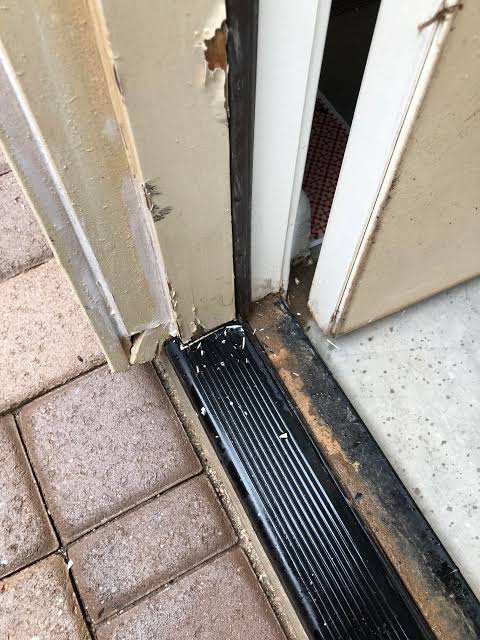
Water pooling in your garage during a storm is more than just an inconvenience—it’s a threat to your tools, vehicles, and home foundation. If you are frustrated by damp floors and potential mold growth, learning how to stop rain from coming under garage door is the first step toward a dry, secure space. This guide provides actionable, professional-grade solutions to seal those gaps effectively.
Why Does Rain Leak Under Your Garage Door?
Before applying fixes, it is crucial to understand the root cause. Garage doors are not designed to be hermetically sealed like interior doors; they require clearance to move up and down. However, this gap creates a vulnerability.
According to building science principles, water intrusion usually occurs due to three main factors:
- Worn Weatherstripping: The rubber seal at the bottom (astragal) hardens and cracks over time.
- Uneven Concrete Floor: Settling foundations create low spots where water pools and flows inward.
- Improper Threshold Alignment: The door does not sit flush against the floor when closed.
Understanding these mechanics helps you choose the right solution rather than applying a temporary patch that fails in the next heavy storm.
Quick Fix: Replace the Bottom Weather Seal
The most common and cost-effective solution is replacing the bottom rubber gasket. This component, often called an “astragal,” is designed to compress against the floor to block water and debris.
Step-by-Step Replacement Guide
- Measure the Width: Use a tape measure to determine the exact width of your garage door. Standard sizes are 8, 9, 10, 16, or 18 feet. Buy a seal that matches this length exactly.
- Remove the Old Seal: Open the door halfway. Locate the metal retainer channel at the bottom edge. Pull the old rubber strip out firmly. If it is stuck, use a flathead screwdriver to gently pry it loose.
- Clean the Channel: Remove any rust, dirt, or old adhesive from the metal channel using a wire brush and a rag soaked in rubbing alcohol. A clean surface ensures a tight fit.
- Install the New Seal: Starting from one end, push the new rubber gasket into the channel. Use a rubber mallet to tap it gently if it resists. Ensure it sits evenly across the entire width.
- Test the Fit: Close the door. Inspect the seal from the inside. It should make uniform contact with the floor without large gaps.
Pro Tip: Choose a bulb-style seal for uneven floors, as its rounded shape adapts better to minor imperfections than flat seals.
Long-Term Solution: Install a Garage Door Threshold Seal
If replacing the weatherstrip doesn’t fully solve the issue, especially during wind-driven rain, installing a threshold seal is the next logical step. This is a rubber or vinyl barrier that adheres to the concrete floor just outside the door.
Benefits vs. Drawbacks
| Feature | Threshold Seal | Standard Weatherstrip |
|---|---|---|
| Water Protection | High (blocks flowing water) | Moderate (blocks splash) |
| Installation Difficulty | Medium (requires adhesive) | Easy (slide-in) |
| Durability | 5–7 years | 2–3 years |
| Cost | $30–$60 | $15–$25 |
Installation Process
- Prepare the Surface: Sweep the concrete area where the door closes. Use a degreaser to remove oil stains, then rinse and let it dry completely for 24 hours. Moisture prevents adhesive from bonding.
- Dry Fit the Seal: Place the threshold seal on the floor to ensure it aligns with the door’s path. Mark the edges with chalk.
- Apply Adhesive: Use a high-quality construction adhesive or the kit provided. Apply a continuous bead along the bottom of the threshold seal.
- Position and Press: Align the seal with your chalk marks. Press it firmly onto the concrete. Walk along the seal to ensure full contact.
- Cure Time: Keep the garage door open and avoid driving over the seal for at least 48 hours to allow the adhesive to cure fully.
For more detailed information on building envelope standards and waterproofing materials, you can refer to general construction guidelines on Wikipedia.
Address Structural Issues: Level the Concrete Floor
Sometimes, the problem isn’t the door but the ground. If your concrete slab has settled, creating a dip near the entrance, water will naturally flow into your garage regardless of the seal quality.
Using a Concrete Leveler
For minor dips (less than 1/2 inch), a self-leveling concrete compound is effective.
- Clean the Area: Remove all dust and debris from the low spot.
- Prime the Surface: Apply a concrete primer to help the leveler bond.
- Mix the Compound: Follow the manufacturer’s instructions precisely. Typically, this involves mixing the powder with water until it reaches a creamy consistency.
- Pour and Spread: Pour the mixture into the low spot. Use a gauge rake to spread it evenly. It will self-level within minutes.
- Let it Cure: Allow 24–48 hours before closing the garage door on it.
Warning: For significant structural settling or cracks wider than 1/4 inch, consult a structural engineer. DIY fixes may not address underlying foundation issues.
Improve External Drainage
Preventing water from reaching the garage door is often more effective than trying to block it at the threshold. Proper grading and drainage systems redirect water away from your home.
- Check the Grade: The ground outside your garage should slope away from the structure at a minimum of 1/4 inch per foot for the first 10 feet.
- Install a Trench Drain: For driveways that slope toward the garage, install a linear trench drain just before the door opening. This catches water before it reaches the seal.
- Maintain Gutters: Ensure your roof gutters are clean and downspouts extend at least 5 feet away from the garage foundation. Clogged gutters cause overflow that pools directly in front of the door.
FAQ: Common Questions About Garage Door Leaks
1. Can I use expanding foam to seal the gap?
No, do not use expanding foam for the bottom gap. It is rigid and will crack when the door moves, potentially damaging the door mechanism. Foam is suitable for stationary side gaps, not the moving bottom edge.
2. How often should I replace my garage door weatherstrip?
Inspect your weatherstrip annually. Replace it every 2–3 years, or sooner if you notice visible cracks, brittleness, or water leakage during rain. Harsh winters and UV exposure accelerate wear.
3. Will a threshold seal damage my car tires?
High-quality threshold seals are made from flexible rubber or vinyl designed to withstand vehicle traffic. They are low-profile (usually less than 1 inch high) and will not harm standard passenger vehicle tires. However, avoid sharp turns over the seal at high speeds.
4. Why is water coming in even with a new seal?
If you have a new seal and still experience leaks, check the alignment of the door tracks. If the door is crooked, it won’t press evenly against the seal. Also, verify that the concrete floor is level. Water may be flowing under the seal from a higher point outside.
5. Is it better to seal from the inside or outside?
It is best to address both. The weatherstrip seals from the inside edge, while a threshold seal blocks water from the outside. Combining both methods provides the highest level of protection against heavy rain and wind-driven water.
Conclusion
Learning how to stop rain from coming under garage door is essential for maintaining a dry, functional, and safe garage. By starting with simple fixes like replacing the weatherstrip and progressing to threshold seals or drainage improvements, you can effectively combat water intrusion.
Remember, a dry garage protects your valuable belongings and preserves your home’s structural integrity. Don’t wait for the next storm to test your defenses. Take action today to seal those gaps.
Found this guide helpful? Share it with your neighbors on Facebook or Twitter to help them keep their garages dry too!
Leave a Reply