Introduction
There are few things more frustrating than sitting in your driveway, pressing a button repeatedly, and watching your garage door refuse to budge. Whether you have just moved into a new home, replaced a lost clicker, or upgraded your system, understanding how to set up remote for LiftMaster garage door opener is an essential homeowner skill that saves both time and service fees. This comprehensive guide will walk you through the exact programming steps, safety protocols, and troubleshooting techniques needed to get your system running smoothly and securely.
Understanding Your LiftMaster System Before Programming
Before you begin pressing buttons, it is vital to identify which generation of LiftMaster opener you own. LiftMaster has evolved significantly over the decades, and the programming method depends entirely on the color and type of the “Learn” button located on the motor unit.
According to industry data, LiftMaster (a brand under The Chamberlain Group) holds a significant share of the North American residential garage door opener market. Their systems generally fall into three categories based on security technology:
- Security+ 2.0 (Yellow Learn Button): Uses rolling code technology with enhanced encryption. Found on models manufactured from 2011 to present.
- Security+ (Orange/Red/Purple Learn Button): Uses earlier rolling code technology. Common in models from 1997–2011.
- DIP Switch (No Learn Button): Uses fixed codes via tiny sliding switches. Found on vintage models pre-1993.
Expert Note: Always check the manufacturing date sticker on the side of your motor head. If your opener was manufactured before 1993 and lacks photo-eye sensors, experts strongly recommend upgrading the entire unit rather than programming a new remote, as older models lack mandatory safety reversal features mandated by federal law.
For foundational background on how these radio frequency mechanisms work, you can refer to the Garage Door Opener entry on Wikipedia.org, which details the evolution from fixed-code to rolling-code security standards.
Step-by-Step: How To Set Up Remote For LiftMaster Garage Door Opener
This tutorial focuses on the most common modern units (Security+ and Security+ 2.0). Ensure your ladder is stable and the garage door area is clear of obstructions before starting.
Step 1: Locate the Learn Button
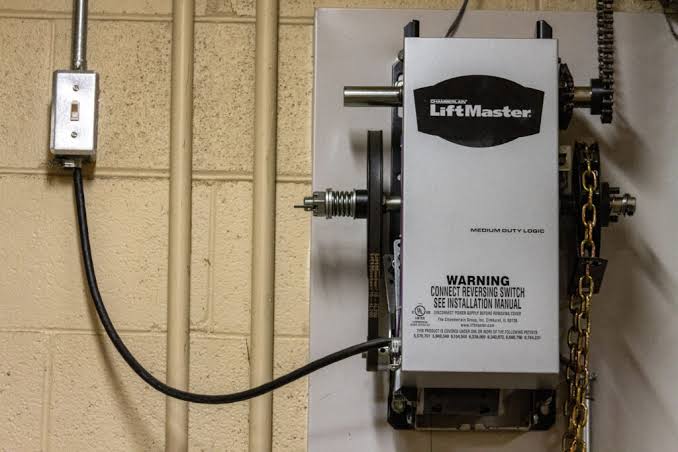
Find the “Learn” button on the back or side panel of the overhead motor unit. It is typically colored yellow, orange, red, or purple. Adjacent to this button is usually a small LED indicator light.
Step 2: Clear Old Codes (Optional but Recommended)
If you are setting up a previously used remote or suspect interference:
- Press and hold the Learn button for approximately 6–10 seconds.
- Release when the adjacent LED turns off.
- This erases all previously paired remotes and keypads. You will need to reprogram all devices after this step.
Step 3: Program the Remote
Timing is critical here. Have your remote in hand before proceeding.
- Press and release the Learn button on the motor unit. The LED will illuminate steadily or begin blinking (depending on model). You now have 30 seconds to complete the next step.
- On your handheld remote, press and hold the button you wish to program.
- Continue holding until the motor unit’s lights flash or you hear two distinct clicks. This confirms successful pairing.
- Release the remote button immediately upon confirmation.
Step 4: Test the System
Stand at least 5 feet away from the door and press the programmed button. The door should activate smoothly. Test the safety sensors by placing an object in the door’s path while closing; the door must reverse within 2 seconds of contact.
Troubleshooting: Why Won’t My Remote Sync?
Even when following instructions perfectly, issues arise. Here is a diagnostic table based on common field service scenarios:
| Symptom | Probable Cause | Solution |
|---|---|---|
| LED doesn’t turn on when pressing Learn | Power issue or burnt-out logic board | Check outlet power; inspect circuit breaker; consult professional if board is faulty |
| LED flashes but remote won’t pair | Incompatible remote frequency | Verify remote matches Learn button color; check model compatibility chart |
| Pairs successfully but range is <10 ft | Weak battery or antenna damage | Replace remote battery (CR2032); ensure antenna wire hangs vertically and isn’t cut |
| Works intermittently | Radio frequency interference | Identify nearby LED bulbs, transformers, or Wi-Fi routers causing signal disruption |
| Door moves but stops halfway | Safety sensor misalignment | Clean sensor lenses; realign brackets so indicator lights are solid green |
Statistical Insight: Service technicians report that nearly 40% of “broken remote” calls are resolved simply by replacing the battery or correcting safety sensor alignment. Always rule out these basics before assuming hardware failure.
Safety First: Critical Precautions During Setup
Programming a garage door opener involves working near heavy mechanical components and electrical wiring. Adhere to these non-negotiable safety rules:
- Never bypass safety sensors. They prevent entrapment injuries and fatalities. Federal regulations require functional photo-eyes on all openers post-1993.
- Keep hands clear of moving parts. The trolley and chain/belt drive exert tremendous force. Disconnect power if performing any physical adjustments beyond button pressing.
- Use proper ladder safety. Motor units are mounted 8–12 feet high. Use a rated stepladder with a spotter if possible.
- Secure your remote codes. Treat your garage remote like a house key. Don’t leave clickers visible in parked vehicles outside your home.
Advanced Tips: Maximizing Range and Security
Once basic programming is complete, optimize your system:
- Antenna Positioning: Ensure the thin wire antenna hangs straight down, perpendicular to the floor. Coiling or taping it against the metal housing reduces range by up to 70%.
- LED Bulb Compatibility: Standard LED bulbs emit RF noise that blocks remote signals. Use only “garage door compatible” LEDs certified by LiftMaster or Chamberlain.
- Rolling Code Verification: After programming, test that your remote uses rolling code by pressing the button twice rapidly. A fixed-code remote will trigger the door each time; a rolling-code remote may not respond to rapid duplicate presses due to security synchronization.
- Smart Integration: Many newer LiftMaster units support myQ technology. Consider pairing your opener with the myQ app for smartphone control, guest access codes, and delivery notifications—adding convenience without compromising security.
Frequently Asked Questions (FAQ)
Q1: Can I program multiple remotes to one LiftMaster opener?
Yes. Most modern LiftMaster units support up to 8 remotes plus 2 keyless entries simultaneously. Each device requires individual programming using the Learn button sequence described above. There is no limit to how many times you can add devices, only a maximum capacity.
Q2: Do I need to reprogram my remote after changing the battery?
Generally, no. Rolling-code remotes retain their programming in non-volatile memory. Simply swap the CR2032 battery and test. Reprogramming is only necessary if you performed a factory reset on the motor unit or replaced the remote entirely.
Q3: What if my LiftMaster opener has no Learn button?
You likely have a pre-1993 DIP switch model. Match the tiny switch positions inside your remote to those inside the motor unit exactly. However, given the age and lack of safety sensors, replacement of the entire opener is strongly advised for safety and insurance compliance.
Q4: Why does my remote work only when I’m very close to the door?
This indicates either a dying battery, damaged antenna wire, or RF interference. Start with a fresh battery. If unresolved, inspect the antenna for breaks. Finally, temporarily turn off nearby electronics to isolate interference sources. Range should be at least 20–30 feet under normal conditions.
Q5: Is it safe to buy universal remotes for LiftMaster?
Universal remotes can work, but OEM LiftMaster remotes are recommended for guaranteed compatibility and security. Third-party universals sometimes lack full rolling-code implementation, potentially creating vulnerabilities. If using universal, verify it explicitly lists your specific LiftMaster model number.
Q6: How often should I replace my garage door remote battery?
Under normal use (2–3 activations daily), expect 12–18 months of battery life. Heavy users may need replacement every 6–9 months. Keep spare CR2032 batteries in your vehicle. A weak battery causes intermittent operation long before complete failure.
Conclusion
Mastering how to set up remote for LiftMaster garage door opener empowers you to maintain secure, reliable access to your home without unnecessary service calls. By identifying your Learn button type, following precise programming steps, and adhering to safety protocols, you ensure both convenience and protection for your household. Remember: when in doubt about compatibility or safety, consulting a certified LiftMaster dealer is always the wisest investment.
Found this guide helpful? Share it with friends, family, or neighbors who might be struggling with their garage door setup! Tag us on social media or pin this article for future reference. Safe and smooth opening to you! 🏠🔧
Leave a Reply