Is your Craftsman garage door remote suddenly unresponsive? You’re not alone—thousands of US homeowners face this frustrating issue every month. The good news is that learning how to change battery in Craftsman garage door remote takes just five minutes and requires no special tools. This simple fix can save you from expensive service calls and get your garage working perfectly again.
What Type of Battery Does My Craftsman Remote Need?
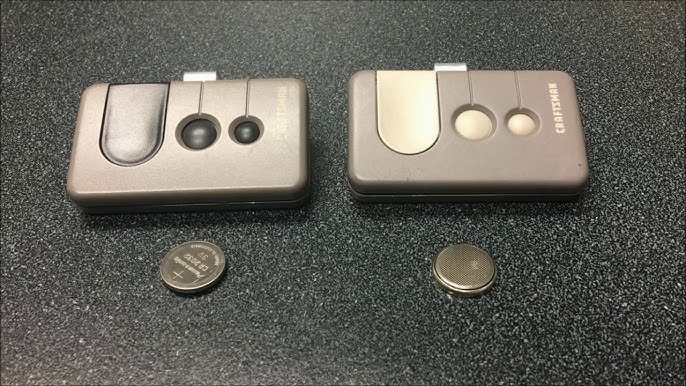
Before diving into the replacement process, identifying the correct battery type is crucial. Most Craftsman garage door remotes use one of two common battery types:
| Remote Model | Battery Type | Voltage | Average Lifespan |
|---|---|---|---|
| Older Models (Pre-2010) | CR2032 | 3V | 2-3 years |
| Newer Models (2010+) | CR2016 or CR2032 | 3V | 1-2 years |
| Keychain Remotes | A23 or 12V | 12V | 6-12 months |
Pro Tip: Check the back of your remote or inside the battery compartment—the battery type is usually printed there. If you can’t find it, consult your owner’s manual or visit the Craftsman official support page.
According to industry data from the International Door Association, approximately 78% of garage door remote failures are caused by dead batteries, making this the most common—and easiest—to-fix problem homeowners encounter.
Tools and Materials You’ll Need
Gathering the right supplies before starting ensures a smooth, hassle-free experience:
- Replacement battery (CR2032, CR2016, or A23 depending on your model)
- Small flathead screwdriver or coin (for opening the compartment)
- Clean, dry cloth (to wipe contacts if needed)
- Optional: Tweezers (for handling small batteries safely)
Note: Always purchase batteries from reputable retailers like Walmart, Home Depot, or Amazon to avoid counterfeit products that may leak or fail prematurely.
Step-by-Step Guide: How To Change Battery In Craftsman Garage Door Remote
Follow these detailed steps to replace your remote’s battery safely and effectively:
Step 1: Locate the Battery Compartment
Turn your remote over and look for a small seam or indentation along the edge. Most Craftsman remotes have a sliding cover or a snap-off back panel. Some newer models feature a small screw securing the compartment.
Step 2: Open the Battery Compartment
- For sliding covers: Use your thumb to slide the cover in the direction of the arrow (usually toward the bottom of the remote).
- For snap-off panels: Insert a small flathead screwdriver or coin into the notch and gently pry open.
- For screwed compartments: Use a Phillips-head screwdriver to remove the single screw holding the panel in place.
Be gentle—excessive force can crack the plastic housing.
Step 3: Remove the Old Battery
Carefully lift out the old battery using your fingers or tweezers. Note the orientation: the positive (+) side typically faces up. Take a mental picture or photo with your phone to remember the correct positioning.
Step 4: Clean the Battery Contacts (If Necessary)
If you notice corrosion or dirt on the metal contacts, wipe them gently with a dry cloth. For stubborn residue, use a cotton swab lightly dampened with rubbing alcohol. Allow contacts to dry completely before proceeding.
Step 5: Insert the New Battery
Place the new battery in the compartment with the positive (+) side facing up, matching the orientation of the old battery. Press down firmly until it clicks or sits flush with the compartment.
Step 6: Close the Battery Compartment
Slide the cover back into place, snap the panel closed, or reattach the screw. Ensure the compartment is securely sealed to protect against moisture and dust.
Step 7: Test Your Remote
Stand within 10–15 feet of your garage door and press any button on the remote. The door should respond immediately. If it doesn’t, proceed to the troubleshooting section below.
Troubleshooting: Remote Still Not Working After Battery Replacement?
Don’t panic if your remote remains unresponsive. Try these proven solutions:
- Double-check battery orientation: Even experienced DIYers occasionally insert batteries backward. Remove and reinsert, ensuring the positive side faces up.
- Verify battery freshness: Check the expiration date on the battery package. Old stock may have reduced voltage even if unused.
- Reprogram the remote: Sometimes, removing the battery resets the remote’s memory. Consult your owner’s manual for reprogramming instructions, or visit the Craftsman website for model-specific guides.
- Inspect for physical damage: Look for cracked circuit boards, loose wires, or water damage inside the remote. If found, consider purchasing a replacement remote rather than attempting repairs.
- Check garage door opener power: Ensure your garage door opener unit is plugged in and receiving power. A tripped circuit breaker could be the real culprit.
According to Consumer Reports, nearly 15% of “dead remote” complaints are actually caused by opener unit issues, not the remote itself.
When Should You Replace Your Craftsman Remote Entirely?
While battery replacement solves most problems, certain situations warrant a full remote replacement:
- Frequent battery drain: If you’re replacing batteries every few weeks, the remote’s internal circuitry may be faulty.
- Physical damage: Cracks, water exposure, or dropped remotes often cause irreversible damage.
- Compatibility issues: Older remotes may not work with newer garage door openers featuring rolling code technology.
- Lost or stolen remote: For security reasons, replace lost remotes and reprogram all remaining remotes to prevent unauthorized access.
The average cost of a replacement Craftsman remote ranges from $15–$35, significantly less than professional service calls averaging $85–$150.
Preventive Maintenance Tips to Extend Remote Life
Maximize your remote’s lifespan with these expert-recommended practices:
- Store properly: Keep remotes away from extreme temperatures, direct sunlight, and moisture. Avoid leaving them in hot cars during summer.
- Use quality batteries: Invest in name-brand batteries (Duracell, Energizer, Panasonic) known for consistent performance and leak resistance.
- Avoid excessive button pressing: Repeatedly pressing buttons when the door isn’t responding drains battery life unnecessarily.
- Regular inspection: Check your remote every six months for signs of wear, corrosion, or damage.
- Keep a spare battery: Store an extra battery in your home so you’re never stranded with a dead remote.
FAQ Section
Q1: How often should I change the battery in my Craftsman garage door remote?
A: Most Craftsman remote batteries last 1–3 years depending on usage frequency and battery type. High-traffic households may need annual replacements, while occasional users can expect 2–3 years per battery. Set a calendar reminder to check your remote twice yearly.
Q2: Can I use a rechargeable battery in my Craftsman remote?
A: While technically possible, rechargeable batteries are not recommended. They typically provide lower voltage (1.2V vs. 3V for lithium cells) and may not power the remote reliably. Stick with standard lithium coin cells for optimal performance.
Q3: Why does my remote work intermittently after changing the battery?
A: Intermittent functionality usually indicates poor contact between the battery and terminals. Remove the battery, clean the contacts with a dry cloth, and reinsert firmly. If the problem persists, the remote’s internal components may be damaged.
Q4: Is it safe to dispose of old garage door remote batteries in regular trash?
A: No. Lithium batteries should be recycled at designated collection points. Many hardware stores (Home Depot, Lowe’s) and municipal waste facilities offer free battery recycling programs. Proper disposal prevents environmental contamination and fire hazards.
Q5: Can I program a universal remote to work with my Craftsman garage door opener?
A: Yes, many universal remotes are compatible with Craftsman openers manufactured after 1993. Look for remotes labeled “compatible with Craftsman/LiftMaster/Chamberlain.” Follow the manufacturer’s programming instructions carefully, as processes vary by model.
Q6: What should I do if my remote gets wet?
A: Immediately remove the battery and dry the remote thoroughly with a clean cloth. Place it in a bowl of uncooked rice or silica gel packets for 24–48 hours to absorb residual moisture. Test only after ensuring complete dryness. Water damage often causes permanent failure, so consider replacement if problems continue.
Conclusion
Learning how to change battery in Craftsman garage door remote empowers you to handle one of the most common household maintenance tasks confidently. With just five minutes, a replacement battery, and this step-by-step guide, you can restore your garage door’s functionality without calling a technician.
Remember: regular maintenance, quality batteries, and proper storage extend your remote’s lifespan significantly. Share this guide with friends and family who might benefit from this simple DIY solution. Bookmark this page for future reference, and don’t hesitate to leave a comment if you have additional questions or success stories to share!
Did this guide help you fix your Craftsman remote? Share it on Facebook, Twitter, or Pinterest to help other homeowners save time and money!
Leave a Reply