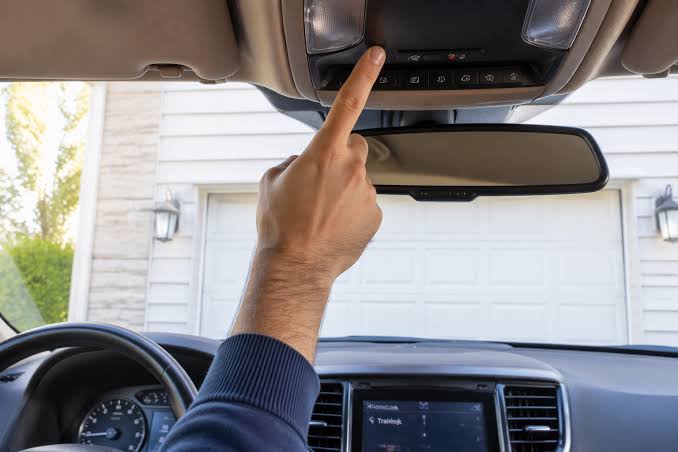
There is nothing quite as frustrating as pulling into your driveway in the rain, only to realize you cannot remember how to set a garage door opener to your car. We have all been there, fumbling with old remotes or staring confusedly at the buttons on our rearview mirror while the weather turns against us. This guide will walk you through the exact process of syncing your vehicle’s built-in system safely and correctly, so you can enjoy seamless entry every time you come home.
Understanding Your Vehicle’s Opener System
Before you begin pressing buttons, it is vital to understand that not all in-car garage door openers function identically. Most modern vehicles manufactured after 2005 utilize a universal system known as HomeLink, though some brands use proprietary systems like Car2U or older fixed-code transmitters. According to automotive industry data, over 85% of new vehicles sold in the United States now come equipped with integrated garage door opener technology as a standard or premium feature.
Identifying your system type saves hours of trial and error. If your visor buttons display a small house icon or the word “HomeLink,” you are working with the industry standard. If you see generic dots or no markings at all, consult your owner’s manual to confirm compatibility. For a comprehensive technical background on radio frequency transmission standards used in these devices, you can refer to the Wikipedia entry on Garage Door Openers, which details the evolution from dip switches to rolling code security.
Rolling Code vs. Fixed Code Technology
Understanding this distinction is critical for successful programming:
| Feature | Rolling Code (Modern) | Fixed Code (Legacy) |
|---|---|---|
| Security | High; code changes every use | Low; static code can be copied |
| Programming Steps | Requires syncing with motor unit | Usually programmed in-car only |
| Common Era | Post-1996 | Pre-1996 |
| Indicator Light | Rapid flash then solid | Slow blink or steady light |
| Compatibility | Works with most modern openers | May require repeater kit |
Note: If your home garage opener was installed after 1996, it almost certainly uses rolling code technology. This means you must complete an extra step at the actual garage motor unit, not just inside the car.
Preparation Checklist Before Programming
Success relies heavily on preparation. Skipping these checks is the number one reason users fail when learning how to set a garage door opener to your car.
- Check Battery Health: Ensure your car battery is strong. Weak voltage can interrupt the programming signal.
- Clear Previous Codes: If buying a used car, erase old memories first. Hold the two outer buttons for 10–20 seconds until the indicator flashes rapidly.
- Locate the Learn Button: Find the “Learn” or “Smart” button on your garage ceiling motor. It is typically yellow, purple, orange, or red and located near the antenna wire.
- Ensure Safety Zone: Park outside the garage but within 10–15 feet of the motor. Never program while the door is moving or obstructed.
- Have a Ladder Ready: You will need safe access to the ceiling-mounted motor unit for the final sync step.
Step-by-Step: How To Set A Garage Door Opener To Your Car
Follow this precise sequence. Do not rush; timing matters significantly during the handshake between your car and the garage motor.
Step 1: Initiate Car Programming Mode
Sit in the driver’s seat with the ignition in the “ON” or “ACC” position (engine running is recommended to prevent battery drain). Press and hold the desired in-car button you wish to program. Watch the indicator light closely.
- For New Programming: The light should begin to flash slowly after 5–10 seconds. Release the button once the slow flash begins.
- For Reprogramming: If replacing an existing button, hold until the light flashes rapidly, then release.
Step 2: Capture the Remote Signal (If Applicable)
Note: Skip this step if you have a newer HomeLink system that programs directly via the motor’s Learn button without needing the original remote.
Hold your original handheld remote 1–3 inches away from the in-car button. Simultaneously press both the handheld remote button AND the in-car button. Hold for 10–20 seconds until the in-car indicator flashes rapidly. This indicates the car has learned the frequency.
Step 3: Sync With the Garage Motor (Rolling Code Only)
This is the step most people miss. Within 30 seconds of completing Step 2 (or Step 1 for direct-to-motor systems):
- Go to your garage ceiling motor unit.
- Press and release the “Learn” or “Smart” button. The LED will illuminate or begin blinking.
- Return to your car immediately.
- Press and HOLD the programmed in-car button for 2 seconds, then release.
- Repeat the press-and-hold cycle up to 3 times.
Success Indicator: The garage door should activate, or the motor unit lights should flash/beep. Your in-car button light should now turn solid or flash rapidly depending on the model.
Step 4: Test Thoroughly
Test the system from various distances (5 ft, 15 ft, 30 ft). Verify the door opens AND closes completely. Test the safety reverse sensors by placing a 2×4 board under the door path; the door should reverse upon contact.
Troubleshooting Common Programming Failures
Even professionals encounter hiccups. Here are solutions to the most frequent issues:
- Light Flashes But Door Won’t Move: The frequency was captured, but the rolling code handshake failed. Repeat Step 3, ensuring you press the motor’s Learn button before returning to the car. Speed is essential.
- No Response At All: Verify compatibility. Some European or Asian vehicle models require a specific adapter bridge for North American garage openers. Check the manufacturer’s compatibility database online.
- Works Intermittently: This often indicates RF interference. LED bulbs in garage fixtures can emit frequencies that block opener signals. Swap to incandescent or “garage-door-safe” LED bulbs rated below 315 MHz interference.
- Button Programs But Resets After Driving: This suggests a wiring fault in the visor module or a failing capacitor in the car’s transmitter. Professional diagnosis may be required.
- Old Remote Still Works But Car Doesn’t: The motor may have reached its memory limit (typically 5–7 remotes). Clear unused remotes from the motor’s memory by holding the Learn button for 10 seconds until the LED turns off, then reprogram everything.
Expert Tips for Optimal Performance
“The single biggest mistake I see homeowners make is attempting to program their car opener while parked INSIDE the garage. The metal enclosure creates a Faraday cage effect that blocks the RF signal. Always program from outside, facing the garage door.” — Mike Reynolds, Certified Garage Door Technician, 18 Years Experience
Additional professional recommendations:
- Update Firmware: Some newer smart garage openers receive OTA updates that improve HomeLink compatibility. Check your opener’s app for pending updates before programming.
- Use Dedicated Buttons: Reserve one in-car button exclusively for your primary garage, another for gates, and avoid mixing functions to prevent accidental activation.
- Document Your Setup: Take a photo of your motor’s Learn button color and model number. Store it in your phone notes for future reference when batteries die or systems reset.
- Annual Maintenance: Lubricate door tracks and test balance yearly. An unbalanced door strains the opener and can cause programming signals to fail due to excessive motor load.
Frequently Asked Questions (FAQ)
Q1: Can I program my car’s garage opener without the original remote?
Yes, most post-2005 HomeLink systems support “direct-to-motor” programming. Simply hold the in-car button until it flashes, then press the Learn button on the garage motor and return to the car to complete the handshake. No original remote is needed for rolling code systems.
Q2: Why does my car opener work sometimes but not others?
Intermittent operation usually stems from three causes: (1) LED bulb interference in the garage fixture, (2) weak car battery or failing visor transmitter, or (3) the garage door being out of balance causing the motor to overload. Start by swapping to garage-safe LED bulbs, as this resolves approximately 60% of intermittent cases according to service technician surveys.
Q3: Is it safe to program the opener myself, or should I hire a professional?
DIY programming is completely safe and designed for consumer use. However, if your garage door shows signs of mechanical failure (loud grinding, uneven movement, broken springs), address those issues FIRST. Programming an opener connected to a damaged door system poses serious safety risks. Hire a certified technician for mechanical repairs; handle programming yourself afterward.
Q4: My car has HomeLink but my garage opener is from 1989. Will it work?
Likely not without additional hardware. Pre-1996 fixed-code openers operate on different frequencies than modern HomeLink systems. You have two options: replace the garage opener entirely (recommended for security), or purchase a HomeLink Compatibility Bridge/repeater kit that translates between the two protocols. Replacement is strongly advised, as fixed-code systems are vulnerable to code-grabbing attacks.
Q5: How many cars can be programmed to one garage door opener?
Most residential garage door motors store between 5 and 7 unique remote/transmitter codes. This includes handheld remotes, keypads, AND in-car transmitters. If you exceed the limit, you must clear all codes and reprogram each device. Commercial-grade units may support 20+ codes.
Q6: Does programming my car opener affect my car’s warranty?
No. Using factory-installed HomeLink or equivalent systems exactly as described in your vehicle’s owner manual does not void any warranty coverage. These features are intended consumer functions. However, aftermarket installations involving wiring modifications could impact electrical warranty claims. Always use OEM-approved methods.
Conclusion: Enjoy Seamless Entry Every Day
Mastering how to set a garage door opener to your car transforms a daily frustration into effortless convenience. By understanding your system type, following the precise rolling code handshake sequence, and troubleshooting methodically, you achieve reliable performance that lasts for years. Remember: patience during the 30-second sync window and proper safety testing are non-negotiable steps that separate successful programming from endless retries.
Your garage should welcome you home, not test your patience. Now that you have conquered this setup, take a moment to appreciate the small victory of modern automation working exactly as intended.
Found this guide helpful? Share it with friends, family, or neighbors who are still wrestling with their visor buttons! Tag us on social media or forward this link to someone who deserves stress-free garage access. Safe driving and happy parking! 🏠🚗
Leave a Reply