Introduction
Dealing with cold drafts, pesky insects, or rising energy bills often points to one common culprit: an unsealed garage. If you are wondering how to seal gaps on side of garage door effectively, you are not alone, as even a small opening can significantly compromise your home’s comfort, security, and energy efficiency. Fortunately, with the right materials and a straightforward DIY approach, you can block out the elements and protect your space in just a single afternoon.
Why Sealing Your Garage Door Side Gaps Matters
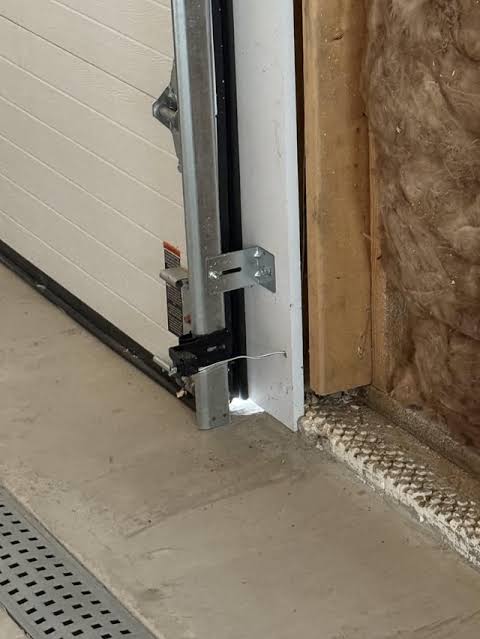
Many homeowners overlook the garage, treating it merely as a storage space or a place to park cars. However, the garage is often the largest opening in your home’s thermal envelope. According to the U.S. Department of Energy, inadequate sealing and insulation can account for up to 25% of a home’s total heat loss during winter months.
When you learn how to seal gaps on side of garage door, you are not just keeping the cold out. You are also:
- Reducing Energy Costs: Preventing conditioned air from escaping lowers your monthly HVAC bills.
- Blocking Pests: Mice, spiders, and insects can squeeze through gaps as small as 1/4 inch.
- Minimizing Noise: A tight seal dampens street noise and the sound of the garage door opener.
- Preventing Water Damage: Sealing gaps stops rain and melting snow from seeping into your foundation or damaging stored items.
Best Materials to Seal the Side of a Garage Door
Choosing the right material is critical for long-lasting results. Not all weatherstripping is created equal, and the best choice depends on your local climate and the size of the gap. Below is a quick comparison to help you decide.
| Material | Durability | Best For | Pros | Cons |
|---|---|---|---|---|
| High-Density Rubber | 5–10 years | Extreme climates, large gaps | Highly flexible, resists cracking, excellent seal | Slightly more expensive |
| Vinyl | 3–5 years | Moderate climates, small gaps | Affordable, easy to cut and install | Can become brittle in freezing temps |
| Closed-Cell Foam | 2–3 years | Temporary fixes, very small gaps | Cheap, easy to apply with adhesive | Degrades quickly, absorbs moisture |
| Brush Seal | 4–7 years | Uneven surfaces, dusty areas | Allows smooth door movement, blocks debris | Less effective against heavy rain or wind |
Expert Tip: For most US homes, high-density rubber weatherstripping with an aluminum or rigid plastic retainer is the gold standard. It provides the perfect balance of flexibility and durability.
How To Seal Gaps On Side Of Garage Door: The Complete Process
Ready to get started? Follow this detailed, step-by-step tutorial to ensure a professional-grade seal.
Tools and Materials You Will Need:
- High-density rubber weatherstrip kit (with top and bottom retainers)
- Tape measure
- Utility knife or heavy-duty scissors
- Power drill with a 7/64-inch drill bit
- 3-inch exterior-grade wood or metal screws (usually included in kits)
- Rubbing alcohol and a clean rag
- Silicone caulk (for sealing the retainer to the wall frame)
Step 1: Measure the Gap and Door Height
First, close the garage door and measure the gap between the door panel and the vertical wall frame. A standard, well-aligned door should have a gap of about 1/4 inch to 1/2 inch. Next, measure the total height of the door opening. Add 2 extra inches to this measurement to ensure you have enough material to trim and fit perfectly.
Step 2: Clean the Surface Thoroughly
A clean surface is mandatory for a secure fit. Wipe down the vertical wooden or metal jambs on both sides of the door using a rag soaked in rubbing alcohol. This removes old adhesive, dirt, and grease. Allow the surface to dry completely for at least 15 minutes before proceeding.
Step 3: Cut the Weatherstripping to Size
Lay the new rubber weatherstrip flat on a workbench. Using your tape measure and utility knife, cut the rubber seal to the exact height you measured in Step 1. Make sure the cut is straight and clean to prevent uneven sealing at the top.
Step 4: Install the Bottom Retainer
Slide the bottom piece of the rigid retainer over the bottom edge of the rubber seal. Position the assembly against the lower part of the door jamb. The rubber bulb should press firmly against the garage door when closed, creating a slight compression of about 1/8 inch. Pre-drill pilot holes every 12 inches using your 7/64-inch drill bit, then secure the retainer with 3-inch exterior screws.
Step 5: Install the Top Retainer and Seal the Edges
Slide the top retainer over the top of the rubber seal, interlocking it with the bottom piece. Secure it with screws every 12 inches. Finally, apply a thin, continuous bead of silicone caulk along the outer edge of the retainer where it meets the wall. This prevents moisture from sneaking behind the weatherstrip.
Note: As outlined in the fundamental principles of weatherstripping, creating a continuous, uncompressed barrier is essential for maximizing thermal efficiency and preventing air infiltration.
Step 6: Test the Door
Open and close the garage door slowly. Listen for any scraping sounds. If the door binds or struggles to close, the seal may be too thick or installed too far inward. Loosen the screws slightly, adjust the retainer outward by a fraction of an inch, and retighten.
Common Mistakes to Avoid When Sealing Garage Doors
Even experienced DIYers can make missteps. Avoid these common pitfalls to ensure your hard work lasts:
- Ignoring the Top Gap: Sealing the sides is useless if a massive gap remains at the top of the door. Always inspect and replace the top seal as well.
- Over-Tightening Screws: Driving screws in too hard can warp the rigid retainer, creating new gaps. Stop drilling once the retainer is snug against the jamb.
- Using the Wrong Screws: Interior drywall screws will rust and fail. Always use exterior-grade, galvanized, or stainless steel screws.
- Skipping the Cleaning Step: Applying new seals over old, dirty surfaces guarantees premature failure and peeling.
Frequently Asked Questions (FAQ)
Q1: What is the absolute best material to seal a garage door gap?
A: High-density EPDM rubber is widely considered the best material. It remains flexible in sub-zero temperatures, resists UV degradation from the sun, and provides a tight, long-lasting compression seal against the door panel.
Q2: Can I use expanding foam to seal the side of my garage door?
A: No, you should never use expanding foam on the moving sides of a garage door. Expanding foam is rigid once cured. When the garage door moves, it will tear the foam apart, creating a mess and failing to provide a dynamic, flexible seal. Expanding foam is only suitable for stationary, non-moving cracks in the surrounding wall.
Q3: How much does it cost to seal a garage door professionally?
A: If you hire a professional garage door technician in the US, expect to pay between $150 and $350 for a full weatherstripping replacement (including top and sides). Doing it yourself typically costs between $30 and $60 for high-quality materials, saving you significant money.
Q4: How often should I replace my garage door weatherstripping?
A: On average, rubber weatherstripping lasts between 5 to 7 years. However, you should inspect it annually. If you notice visible cracks, brittleness, tearing, or if you can see daylight through the seal when the door is closed, it is time for a replacement.
Q5: Will sealing the garage door affect its opening and closing mechanism?
A: If installed correctly, it should not. The rubber seal is designed to compress slightly (about 1/8 inch) when the door closes. If your door motor strains or reverses unexpectedly after installation, the seal is likely too tight or misaligned, and you should adjust the retainer position slightly outward.
Conclusion
Learning how to seal gaps on side of garage door is a highly rewarding DIY project that pays for itself in reduced energy bills, enhanced pest control, and improved home comfort. By choosing the right materials, following a meticulous step-by-step installation process, and avoiding common pitfalls, you can create a durable, weatherproof barrier that protects your home for years to come.
Did you find this guide helpful? Don’t keep the warmth (and the knowledge) to yourself! Share this article on Facebook, Pinterest, or X (Twitter) to help your friends, family, and neighbors tackle their own garage door drafts this season.
Leave a Reply