Introduction
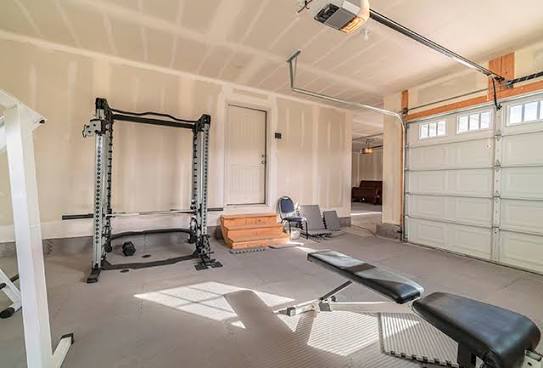
Converting an unused garage into a functional living space is one of the most cost-effective home improvement projects you can undertake, but leaving the existing garage door in place creates significant challenges regarding temperature control, noise, and security. If you are wondering how to seal a garage door to make a room without removing the entire structure, you need a strategy that prioritizes air-tightness, thermal resistance, and structural integrity. This guide provides a professional, step-by-step approach to transforming that drafty opening into a solid, insulated wall that meets modern comfort standards.
Why Properly Sealing Your Garage Door Matters
Before picking up a hammer, it is crucial to understand why simply nailing plywood over the door tracks is insufficient. Garages are typically built with different tolerances than living spaces; they lack vapor barriers, adequate insulation, and sometimes even proper foundation sealing.
According to the U.S. Department of Energy, unsealed gaps and poor insulation can account for 25–30% of residential heating and cooling energy loss. When converting a garage, the door opening is often the single largest source of this inefficiency. Furthermore, understanding the architectural implications of modifying your home’s envelope is essential for safety and compliance; resources like Wikipedia’s entry on Building Envelopes explain how critical the separation between conditioned and unconditioned spaces is for preventing moisture damage and maintaining indoor air quality.
Can You Insulate Over an Existing Garage Door?
Yes, you can insulate directly over an existing garage door, but only if the door is permanently disabled and sealed first. This method is ideal for homeowners who want to retain the option of reversing the conversion in the future or who have HOA restrictions requiring the exterior appearance of a garage door to remain unchanged.
However, this approach has limitations compared to full demolition:
| Feature | Insulating Over Door | Full Removal & Framing |
|---|---|---|
| R-Value Potential | R-10 to R-16 (Limited by depth) | R-19 to R-30+ (Standard wall cavity) |
| Air Sealing Quality | Moderate (Dependent on surface prep) | High (Integrated with house wrap/sheathing) |
| Reversibility | High | Low |
| Cost | $300 – $800 | $1,500 – $4,000+ |
| Soundproofing | Fair | Excellent |
| Exterior Appearance | Unchanged | Matches house siding |
Note: If you live in a climate zone with extreme temperatures, full removal and framing is strongly recommended to meet current International Residential Code (IRC) standards.
Step-by-Step: How To Seal A Garage Door To Make A Room
Follow this precise tutorial to create a durable, insulated barrier. These steps assume you are keeping the exterior door panels intact for aesthetic or regulatory reasons.
Step 1: Clean and Prepare the Surface
Dust, grease, and old weatherstripping prevent adhesives and sealants from bonding. Use a degreaser and a stiff brush to clean the interior face of the garage door. Measure the exact dimensions of each panel section. You must work in a well-ventilated area and wear N95 respiratory protection, as older doors may contain lead paint or fiberglass particulates.
Step 2: Apply Air-Sealing Foam to Perimeter Gaps
The gap between the door panels and the concrete floor or side jambs is your primary enemy. Use a low-expansion polyurethane foam specifically designed for windows and doors. Apply a continuous bead along the bottom seal and vertical tracks where the door meets the frame. Do not use high-expansion foam, as it can bow the metal door panels inward. Allow 24 hours for curing at temperatures between 15°C and 30°C (60°F–85°F).
Step 3: Install Rigid Foam Insulation Boards
Cut XPS (extruded polystyrene) or polyiso rigid foam boards to fit snugly within each door panel recess. XPS typically offers R-5 per inch and has superior moisture resistance. Adhere the boards using a foam-compatible construction adhesive applied in a zigzag pattern. Press firmly for 30 seconds per board to ensure full contact. For a standard 7-foot tall door, you will likely need three to four horizontal sections.
Step 4: Seal All Board Seams with Tape
This is the step most DIYers skip, leading to failure. Use acrylic or foil-faced tape rated for foam insulation to seal every seam between boards and around the perimeter. This creates a continuous vapor retarder and air barrier. Overlap tape by at least 2 inches at corners. The goal is to make the entire surface monolithic—no visible gaps or untreated edges.
Step 5: Add a Thermal Break Layer (Optional but Recommended)
To prevent thermal bridging through the metal door panels and increase overall R-value, install a second layer of 1-inch polyiso board over the first, staggering the seams. Secure this layer with cap washers and screws that penetrate into the door’s internal steel ribs (locate these by tapping or using a stud finder). This adds approximately R-6 to your assembly and provides a flat surface for finishing.
Step 6: Frame Out for Drywall or Paneling
You cannot attach drywall directly to foam. Install 1×3 furring strips horizontally across the door face, spaced 16 inches on center, anchored through the foam into the door’s structural members. Alternatively, build a lightweight non-load-bearing stud wall 1 inch away from the sealed door surface if ceiling height permits. This cavity allows for electrical wiring and additional batt insulation if desired.
Step 7: Finish and Paint
Install your chosen wall material (drywall, shiplap, or MDF panels). Tape, mud, and sand drywall joints as usual. Prime with a vapor-retarding primer if you are in a humid climate. Paint with low-VOC interior paint to maintain healthy indoor air quality in your newly converted room.
Critical Safety and Code Considerations
When researching how to seal a garage door to make a room, safety must precede aesthetics. Garages often house vehicles, chemicals, or gas appliances, making fire separation non-negotiable.
- Fire-Rated Separation: If the garage is attached to the house, the wall separating them (including any sealed door opening) typically requires ½-inch Type X gypsum board on the garage side. Verify with your local building department.
- Carbon Monoxide Risks: Never convert a garage that still contains fuel-burning appliances without installing CO detectors and ensuring adequate combustion air supply.
- Egress Requirements: If the new room is a bedroom, the sealed garage door cannot serve as an egress window. You must provide a code-compliant emergency escape opening elsewhere.
- Moisture Management: In cold climates, placing vapor-impermeable foam against a cold metal door can trap condensation. Consult a building scientist if you are in Climate Zones 5 or higher to avoid mold growth inside the wall assembly.
FAQ: Common Questions About Sealing Garage Doors
Is it better to remove the garage door or seal over it?
For permanent living spaces, removal and traditional framing is superior in insulation value, soundproofing, and code compliance. Sealing over the door is best reserved for temporary conversions, rental properties where reversibility is required, or when HOA covenants prohibit exterior alterations. Always weigh long-term energy savings against short-term installation costs.
What R-value should I aim for when sealing a garage door?
Target a minimum of R-19 for walls in most U.S. climate zones, per IRC recommendations. When sealing over a door, achieving R-19 is challenging; aim for at least R-13 to R-16 using layered polyiso and XPS. Supplement with insulated window treatments or interior storm panels if you cannot reach code minimums through the door assembly alone.
Will sealing the garage door cause moisture problems?
It can, if done incorrectly. Metal doors conduct cold rapidly, creating condensation points when warm, humid interior air contacts the cold surface. Using closed-cell foam (XPS or polyiso) rather than open-cell spray foam minimizes this risk. Always include a vapor retarder appropriate for your climate zone and ensure the garage itself has adequate ventilation to manage humidity at its source.
Do I need a permit to seal a garage door for room conversion?
In most jurisdictions, yes. Converting a garage to habitable space changes the occupancy classification and triggers requirements for insulation, egress, electrical, and fire safety. Even if you are only sealing the door and not altering the structure, the change in use typically requires permitting. Check with your local building department before starting work to avoid fines or forced deconstruction.
How much does it cost to professionally seal a garage door?
Professional garage-to-room conversions range from $8,000 to $25,000 depending on size, finishes, and mechanical systems. The door-sealing portion specifically typically costs $1,500 to $3,500 when performed by licensed contractors who include air-sealing testing, code-compliant materials, and warranty-backed workmanship. DIY material costs average $400 to $900 but require significant skill to achieve comparable performance.
Can I still open the garage door after sealing it?
No. Once you apply foam, rigid insulation, and furring strips to the interior face, the door becomes a fixed wall assembly. The tracks, springs, and opener mechanism must be removed or permanently locked out before beginning work. Attempting to operate a sealed door will destroy the insulation, damage the door mechanism, and create serious safety hazards. Plan for permanence before committing to this method.
Conclusion
Learning how to seal a garage door to make a room empowers you to reclaim valuable square footage while improving your home’s energy efficiency and comfort. Whether you choose the reversible foam-over-door method or opt for full demolition and framing, success depends on meticulous air sealing, appropriate insulation selection, and strict adherence to safety codes. Remember that the cheapest solution upfront often costs more in energy bills and repairs down the road—invest in quality materials and proper technique from the start.
If this guide helped you plan your garage conversion project, please share it with friends, family, or fellow DIY enthusiasts on social media who might benefit from these proven strategies. Tag us in your transformation photos—we love seeing real-world results! Together, we can build safer, more efficient homes one garage at a time.
Leave a Reply