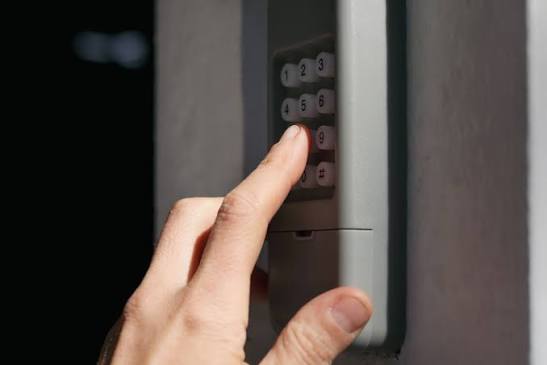
Introduction
There are few things more frustrating than standing in your driveway, punching in your code, and watching your garage door refuse to budge. Whether you have forgotten your PIN, moved into a new home, or your wireless keypad simply stopped responding, knowing how to reset the keypad on a garage door opener is an essential homeowner skill. This guide provides clear, safe, and manufacturer-aligned instructions to get your keyless entry system working perfectly again without needing an expensive service call.
Why Your Garage Door Keypad Might Need a Reset
Before diving into the reset process, it is helpful to understand why malfunctions occur. Diagnosing the root cause ensures you apply the correct fix rather than wasting time on unnecessary reprogramming.
- Dead Batteries: The most common culprit. Most keypads use 9V or AAA batteries that last 1–2 years.
- Power Outages: Electrical surges or outages can wipe the opener’s memory.
- Security Concerns: Previous owners, tenants, or contractors may still have access codes.
- Glitches: Wireless interference or firmware bugs can cause synchronization loss.
- Physical Damage: Weather exposure can corrode contacts or damage buttons.
Expert Insight: According to industry technicians, nearly 60% of keypad service calls are resolved simply by replacing the battery and performing a hard reset. Always start with the basics before assuming hardware failure.
Safety First: Critical Precautions Before Resetting
Garage doors are heavy mechanical systems. Before you learn how to reset the keypad on a garage door opener, adhere to these safety protocols:
- Clear the Area: Ensure no people, pets, or objects are near the door path.
- Disconnect Power (If Needed): If you are accessing the motor unit’s “Learn” button, use a stable ladder and avoid touching moving parts.
- Test Safety Sensors: After any reset, verify the photo-eye sensors reverse the door upon obstruction.
- Keep Old Codes Private: If resetting for security, never share previous codes during the transition.
For comprehensive safety standards regarding automatic gate and door operators, refer to the Wikipedia article on Garage Door Openers, which outlines UL 325 safety requirements and historical injury prevention data.
Step-by-Step: How To Reset The Keypad On A Garage Door Opener
The exact method varies by brand, but most modern openers follow a universal logic. Below is the standard procedure applicable to major brands like LiftMaster, Chamberlain, Craftsman, and Genie.
Step 1: Locate the “Learn” Button on the Motor Unit
The “Learn” button is typically found on the back or side of the garage door opener motor housing. It is usually colored yellow, red/orange, purple, or green. You may need to remove the light lens cover to access it.
Step 2: Clear Existing Codes (Factory Reset)
To fully erase old codes:
- Press and hold the Learn button for 6–10 seconds until the indicator LED turns off.
- Release the button. All remote and keypad codes are now erased.
- Note: This resets ALL devices. You will need to reprogram remotes afterward.
Step 3: Reprogram the Wireless Keypad
- Press the Learn button once (LED will illuminate or blink).
- Within 30 seconds, go to your exterior keypad.
- Enter your desired 4-digit PIN.
- Press and hold the ENTER button until the opener lights flash or you hear a click.
- Test the new code immediately.
Step 4: Verify and Secure
Close the door and test the keypad from outside. Confirm the safety reversal system works by placing a 2×4 board on the floor in the door’s path; the door should reverse upon contact.
Brand-Specific Reset Instructions at a Glance
While the general steps above work for most units, some brands have unique nuances. Use this comparison table for quick reference:
| Brand | Learn Button Color | Reset Hold Time | Special Notes |
|---|---|---|---|
| LiftMaster / Chamberlain | Yellow/Red/Purple | 10 seconds | Security+ 2.0 requires precise timing |
| Genie | Square/Round Black | 10 seconds | Intellicode models flash blue when ready |
| Craftsman | Orange/Yellow | 10 seconds | Older models may use DIP switches instead |
| Overhead Door | Red/Green | 10 seconds | CodeDodger tech requires sequential entry |
| Wayne Dalton | Green | 5 seconds | Some models lack external Learn button |
Pro Tip: If your opener lacks a Learn button and uses DIP switches (pre-1993 models), matching the switch positions inside the keypad and motor unit is required. Consider upgrading to a modern opener for improved security and reliability.
Troubleshooting: When the Reset Doesn’t Work
If you have followed the steps for how to reset the keypad on a garage door opener and it still fails, check these common issues:
- Battery Polarity: Ensure the battery is inserted correctly. Corroded terminals should be cleaned with vinegar and a cotton swab.
- Range Issues: Metal siding, LED bulbs, or Wi-Fi routers can cause interference. Try reprogramming while standing directly next to the motor.
- Keypad Lock Mode: Many keypads have a lock feature activated by holding a specific button for 3 seconds. Consult your manual.
- Opener Capacitor Failure: If the motor hums but doesn’t move, the capacitor may be faulty—a separate issue from keypad programming.
- Antenna Position: Ensure the hanging wire antenna is not coiled or touching metal surfaces.
Frequently Asked Questions (FAQ)
1. Will resetting my keypad delete my car remote codes?
Yes, if you perform a full factory reset by holding the Learn button for 10+ seconds, all paired devices are erased. You must reprogram each remote and keypad individually afterward. If you only want to change the keypad code without affecting remotes, simply enter a new PIN following the standard programming steps without holding the Learn button to erase memory.
2. How often should I reset my garage door keypad?
Security experts recommend resetting codes annually or whenever someone with access moves out, loses a device, or after a break-in attempt. Regular resets reduce unauthorized entry risk significantly.
3. Can I reset the keypad without accessing the motor unit?
Generally, no. The Learn button on the motor unit is required to authorize new devices. However, some newer smart openers allow reprogramming via smartphone apps without physical access to the motor. Check your specific model’s app capabilities.
4. What if my keypad doesn’t have numbers lighting up?
This almost always indicates a dead battery or corroded contacts. Replace the battery first. If lights remain off, inspect wiring (for wired keypads) or consider replacement, as internal circuitry may have failed due to moisture damage.
5. Is there a master code for garage door keypads?
No. There is no universal master code or backdoor override. Each keypad is individually programmed to your specific opener. Claims of “master codes” online are typically scams or misinformation. Security relies entirely on your unique PIN and physical access to the Learn button.
6. Why does my keypad work intermittently after resetting?
Intermittent operation usually points to weak batteries, wireless interference, or failing keypad buttons. Replace batteries with high-quality alkaline cells. If problems persist, test with a different keypad to isolate whether the issue is the keypad itself or the opener’s receiver board.
Conclusion
Understanding how to reset the keypad on a garage door opener empowers you to maintain home security and convenience without relying on costly technician visits. By following the step-by-step process outlined above—locating the Learn button, clearing old codes, and reprogramming with precision—you can resolve most keypad issues in under 10 minutes. Remember to prioritize safety, test your reversal system after every reset, and update your codes regularly to protect your property.
Found this guide helpful? Share it with friends, family, or neighbors who might be locked out of their garage! Tag us on social media or leave a comment below with your brand-specific tips. Your experience could save someone else a headache. Stay secure and keep your garage accessible!
Leave a Reply