Introduction
Is your garage letting in cold drafts, rainwater, or unwanted pests? A worn-out bottom seal is often the culprit, and learning how to replace the bottom seal of a garage door is one of the most cost-effective home maintenance tasks you can tackle this weekend. Not only does a fresh seal protect your stored belongings from moisture damage, but it also improves energy efficiency by keeping conditioned air inside. In this comprehensive guide, we will walk you through every step of the replacement process so you can restore your garage’s comfort and security without hiring a professional.
Why Is My Garage Door Bottom Seal Failing?
Before grabbing your tools, it helps to understand why seals fail. According to industry data from the International Door Association, the average rubber garage door seal lasts between 5 to 8 years depending on climate exposure and usage frequency. Extreme temperature fluctuations cause rubber to become brittle, while UV exposure accelerates cracking.
Common signs your seal needs replacement include:
- Visible gaps of light under the closed door.
- Water pooling inside the garage after rain.
- Leaves, dirt, or insects entering freely.
- Noticeable temperature differences between the garage and adjacent living spaces.
Addressing these issues promptly prevents long-term structural damage to your garage floor and reduces heating/cooling costs by up to 10%, according to energy efficiency studies.
What Tools and Materials Do I Need?
Preparation is half the battle. Having the right supplies ensures the job takes less than an hour rather than an entire afternoon.
Essential Tool List
- Pliers or Vise Grips: For removing old retainer nails/screws.
- Rubber Mallet: To tap the new seal into the track without damaging it.
- Utility Knife: For trimming excess rubber.
- Tape Measure: To verify door width (standard sizes are 8, 9, 10, 16, or 18 feet).
- Silicone Spray or Soapy Water: Crucial lubricant for sliding the seal.
- Safety Glasses & Gloves: Protect against rusted metal edges and debris.
Choosing the Right Seal Type
Not all seals are universal. Refer to this comparison table to select the correct profile:
| Seal Type | Best For | Durability | Installation Difficulty |
|---|---|---|---|
| T-Style | Steel doors with single channel | High | Easy |
| Beaded/U-Channel | Aluminum/Wood doors with double channel | Medium-High | Moderate |
| Bulb Seal | Uneven concrete floors | Very High | Easy |
| Threshold Seal | Floor-mounted (adhesive) | Medium | Easy (No door mod) |
Expert Tip: Always measure the retainer track width, not just the door width. A mismatched profile is the #1 reason DIY replacements fail.
Step-by-Step: How To Replace The Bottom Seal Of A Garage Door
Follow these precise instructions for a safe, secure installation. This tutorial assumes a standard T-style or beaded seal on a sectional garage door.
Step 1: Secure the Door and Remove Old Seal
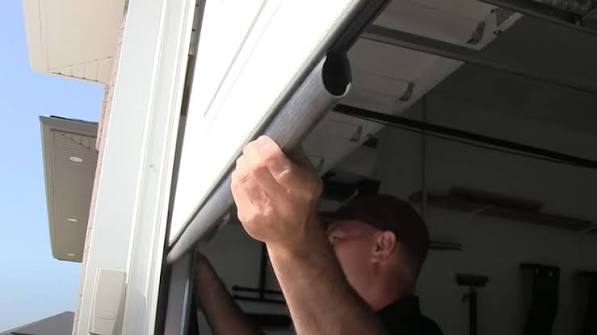
Close the garage door completely and disconnect the automatic opener to prevent accidental activation. Locate the end caps or retaining nails at both sides of the bottom panel. Use pliers to pull out nails or unscrew fasteners. Once loose, grip the old rubber seal firmly and pull it horizontally out of the track. If it’s stuck, apply penetrating oil and wait 5 minutes. Dispose of the old seal responsibly; many municipal recycling centers accept rubber weatherstripping.
Step 2: Clean and Inspect the Retainer Track
This step is often skipped but is critical for longevity. Use a wire brush or compressed air to remove rust, dirt, and old adhesive from the metal channel. Inspect for bent or damaged track sections—if the channel is deformed, the new seal won’t seat properly. Straighten minor bends with pliers or replace the bottom panel retainer if severely damaged. Wipe the track clean with a damp cloth and let it dry completely before proceeding.
Step 3: Lubricate the Track Generously
Friction is your enemy during installation. Spray silicone lubricant or apply soapy water (mix 2 tablespoons dish soap per 1 liter of water at room temperature) along the entire length of the retainer channel. This reduces insertion force by up to 60% and prevents tearing the new rubber. Avoid petroleum-based lubricants like WD-40, as they can degrade certain rubber compounds over time.
Step 4: Insert the New Seal
Align the seal’s T-edge or beads with the track opening at one end. Using your hands initially, feed approximately 6–12 inches into the channel. Then, use a rubber mallet to gently tap the seal deeper while simultaneously pulling from the opposite end. Work in 2-foot increments, alternating between tapping and pulling to maintain even tension. Never force the seal; if resistance increases significantly, back it out and re-lubricate.
Step 5: Trim and Secure Ends
Once fully inserted, ensure equal overhang on both sides (typically ½ inch beyond the door edge). Mark your cut line with a pencil, then use a sharp utility knife to trim excess rubber at a 45-degree angle for a clean finish. Reinstall end caps or drive new galvanized nails/screws through pre-drilled holes to lock the seal in place. Test by manually lifting the door slightly—the seal should stay firmly seated without slipping.
Step 6: Test and Adjust
Reconnect the opener and cycle the door 2–3 times. Observe the seal’s contact with the floor across the entire width. Gaps indicate uneven flooring or improper seating. For persistent gaps, consider adding a floor-mounted threshold seal as a secondary barrier. According to Wikipedia, proper sealing contributes significantly to residential thermal envelope integrity, making this final verification essential for energy savings.
Pros and Cons of DIY vs. Professional Replacement
Still debating whether to hire help? Consider this balanced perspective:
DIY Advantages:
- Cost savings of $100–$200 in labor fees.
- Immediate scheduling flexibility.
- Valuable home maintenance skill acquisition.
DIY Disadvantages:
- Risk of incorrect seal type selection.
- Potential injury from heavy door components.
- No warranty on installation workmanship.
Professional Advantages:
- Guaranteed correct part matching.
- Comprehensive door inspection included.
- Liability coverage for accidents.
For most homeowners with basic tool competency, DIY is perfectly viable. However, if your door shows signs of spring tension issues or track misalignment, consult a certified technician first.
Frequently Asked Questions (FAQ)
How often should I replace my garage door bottom seal?
Most experts recommend inspection annually and replacement every 5–8 years. Harsh climates (extreme heat, salt air, or freeze-thaw cycles) may shorten lifespan to 3–5 years. Proactive replacement prevents emergency repairs during storm seasons.
Can I replace the seal without removing the garage door?
Yes! The bottom seal slides horizontally through the retainer track while the door remains installed and closed. Only the end retainers need removal. Never attempt to lift or disassemble door panels unless trained—torsion springs store lethal energy.
What’s the difference between vinyl and rubber garage door seals?
Rubber (EPDM) offers superior flexibility in cold weather and longer UV resistance, making it ideal for northern climates. Vinyl is more affordable and rigid, suitable for mild climates but prone to cracking below freezing. Premium hybrid blends combine benefits of both materials.
Why does my new seal still leak water?
Three common causes: (1) Incorrect seal profile for your door type, (2) Uneven concrete slab creating low spots, or (3) Insufficient downward pressure from door springs. Address floor imperfections with self-leveling compound or add a complementary threshold seal for complete waterproofing.
Is it safe to do this myself if I have an automatic opener?
Absolutely, provided you disconnect power to the opener before starting. The seal replacement itself doesn’t involve springs, cables, or high-tension components. Always reconnect and test the safety reversal sensors after completing the job to ensure compliance with federal safety standards.
Conclusion
Mastering how to replace the bottom seal of a garage door empowers you to safeguard your home against weather, pests, and energy waste—all for under $50 in materials. By following this detailed guide, selecting the correct seal type, and prioritizing safety precautions, you’ll achieve professional-grade results that last for years. Remember, regular maintenance extends not just your seal’s life, but your entire garage door system’s performance.
Found this guide helpful? Share it on Facebook, Pinterest, or Nextdoor to help fellow homeowners tackle this essential repair! Tag us with your before-and-after photos—we love seeing successful DIY transformations. Together, we can build safer, more efficient homes one garage at a time.
Leave a Reply