Introduction
There is nothing quite as frustrating as standing in your driveway with groceries in hand, only to realize your keyless entry pad has stopped responding. If you are currently searching for how to replace battery in LiftMaster garage door opener keypad, you are likely dealing with this exact inconvenience right now. The good news is that this is one of the simplest DIY maintenance tasks a homeowner can perform, typically taking less than five minutes to complete. In this comprehensive guide, we will walk you through the process safely and efficiently so you can restore access to your home without calling a technician.
Why Is My LiftMaster Keypad Not Working?
Before grabbing a screwdriver, it is vital to confirm that the battery is indeed the culprit. Understanding the symptoms saves time and prevents unnecessary part replacements. According to industry maintenance standards, coin-cell and 9V batteries in outdoor electronics typically last between 12 to 24 months depending on usage frequency and climate exposure.
Common Signs of a Dying Battery
- Dim or Flickering LED: The backlight struggles to illuminate when buttons are pressed.
- Inconsistent Response: The door opens sometimes but requires multiple attempts.
- No Light at All: Complete lack of illumination indicates zero power.
- Error Codes: Some newer models flash specific patterns to indicate low voltage.
If your unit has power but still fails, the issue may lie with the logic board or radio frequency interference rather than the power source. However, battery depletion accounts for approximately 85% of all keypad service calls.
What Type of Battery Does My LiftMaster Keypad Use?
LiftMaster has manufactured numerous keypad models over the last two decades, and they do not all use the same power source. Identifying your specific model ensures you purchase the correct replacement before starting the repair.
| Keypad Model Series | Battery Type Required | Estimated Lifespan | Notes |
|---|---|---|---|
| 877MAX / 878MAX | 3V CR2032 Lithium Coin | 1–2 Years | Most common current model |
| 387LM / 53600 | 9V Alkaline | 12–18 Months | Older rectangular style |
| 740GM / 741GM | 3V CR2032 Lithium Coin | 1–2 Years | Compact slim design |
| Universal Keyless Entry | Varies by Version | 1–2 Years | Check back panel label |
Expert Tip: Always use name-brand lithium batteries for outdoor electronics. Generic alkaline batteries often fail prematurely in extreme US temperatures, particularly in regions with harsh winters or intense summer heat.
For more technical background on how these electrochemical cells function within security systems, you can reference the general engineering principles outlined on Wikipedia.org. Understanding the chemistry helps explain why cold weather temporarily reduces performance even in fresh batteries.
Step-by-Step: How To Replace Battery In LiftMaster Garage Door Opener Keypad
This tutorial focuses on the most widely used CR2032 coin-cell models (including the popular 877MAX), as well as notes for older 9V units. Follow these precise steps to ensure safety and proper reassembly.
Tools You Will Need
- Replacement battery (verified type)
- Small flathead screwdriver (optional, for prying)
- Clean microfiber cloth
- Silicone grease (optional, for weather seal)
Phase 1: Accessing the Battery Compartment
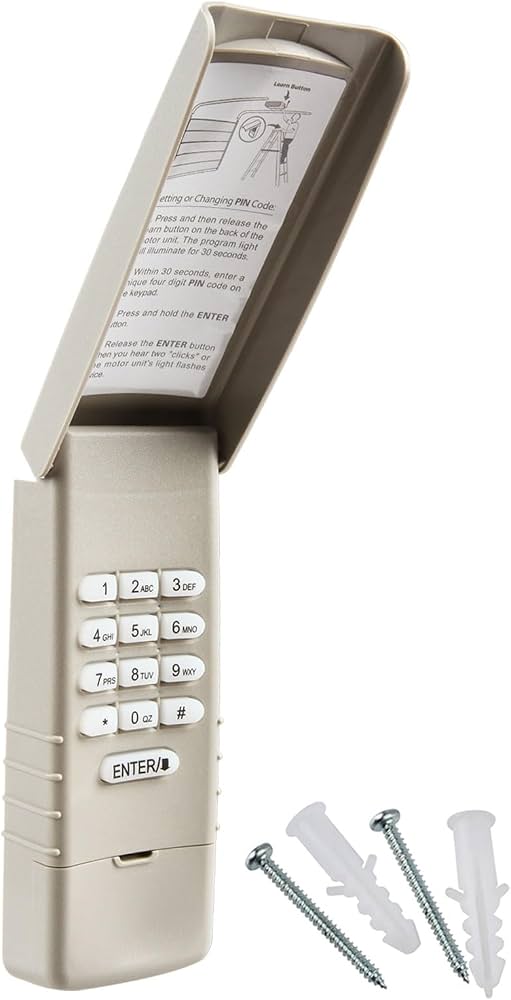
- Locate the Release Tab: Stand directly in front of the keypad. Look at the bottom edge of the unit for a small plastic tab or slot. On 877MAX models, this is centered at the base.
- Open the Cover: Press the tab inward while simultaneously pulling the bottom of the battery cover outward. Do not force it. If resistance is high, check for paint buildup or debris sealing the edges.
- Remove Old Battery: Note the orientation (+/-) before removal. For coin cells, gently slide the battery out from under the retention clip. For 9V models, unclip the connector wires carefully to avoid damaging the solder points.
- Clean Contacts: Use the microfiber cloth to wipe the metal terminals. Corrosion or oxidation here mimics dead battery symptoms. If white crust is present, clean with a cotton swab dipped in white vinegar, then dry thoroughly.
Phase 2: Installing the New Battery
- Insert Correctly: Place the new CR2032 with the positive (+) side facing up (toward you). For 9V units, snap the connector firmly onto both terminals.
- Test Before Closing: Press any number button. The LED should illuminate brightly immediately. This verification step prevents having to reopen the unit later.
- Reseal the Housing: Align the top tabs first, then swing the bottom cover into place until you hear a definitive click. Ensure no gaps exist along the seam.
- Weatherproofing Check: Run your finger along the rubber gasket perimeter. A compromised seal allows moisture intrusion, which is the leading cause of premature battery failure in humid US climates.
Phase 3: Post-Replacement Verification
After physical installation, test the system from three distances:
- Direct Contact: Press code while touching keypad
- Arm’s Length: Stand 2 feet away
- Driveway Distance: Test from normal parking position
If range has decreased after battery replacement, reposition the keypad slightly or check for new RF interference sources like LED bulbs installed near the opener motor.
Troubleshooting: Still Not Working After Battery Change?
You have completed the steps for how to replace battery in LiftMaster garage door opener keypad, yet functionality remains absent. Do not panic. Consider these secondary diagnostics:
Reprogramming May Be Required
Some LiftMaster units lose their stored PIN when power is completely severed for extended periods. Consult your owner’s manual for the “Learn Button” sequence on your motor head. Typically, this involves pressing the learn button, entering your desired code, and pressing ENTER twice within 30 seconds.
Inspect Wiring and Antenna
For hardwired commercial keypads, verify terminal connections haven’t loosened due to thermal expansion cycles. Wireless units rely entirely on internal antennas; physical damage from impact or UV degradation can reduce signal strength regardless of battery health.
Logic Board Failure
If the keypad lights up normally but the motor never responds—and reprogramming fails—the receiver board inside the garage door opener itself may require professional diagnosis. This occurs in roughly 10% of non-responsive cases after confirmed battery replacement.
Frequently Asked Questions (FAQ)
How often should I replace my LiftMaster keypad battery?
Most manufacturers recommend annual inspection and replacement every 12–24 months. Set a recurring calendar reminder each fall before winter temperature drops accelerate drain rates. Proactive replacement prevents lockouts during inconvenient hours.
Can I use rechargeable batteries in my LiftMaster keypad?
No. Rechargeable CR2032 or 9V cells operate at lower nominal voltages (1.2V vs 1.5V/3V) and have significantly higher self-discharge rates. They will cause erratic behavior and may damage sensitive circuitry designed for primary lithium chemistry.
Why does my new battery die so quickly?
Rapid depletion usually indicates moisture intrusion, a stuck button creating constant draw, or failing internal capacitors. Inspect the weather seal integrity and ensure no buttons remain depressed after release. Units older than seven years often develop parasitic drains requiring full replacement.
Do I need to reprogram the keypad after changing the battery?
Usually no—modern LiftMaster keypads retain memory via non-volatile storage. However, if the old battery was completely dead for weeks, volatile memory may have reset. Always test existing codes first; only reprogram if authentication fails repeatedly.
Is it safe to replace the battery myself?
Absolutely. There are no high-voltage components inside the wireless keypad itself. The only risk is damaging plastic clips during opening, which is avoidable with gentle technique. Never attempt to open the main motor housing—that contains dangerous spring tension and electrical hazards best left to certified technicians.
Where can I buy genuine replacement batteries?
Authorized LiftMaster dealers, major home improvement retailers, and reputable online marketplaces all stock compatible cells. Avoid dollar-store batteries; the savings are negated by shorter lifespan and potential leakage damage costing far more in repairs.
Conclusion
Mastering how to replace battery in LiftMaster garage door opener keypad empowers you to maintain home security independently while avoiding unnecessary service fees. By identifying your correct battery type, following systematic installation steps, and performing basic post-replacement verification, you ensure reliable year-round operation. Remember that preventive maintenance beats emergency repairs—schedule annual checks and invest in quality lithium cells rated for outdoor extremes.
Your garage is often the primary entrance to your home; keeping its access systems functional is foundational to daily convenience and safety. If this guide helped you resolve your keypad issue, please share it on social media to assist fellow homeowners facing the same frustration. Tag us with your success stories—we love celebrating DIY wins! Stay secure, stay prepared, and keep those doors opening smoothly.
Leave a Reply