Is your Genie garage door remote suddenly unresponsive? You’re not alone. Thousands of homeowners face this frustrating issue every year when their garage door opener battery dies unexpectedly. Learning how to replace battery in Genie garage door opener is a simple task that can save you time, money, and the hassle of calling a technician. In this comprehensive guide, we’ll walk you through everything you need to know to get your garage door working smoothly again.
Why Does Your Genie Garage Door Remote Battery Die?
Before diving into the replacement process, it’s helpful to understand why batteries fail. Most Genie garage door remotes use standard lithium or alkaline batteries, which typically last between 1–3 years depending on usage frequency. According to the U.S. Department of Energy, average households open and close their garage doors approximately 1,500 times per year, which significantly impacts battery life.
Several factors can accelerate battery depletion:
- Frequent use: Heavy daily usage drains batteries faster
- Extreme temperatures: Both hot and cold weather affect battery performance
- Age: Older batteries naturally lose capacity over time
- Poor contact: Corrosion or loose connections can cause premature failure
Understanding these factors helps you anticipate when replacement might be necessary and prevents unexpected lockouts.
What Type of Battery Does Your Genie Remote Use?
Identifying the correct battery type is crucial before starting the replacement process. Genie produces several remote models, each requiring specific battery types:
| Remote Model | Battery Type | Typical Lifespan |
|---|---|---|
| Genie Intellicode (Standard) | CR2032 Lithium Coin Cell | 2–3 years |
| Genie G3T-R Remote | CR2032 Lithium Coin Cell | 2–3 years |
| Genie Wireless Keypad | AA Alkaline Batteries (2) | 1–2 years |
| Genie Universal Remote | CR2032 or CR2025 | 1–2 years |
Pro Tip: Always check your owner’s manual or look inside the battery compartment for specific requirements. Using the wrong battery type can damage your remote or cause malfunction.
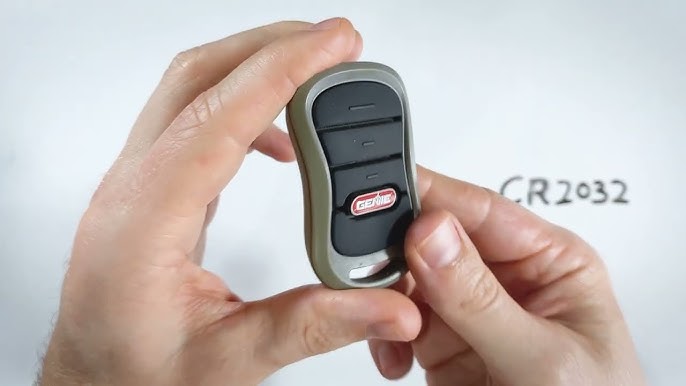
Most modern Genie remotes use the CR2032 lithium coin cell battery, which is widely available at hardware stores, pharmacies, and online retailers. These batteries provide consistent power output and have a longer shelf life compared to alkaline alternatives.
Step-by-Step Guide: How To Replace Battery In Genie Garage Door Opener
Follow these detailed instructions to safely replace your Genie garage door remote battery:
Step 1: Gather Your Supplies
Before beginning, ensure you have:
- New CR2032 lithium battery (or appropriate type for your model)
- Small flathead screwdriver (if needed)
- Clean, dry cloth
- Fresh pair of hands (to avoid static electricity)
Step 2: Locate the Battery Compartment
Turn your remote over and look for the battery compartment cover. Most Genie remotes feature one of two designs:
- Slide-off cover: Look for a small notch or arrow indicating direction
- Screw-secured cover: Requires a small Phillips or flathead screwdriver
Step 3: Open the Battery Compartment
For slide-off covers:
- Press firmly on the indicated area
- Slide the cover in the direction of the arrow
- Remove carefully to avoid damaging internal components
For screw-secured covers:
- Use the appropriate screwdriver
- Loosen screws counterclockwise (typically 2–4 screws)
- Keep screws in a safe place to prevent loss
Step 4: Remove the Old Battery
- Note the battery orientation (positive side up is standard)
- Gently lift or slide out the old battery
- Dispose of properly according to local regulations
Warning: Never force the battery out, as this may damage the contacts. If the battery appears stuck, gently wiggle it side to side.
Step 5: Insert the New Battery
- Ensure the new battery matches the required type (CR2032)
- Insert with the positive (+) side facing up
- Press down firmly until it clicks into place
- Double-check orientation before proceeding
Step 6: Close the Battery Compartment
- Align the cover properly
- Slide or snap it back into place
- If using screws, tighten securely but don’t overtighten
Step 7: Test Your Remote
- Stand within 20 feet of your garage door opener
- Press any button on the remote
- Observe if the garage door responds
- If no response, recheck battery orientation and compartment closure
Troubleshooting Common Issues After Battery Replacement
Even after following the steps correctly, you might encounter problems. Here are solutions to common issues:
Remote Still Doesn’t Work:
- Verify battery orientation is correct
- Try a different new battery (occasionally, new batteries are defective)
- Check if the garage door opener itself has power
- Reprogram the remote following manufacturer instructions
Intermittent Response:
- Clean battery contacts with a dry cloth
- Ensure battery compartment is fully closed
- Move closer to the garage door opener to test range
Short Battery Life:
- Check for corrosion in the battery compartment
- Avoid storing remote in extreme temperatures
- Consider upgrading to high-quality lithium batteries
According to Wikipedia’s article on garage door openers, proper maintenance including regular battery replacement extends the lifespan of remote control systems significantly.
When Should You Replace Your Genie Remote Battery?
Recognizing early warning signs helps prevent complete battery failure:
- Reduced range: Remote works only when very close to the garage
- Delayed response: Noticeable lag between pressing button and door movement
- Dim LED indicator: If your remote has an LED light, dimness indicates low battery
- Intermittent operation: Works sometimes but not consistently
Expert Recommendation: Replace batteries proactively every 18–24 months, even if the remote still functions. This preventive approach avoids unexpected failures during inconvenient times.
FAQ Section
Q1: Can I use a rechargeable battery in my Genie garage door remote?
A: While technically possible, rechargeable batteries are not recommended. They typically provide lower voltage (1.2V vs. 3V for lithium) and may not power the remote effectively. Stick with standard CR2032 lithium batteries for optimal performance.
Q2: How do I know if the problem is the battery or the remote itself?
A: First, replace the battery with a fresh one. If the remote still doesn’t work, try reprogramming it. If issues persist, the remote may need replacement. You can also test the remote by standing directly next to the garage door opener—if it works there but not from a distance, the battery is likely weak.
Q3: Is it safe to replace the battery myself, or should I call a professional?
A: Replacing the battery is completely safe and designed for DIY completion. No special tools or technical knowledge are required. However, if you’re uncomfortable or the remote remains non-functional after replacement, consult a professional technician.
Q4: Where can I buy replacement batteries for Genie remotes?
A: CR2032 batteries are available at most retail locations including Walmart, Home Depot, Lowe’s, CVS, Walgreens, and Amazon. They typically cost $2–$5 for a single battery or $8–$15 for multi-packs.
Q5: Can extreme weather affect my Genie remote battery life?
A: Yes, extreme temperatures significantly impact battery performance. Cold weather reduces battery capacity temporarily, while heat can cause permanent damage. Store your remote at room temperature when possible, and consider replacing batteries more frequently if you live in areas with extreme climate conditions.
Q6: What should I do with old batteries after replacement?
A: Never throw batteries in regular trash. Take them to designated recycling centers, many hardware stores, or battery collection drop-off points. Proper disposal prevents environmental contamination and allows valuable materials to be recovered.
Conclusion
Learning how to replace battery in Genie garage door opener is an essential skill every homeowner should master. With just a few minutes and a inexpensive CR2032 battery, you can restore full functionality to your garage door remote and avoid costly service calls. Remember to choose quality batteries, follow proper installation procedures, and replace them proactively every 1–2 years for optimal performance.
Did you find this guide helpful? Share it with friends and family who might benefit from knowing how to troubleshoot their Genie garage door remotes. Don’t forget to bookmark this page for future reference, and leave a comment below if you have additional questions or tips to share with our community!
Leave a Reply