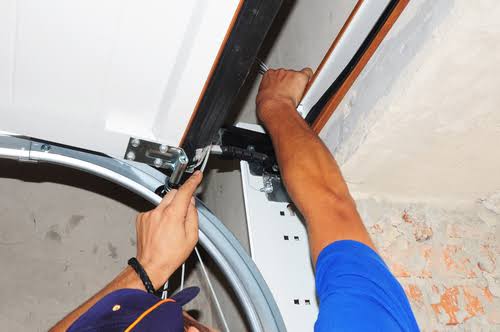
A snapped garage door cable can leave your vehicle trapped and your home insecure, creating immediate stress for any homeowner. If you are searching for how to replace a broken cable on a garage door, you need clear, safe instructions that prioritize your well-being over speed. This guide walks you through the process with expert-backed safety protocols, but please remember: garage door springs store lethal energy, and professional help is often the safest choice.
Is It Safe to Replace a Garage Door Cable Yourself?
Before picking up a wrench, you must understand the risks involved in garage door repair. According to the U.S. Consumer Product Safety Commission (CPSC), garage door-related injuries send thousands of people to emergency rooms annually, with spring and cable failures being primary culprits.
The Critical Safety Distinction:
- Extension Spring Systems: Generally considered more DIY-friendly because the springs run parallel to the tracks and store less concentrated tension.
- Torsion Spring Systems: The spring is mounted above the door on a metal shaft. These store extreme kinetic energy. Replacing a cable on a torsion system requires releasing and resetting spring tension. Most experts strongly advise against DIY torsion spring work.
⚠️ Expert Warning: “Never attempt to release torsion spring tension without proper winding bars and training. A slipping bar can cause catastrophic injury or death. When in doubt, hire a certified technician.” — International Door Association (IDA) Safety Guidelines
If your door uses torsion springs and you lack experience, use this article to understand the process so you can vet professionals effectively, rather than attempting the repair yourself. For more background on garage door mechanics and safety standards, refer to the Garage Door Wikipedia entry for foundational knowledge.
What Tools Do You Need to Replace a Garage Door Cable?
Having the correct tools prevents damage and injury. Never substitute improper tools (e.g., screwdrivers as winding bars).
| Tool | Purpose | Safety Note |
|---|---|---|
| Winding Bars (2x) | Torsion spring tension release/reset | Must be steel, 18″+ long, proper diameter |
| Locking Pliers / Vise Grips | Securing door track below roller | Prevents accidental door movement |
| Adjustable Wrench Set | Loosening drum set screws & brackets | Use correct size to avoid stripping |
| Socket Set & Ratchet | Removing bottom bracket bolts | Metric or SAE depending on hardware |
| Safety Glasses & Gloves | Eye/hand protection | Non-negotiable PPE |
| Replacement Cable | Exact match to original spec | Measure length & diameter precisely |
| Ladder (Stable) | Access to drum/spring area | Have a spotter if possible |
| C-Clamps | Secondary door securing | Backup to locking pliers |
Key Statistic: Over 60% of DIY garage door injuries occur due to improper tool use or lack of PPE, according to CPSC injury reports. Investing $30–$50 in proper winding bars and safety gear is non-negotiable.
Step-by-Step: How To Replace A Broken Cable On A Garage Door
Note: These steps assume an extension spring system or a torsion system where spring tension has already been professionally released. If tension remains, STOP and call a professional.
Step 1: Secure the Door and Disconnect Power
- Close the garage door completely.
- Place locking pliers on the track directly below the bottom roller on the intact side to prevent upward movement.
- Add C-clamps as secondary security.
- Unplug the garage door opener or pull the emergency release cord to disconnect automatic operation.
- Put on safety glasses and gloves.
Step 2: Release Remaining Tension (Extension Springs Only)
For extension spring systems:
- Open the door manually until the spring is fully extended (no tension).
- Secure the door in this position with clamps on both tracks.
- Carefully detach the broken cable from the bottom bracket and the pulley system.
For torsion systems: This step requires winding bars and professional technique. Do not proceed without training.
Step 3: Remove the Damaged Cable
- Locate the cable drum at the top corner (torsion) or the pulley assembly (extension).
- Loosen the set screws on the drum using the correct socket/wrench.
- Unwind the old cable from the drum carefully—note the winding direction and number of wraps.
- Detach the cable end from the bottom bracket on the door panel.
- Inspect the drum, pulleys, and brackets for wear. Replace if grooved or damaged.
Step 4: Install the New Cable
- Thread the new cable through the bottom bracket exactly as the original was routed.
- Feed the cable up to the drum/pulley assembly.
- Insert the cable end into the drum’s anchor hole and tighten set screws to manufacturer torque specs (typically 15–20 ft-lbs—check your manual).
- Wind the cable onto the drum in the same direction and number of wraps as noted during removal. Uneven wrapping causes premature failure.
- Ensure the cable sits flush in the drum grooves with no overlapping.
Step 5: Re-tension and Test
- Remove all clamps and locking pliers.
- Manually lift the door halfway—it should stay in place with minimal effort. If it drops or rises unevenly, tension is incorrect.
- Open and close the door fully by hand 3–4 times, watching for binding, fraying, or misalignment.
- Reconnect the opener and test the auto-reverse safety sensors.
- Lubricate cables and rollers with silicone-based garage door lubricant (never WD-40).
Common Mistakes That Cause Repeat Cable Failure
Avoid these errors to extend your repair’s lifespan:
- Wrong Cable Size: Using 1/8″ cable when 5/32″ is required reduces load capacity by 40%. Always match OEM specifications.
- Improper Drum Wrapping: Overlapping cables create friction points that fray within weeks.
- Ignoring Pulley Wear: A worn pulley acts like a knife edge on new cable. Replace pulleys when replacing cables.
- Skipping Balance Testing: An unbalanced door puts 2–3x normal stress on cables. Always test balance post-repair.
- No Lubrication: Dry cables corrode and fatigue faster. Lubricate every 6 months.
FAQ: Your Top Questions About Garage Door Cable Replacement
How much does it cost to replace a garage door cable professionally?
Professional replacement typically costs $150–$300 for a single cable, including parts and labor. Both cables are often replaced simultaneously ($250–$400 total) since they wear evenly. Prices vary by region and spring type; torsion system repairs cost more due to complexity.
How long do garage door cables last?
Quality galvanized steel cables last 5–7 years under normal use (3–5 cycles/day). Factors shortening lifespan include lack of lubrication, misaligned tracks, extreme temperatures, and unbalanced doors. Annual inspection catches early wear before failure.
Can I replace just one cable, or should I replace both?
Always replace both cables simultaneously. Even if only one broke, the other has endured identical stress cycles and will likely fail soon. Mismatched cable ages cause uneven lifting, accelerating wear on springs, rollers, and the opener.
Why did my garage door cable break?
Common causes include: normal metal fatigue after 10,000+ cycles, corrosion from moisture/salt, worn pulleys creating friction, loose drum set screws allowing slippage, and door imbalance forcing excess strain. Identifying the root cause prevents repeat failures.
How do I know if my garage door is properly balanced after repair?
Disconnect the opener and lift the door manually to waist height. A balanced door stays in place without support. If it falls, springs are under-tensioned; if it rises, they’re over-tensioned. Adjustments require specialized tools—call a pro if unbalanced.
Is it illegal to repair my own garage door?
No federal law prohibits DIY repair, but some local codes require licensed technicians for torsion spring work. More importantly, insurance may deny claims for injuries from unpermitted DIY repairs. Check your policy and local regulations before starting.
Final Thoughts: Safety First, Always
Learning how to replace a broken cable on a garage door empowers you to make informed decisions, whether you tackle the repair yourself or hire a professional. Remember: no amount of saved money is worth a life-altering injury. Extension spring systems may be manageable for experienced DIYers with proper tools, but torsion spring systems demand professional expertise.
Regular maintenance—annual inspections, bi-annual lubrication, and prompt attention to unusual noises—prevents most cable failures. Your garage door performs over 1,000 cycles yearly; treating it as a critical safety system, not just a convenience, protects your family and property.
Found this guide helpful? Share it on Facebook, X (Twitter), or Pinterest to help fellow homeowners stay safe! Tag a friend who’s been dealing with garage door issues—they’ll thank you later. 🔧🏡
Disclaimer: This article is for educational purposes only. Garage door repair involves significant risk. Always consult a certified professional for torsion spring work or if you are uncertain about any step. The author assumes no liability for injury or damage resulting from following this guide.
Leave a Reply