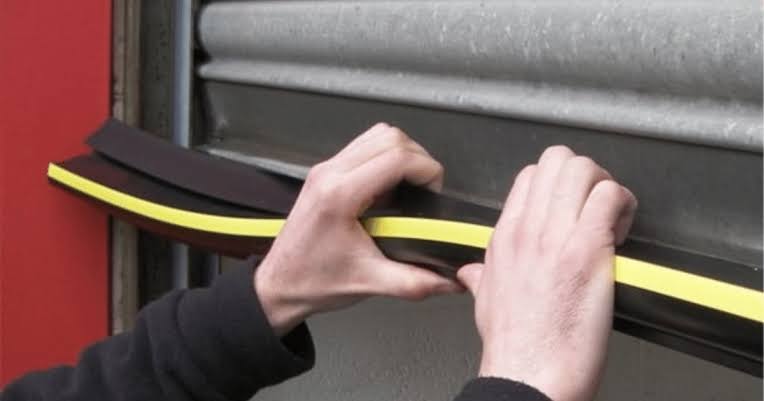
A drafty, wet, or pest-prone garage often stems from a worn-out bottom seal, leaving your home vulnerable to the elements and higher energy bills. If you are wondering how to put rubber seal on bottom of garage door, you have come to the right place for a simple, cost-effective solution. This guide will walk you through the process safely and efficiently, restoring your garage’s comfort and protection in just an afternoon.
Why Is My Garage Door Bottom Seal Failing?
Before grabbing your tools, it is helpful to understand why seals fail. According to the U.S. Department of Energy, air leaks through gaps like garage doors can account for significant energy loss in residential buildings. Rubber seals typically degrade due to UV exposure, extreme temperature fluctuations, and mechanical friction against the concrete floor.
Common signs of failure include:
- Visible daylight under the closed door.
- Water pooling inside after rain.
- Leaves, dirt, or insects entering the garage.
- Cracked, brittle, or flattened rubber.
Addressing these issues promptly prevents moisture damage to stored items and improves your home’s overall thermal envelope. For more context on how weatherization impacts residential structures, refer to the Weatherization entry on Wikipedia.org, which outlines the principles of sealing building envelopes against air infiltration.
What Tools and Materials Do I Need to Replace a Garage Door Seal?
Gathering the correct supplies before starting ensures a smooth installation. Using the wrong seal type is the most common mistake DIYers make.
Essential Tool List
- Flathead screwdriver or cordless drill (with appropriate bit)
- Pliers or locking vise grips
- Rubber mallet
- Tape measure
- Utility knife or hacksaw
- Silicone spray or soapy water (lubricant)
- Safety glasses and work gloves
Choosing the Right Seal Type
Not all seals are universal. Match the replacement to your door’s retainer system:
| Seal Type | Best For | Retainer Style | Durability |
|---|---|---|---|
| T-Bulb | Most modern steel doors | Single channel T-slot | High |
| Beaded | Older wooden/custom doors | Double bead channel | Medium |
| U-Shape | Universal fit / retrofit | Wraps around door edge | Medium-High |
| Threshold | Uneven concrete floors | Adheres to floor, not door | Variable |
Pro Tip: Measure the width of your door and the retainer channel before purchasing. A seal that is too wide will bind; one that is too narrow will leave gaps.
How To Put Rubber Seal On Bottom Of Garage Door: Step-by-Step
Now for the main event. Follow these precise steps to ensure a watertight, long-lasting seal. Always disconnect your garage door opener before beginning manual work to prevent accidental activation.
Step 1: Remove the Old Seal
Open the door fully and secure it in place. Locate the end caps or retaining screws at each side of the bottom bracket. Remove them using your screwdriver or drill. Grip the old rubber with pliers and pull it steadily out of the channel. If it is stuck, apply silicone spray to loosen debris. Do not force it, as this can bend the aluminum retainer.
Step 2: Clean and Inspect the Retainer Channel
Use a wire brush or rag to remove rust, dirt, and old adhesive from the channel. Inspect for bends or corrosion. A damaged retainer will prevent the new seal from seating properly. Straighten minor bends with pliers; replace the retainer if severely corroded.
Step 3: Lubricate the New Seal
Apply a thin coat of silicone spray or soapy water along the entire length of the new rubber seal’s insertion edge. This reduces friction by up to 70% and prevents tearing during installation. Avoid petroleum-based lubricants, which degrade rubber over time.
Step 4: Insert the New Seal
Align the seal’s bulb or bead with the retainer channel. Starting at one end, push the seal into the channel using your hands. For stubborn sections, tap gently with a rubber mallet—never a metal hammer. Work gradually across the door’s width. The seal should slide smoothly without bunching.
Step 5: Trim and Secure Ends
Once fully inserted, close the door to check alignment. Trim excess rubber with a utility knife, leaving ¼ inch overhang on each side. Reinstall end caps or screws to lock the seal in place. Ensure no sharp edges protrude that could snag clothing or skin.
Step 6: Test the Seal
Close the door and inspect from inside. There should be uniform contact along the entire threshold. Place a piece of paper under the door and close it; you should feel resistance when pulling the paper out. If gaps remain, adjust the door’s travel limit or consider adding a threshold seal for uneven floors.
Common Mistakes to Avoid During Installation
Even experienced DIYers stumble on these pitfalls:
- Skipping Lubrication: Dry installation causes micro-tears that shorten seal life by years.
- Forcing the Seal: Excessive pressure deforms the retainer, creating permanent gaps.
- Ignoring Floor Condition: A cracked or sloped concrete slab defeats even the best seal. Repair flooring first.
- Using Wrong Size: Always verify measurements twice. Returns are costly and delay repairs.
- Neglecting Safety: Garage doors are heavy. Never work under an unsecured door.
FAQ: Your Top Questions About Garage Door Seals Answered
How often should I replace my garage door bottom seal?
Most quality rubber seals last 5–8 years, depending on climate and usage. Inspect annually for cracks, flattening, or gaps. In harsh climates (extreme heat/cold), replacement may be needed every 3–4 years.
Can I install a new seal without removing the garage door?
Yes! Most modern T-bulb and beaded seals are designed for in-situ replacement. Only U-shape wrap-around seals typically require door removal. Always confirm compatibility with your specific door model before purchasing.
Why does my new seal still leak water?
Water intrusion usually indicates one of three issues: (1) improper seal size/type, (2) uneven concrete threshold, or (3) misaligned door tracks. Check floor levelness with a straightedge; deviations >¼ inch require a threshold seal or concrete repair. Also verify the door closes fully—adjust opener limits if needed.
Is vinyl or rubber better for garage door seals?
Rubber (EPDM) outperforms vinyl in durability, flexibility, and temperature resistance. Vinyl hardens in cold weather and cracks faster under UV exposure. EPDM rubber maintains elasticity from -40°F to 250°F and resists ozone degradation. The slight premium cost pays off in longevity.
How much does professional seal replacement cost?
National averages range from $150–$300 for labor and materials. DIY costs typically fall between $30–$80 for the seal alone. Professional installation is recommended if your retainer is damaged, the door is misaligned, or you lack confidence working with heavy components.
Can I use caulk instead of replacing the seal?
Caulk is a temporary patch, not a permanent fix. It lacks the compression resilience needed for daily door movement and will crack within weeks. Proper seal replacement addresses the root cause and provides reliable, long-term protection.
Final Thoughts: Seal It Right, Sleep Soundly
Learning how to put rubber seal on bottom of garage door empowers you to protect your home from drafts, moisture, and pests while boosting energy efficiency. With the right tools, correct seal type, and careful installation, this weekend project delivers immediate comfort and long-term savings. Remember: patience during cleaning and lubrication prevents frustration later, and testing ensures your effort translates to real-world performance.
Loved this guide? Share it with fellow homeowners on Facebook, Pinterest, or Nextdoor who might be battling leaky garages! Tag us in your before-and-after photos—we’d love to celebrate your DIY success. Don’t forget to bookmark this page for future maintenance reminders. Your garage (and your wallet) will thank you!
Leave a Reply