Introduction
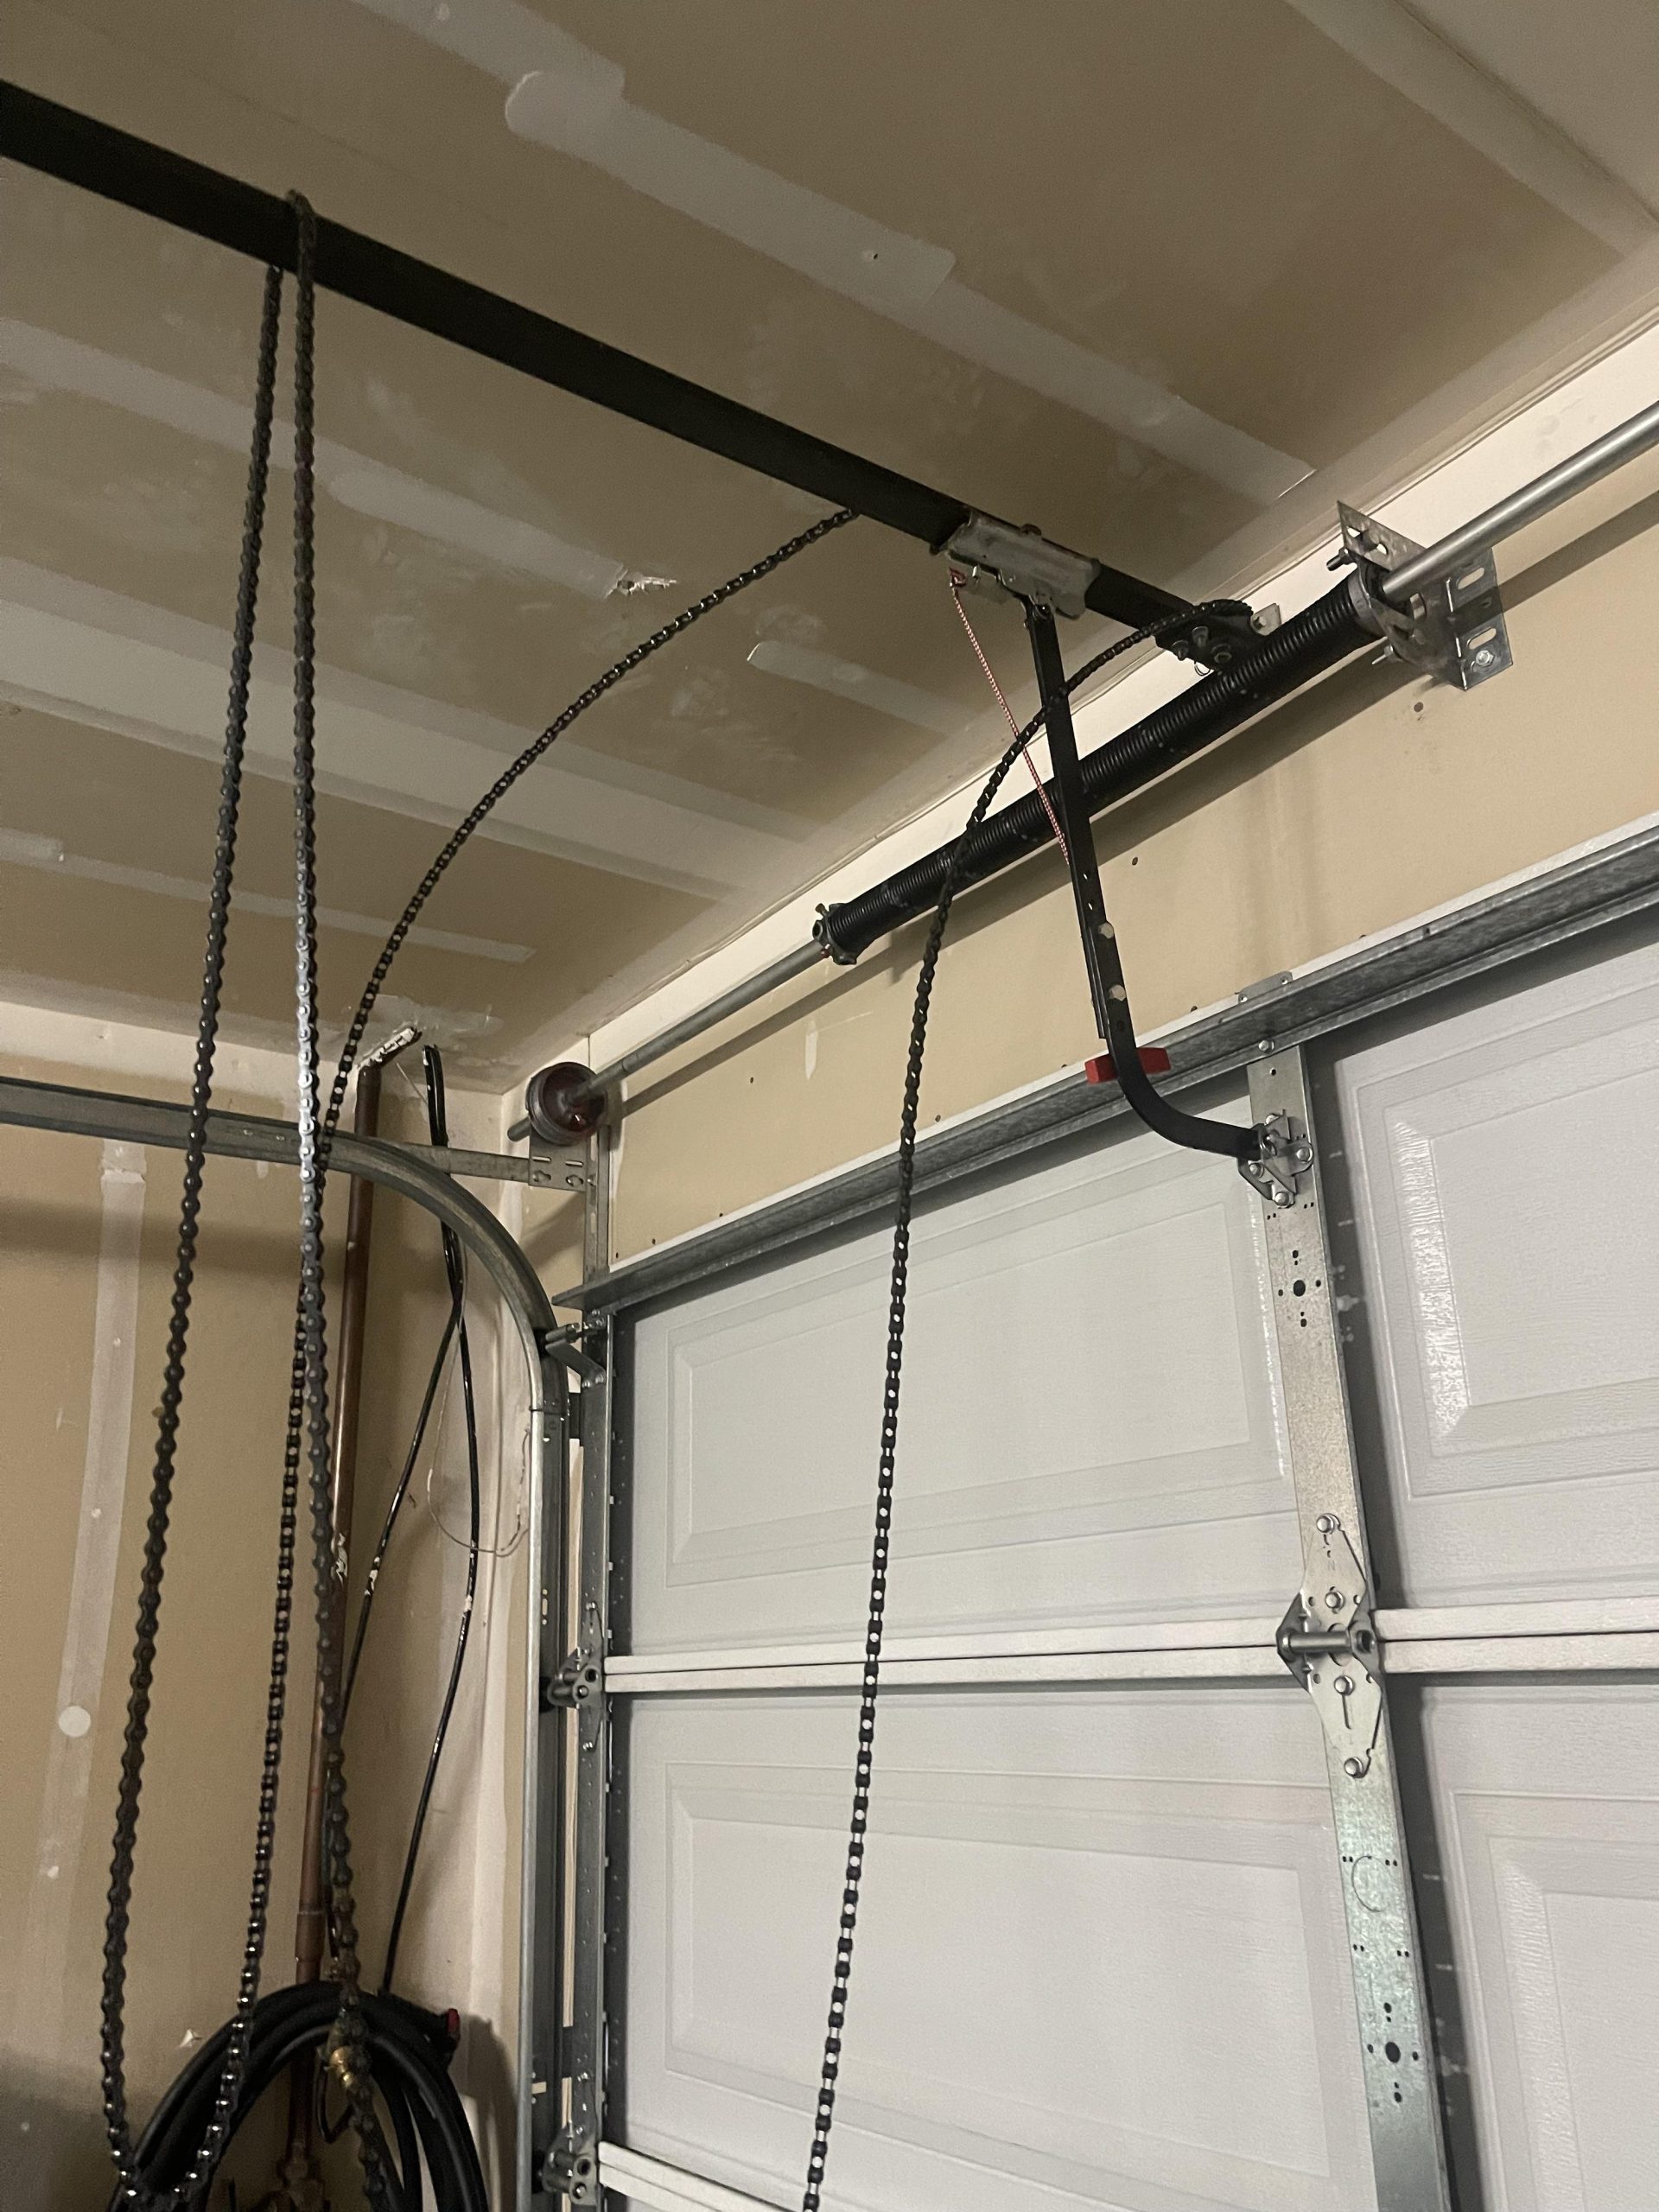
There are few sounds more alarming to a homeowner than the loud clatter of a garage door chain jumping off its sprocket. If you are currently staring at a slack, derailed chain and wondering how to put a garage door chain back on track, you are not alone, and this is often a fixable DIY task. This guide will walk you through the safe, systematic process of reseating your chain, ensuring your garage door operates smoothly and securely once again.
Why Does a Garage Door Chain Come Off the Track?
Before attempting a repair, it is vital to understand the root cause to prevent immediate recurrence. According to industry data from the International Door Association (IDA), nearly 30% of premature garage door opener failures stem from neglected tension adjustments and lack of lubrication. When a chain derails, it is rarely just bad luck; it is usually a symptom of underlying mechanical stress.
Common causes include:
- Improper Chain Tension: A chain that is too loose can slip over the sprocket teeth during operation, while a chain that is too tight puts excessive strain on the motor shaft and bearings.
- Worn Sprocket or Gear: Over time, the plastic or metal teeth on the drive sprocket can wear down, losing their ability to grip the chain links effectively.
- Misaligned Rail: If the opener rail has shifted or bent, the chain path becomes distorted, forcing the chain off its intended track.
- Lack of Lubrication: Dry chains create friction and heat, leading to stretching and eventual derailment. For a deeper understanding of mechanical power transmission principles, you can refer to the Chain drive entry on Wikipedia.org.
- Obstruction in the Door Path: If the door itself is binding or hitting an obstacle, the sudden resistance can shock the chain off the sprocket.
Safety First: Critical Precautions Before Starting
Garage door openers combine high-tension springs with electrical components. Never skip safety protocols.
- Disconnect Power: Unplug the opener unit from the ceiling outlet or turn off the dedicated circuit breaker. This prevents accidental activation while your hands are near moving parts.
- Secure the Door: Manually lower the garage door completely and lock it in place using C-clamps on the tracks below the bottom rollers. This removes tension from the chain system.
- Wear Protective Gear: Use safety glasses and heavy-duty work gloves. Chain links can have sharp edges, and grease is difficult to remove from skin.
- Use a Stable Ladder: Ensure your ladder is rated for your weight plus tools, and position it on level ground directly beneath the opener unit.
Step-by-Step: How To Put A Garage Door Chain Back On Track
Follow these precise steps to reseat your chain safely. Most residential chain-drive openers require approximately 45–60 minutes for this repair.
Step 1: Inspect and Clean the Drive Assembly
Before repositioning the chain, wipe down the sprocket and rail with a degreaser. Remove built-up grime, rust, or debris that could interfere with proper seating. Inspect the sprocket teeth closely; if they appear hooked, flattened, or cracked, stop immediately. You must replace the sprocket before proceeding, as a worn sprocket will simply derail the chain again within days.
Step 2: Release Chain Tension
Locate the tension adjustment mechanism. On most modern openers, this is a threaded rod with two locking nuts positioned near the motor unit or at the end of the rail. Using a wrench, loosen the locking nuts and turn the adjustment bolt counterclockwise to create maximum slack. Do not force the chain onto the sprocket under tension; this damages both the chain and the sprocket teeth.
Step 3: Reseat the Chain Onto the Sprocket
With adequate slack created, manually guide the chain links back onto the drive sprocket teeth. Work slowly, ensuring each link sits fully in the tooth gap. Rotate the sprocket by hand (if possible) to verify the chain tracks smoothly without binding or skipping. The chain should sit centered on the sprocket, not riding against the side plates.
Step 4: Adjust Chain Tension to Specification
This is the most critical step. Proper tension allows approximately 1/4 inch to 1/2 inch of vertical movement at the midpoint of the rail when pressed with moderate finger pressure. Tighten the adjustment bolt clockwise in small increments, checking movement after each quarter-turn. Once correct tension is achieved, tighten the locking nuts securely against the adjustment bracket to prevent vibration-induced loosening.
Step 5: Lubricate and Test
Apply a dedicated garage door chain lubricant (never WD-40, which attracts dirt) along the entire chain length. Reconnect power and operate the door through one complete cycle while observing the chain. Listen for unusual grinding, clicking, or slapping sounds. If the chain runs smoothly and quietly, the repair is successful.
Pros and Cons of DIY Chain Repair vs. Professional Service
| Factor | DIY Repair | Professional Service |
|---|---|---|
| Cost | $15–$30 (lubricant & basic tools) | $150–$300+ (service call + labor) |
| Time Investment | 1–2 hours | 30–60 minutes (after scheduling) |
| Risk Level | Moderate (requires safety knowledge) | Low (trained technicians) |
| Warranty Impact | May void manufacturer warranty | Typically preserves warranty |
| Long-Term Reliability | Depends on diagnostic accuracy | Higher (professional diagnosis) |
| Best For | Simple derailments, confident DIYers | Worn parts, recurring issues, safety concerns |
When to Call a Professional Instead
While learning how to put a garage door chain back on track empowers many homeowners, certain situations demand expert intervention:
- The chain derails repeatedly within weeks of proper adjustment, indicating a deeper mechanical failure.
- The motor housing shows cracks or the output shaft has visible play/wobble.
- You discover damaged torsion springs during inspection. Spring replacement is extremely dangerous and should never be attempted without specialized training and tools.
- The opener is over 15 years old. At this age, component fatigue is widespread, and repair costs often exceed replacement value.
- You feel uncertain about any step. Your safety is worth far more than the cost of a service call.
Frequently Asked Questions (FAQ)
How often should I lubricate my garage door chain?
Most manufacturers recommend lubricating chain-drive openers every six months or after 500 operating cycles. Use only lithium-based or silicone garage door lubricants. Avoid petroleum-based products like WD-40, which dissolve existing grease and attract abrasive dust particles that accelerate wear.
Can I use a bicycle chain as a replacement for my garage door opener?
Absolutely not. Garage door opener chains are specifically engineered for low-speed, high-torque applications with precise pitch measurements matching the drive sprocket. Bicycle chains have different link dimensions, tensile strength ratings, and roller diameters. Using an incorrect chain risks catastrophic failure, property damage, or personal injury. Always use OEM-specified replacement chains.
What is the correct chain tension for my opener?
Proper tension allows 1/4″ to 1/2″ of vertical deflection at the rail’s midpoint. Consult your specific opener’s manual for exact specifications, as requirements vary between brands like LiftMaster, Genie, and Chamberlain. Over-tightening causes premature motor bearing failure; under-tightening leads to derailment and noisy operation.
Why does my chain keep coming off even after proper adjustment?
Recurring derailment typically indicates worn sprocket teeth, a bent rail, misaligned trolley, or internal gear damage. If tension and alignment are verified correct, the drive assembly likely requires component replacement. Continuing to operate a malfunctioning opener risks motor burnout or chain snap.
Is it normal for a new chain to stretch after installation?
Yes, initial “break-in” stretch of 1–2% is expected during the first 30 days of operation. Recheck and adjust tension after this period. Excessive stretching beyond 3% indicates a defective chain or improper lubrication. Document the installation date and retain purchase receipts for warranty claims.
How long does a garage door opener chain typically last?
With proper maintenance, chains last 10–15 years. Factors reducing lifespan include extreme temperatures, high humidity, frequent use (4+ cycles daily), and inadequate lubrication. Annual professional inspections can identify wear before failure occurs, extending overall system life and preventing emergency repairs.
Conclusion
Understanding how to put a garage door chain back on track saves money, builds confidence, and keeps your home secure. By following safety protocols, diagnosing root causes, and adjusting tension precisely, most homeowners can resolve this common issue in under an hour. Remember: when in doubt, call a certified technician. Your safety and your garage door’s longevity depend on getting it right.
Found this guide helpful? Share it on Facebook, X (Twitter), or Pinterest to help fellow homeowners tackle garage door repairs safely! Tag a friend who’s been battling a noisy, derailed chain—they’ll thank you later. 🔧🏠
Leave a Reply