Introduction
There are few things more frustrating than pulling into your driveway in the rain, only to realize you cannot remember how to sync your vehicle’s built-in system with your garage. If you have been searching for how to program your car to your garage door opener, you are not alone; this is one of the most common homeowner maintenance tasks that often gets postponed due to perceived complexity. The good news is that with the right guidance, you can achieve a seamless connection in under ten minutes, restoring both convenience and security to your daily routine.
This guide is designed to walk you through the process with empathy and precision, whether you are using a modern smart vehicle or an older model with a universal visor clip. We will cover safety protocols, specific programming steps, and troubleshooting advice to ensure you get it right the first time.
Understanding Your System: HomeLink vs. Universal Remotes
Before pressing any buttons, it is vital to identify which technology your vehicle uses. Most modern vehicles (post-2000) come equipped with HomeLink or Car2U systems integrated into the rearview mirror, overhead console, or sun visor. Older vehicles or aftermarket setups typically use a separate universal remote transmitter.
According to industry data from the International Door Association, over 75% of new vehicles sold in the US now feature integrated garage door controls as standard equipment. However, compatibility varies significantly based on the frequency of your garage door opener (GDO).
| Feature | Integrated HomeLink | Universal Clip-On Remote |
|---|---|---|
| Installation | Built-in factory hardware | Aftermarket accessory |
| Range | Typically 100–300 feet | Varies by battery strength |
| Compatibility | Rolling Code & Fixed Code | Mostly Fixed Code (older) |
| Aesthetics | Seamless/OEM look | Visible device on visor |
| Programming Steps | Vehicle + GDO Learn Button | Dip Switch Matching |
Note: Always consult your vehicle owner’s manual for specific button locations, as manufacturers place these controls differently.
Safety First: Pre-Programming Checklist
Safety should never be an afterthought when dealing with automated mechanical systems. Before you begin learning how to program your car to your garage door opener, please adhere to these critical precautions:
- Clear the Path: Ensure no people, pets, or objects are in the path of the garage door. The door will cycle multiple times during programming.
- Check Sensors: Verify that your photo-eye safety sensors are aligned and clean. If the beam is broken, programming may fail or the door may reverse unexpectedly.
- Battery Health: Weak batteries in your existing handheld remote can cause signal interference. Replace them before starting.
- Ladder Safety: If your “Learn” button is located high on the motor unit, use a stable stepladder. Never stand on chairs or unstable surfaces.
Step-by-Step: Programming HomeLink Systems
HomeLink is the industry standard for integrated vehicle transmitters. The process generally involves three phases: clearing old codes, training the vehicle, and syncing with the opener.
Phase 1: Clear Previous Codes (If Applicable)
If you bought a used car or previously programmed a different door, you must reset the system.
- Press and hold the two outer HomeLink buttons simultaneously.
- Hold for approximately 10 seconds until the indicator light flashes rapidly.
- Release the buttons. The system is now in “training mode.”
Phase 2: Train the Vehicle Transmitter
- Turn your vehicle ignition to the ON/RUN position (engine off is usually sufficient, but some models require running).
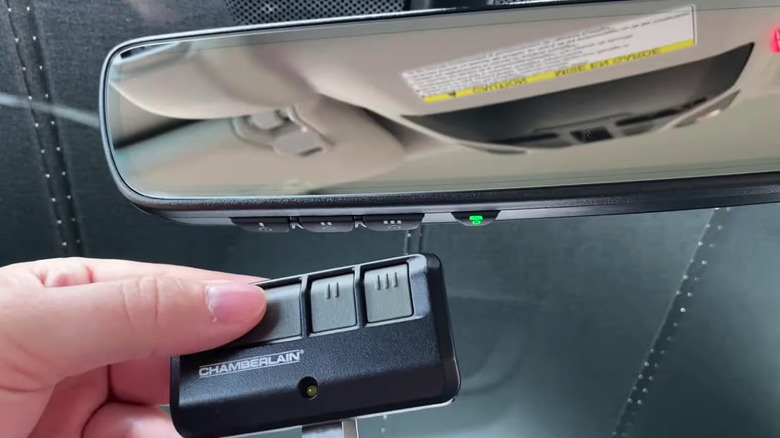
- Hold your existing handheld garage remote 1–3 inches away from the HomeLink buttons.
- Simultaneously press and hold the desired HomeLink button AND the button on your handheld remote.
- Watch the HomeLink indicator light. It will flash slowly at first, then rapidly when the frequency is captured. This typically takes 5–20 seconds.
- Release both buttons once the light flashes rapidly.
Phase 3: Sync with the Garage Door Motor
This step is mandatory for all rolling code openers (manufactured after 1996).
- Locate the “Learn” or “Smart” button on your garage door motor unit. It is usually colored yellow, purple, red, or orange.
- Press and release the Learn button. You typically have 30 seconds to complete the next step.
- Return to your vehicle and press the newly programmed HomeLink button three times, holding each press for 2 seconds.
- Test the door. If it operates smoothly, you have successfully completed the process.
Expert Insight: According to technical documentation referenced on Wikipedia, rolling code technology changes the transmission signal every time the button is pressed to prevent code grabbing. This is why Phase 3 is non-negotiable for modern security.
Troubleshooting: Why Won’t My Car Connect?
Even when following instructions perfectly, issues arise. Here are solutions to the most frequent problems encountered when figuring out how to program your car to your garage door opener:
- Light Flashes But Door Doesn’t Move: Your vehicle may require a Compatibility Bridge. Some newer cars cannot communicate directly with older openers without this intermediary device. Check the HomeLink compatibility checker online.
- Intermittent Operation: This often indicates radio frequency interference. LED bulbs in your garage opener can sometimes emit RF noise. Try temporarily removing LED bulbs to test if range improves.
- Programming Times Out: Ensure you are within the 30-second window after pressing the Learn button. Also, verify your handheld remote battery is fresh; a weak signal won’t transfer to the car.
- Door Reverses Immediately: Your safety sensors may be misaligned, or the travel limits need adjustment. Reprogramming will not fix mechanical safety faults.
FAQ: Common Questions About Garage Door Programming
1. Can I program my car to my garage door opener without a handheld remote?
Generally, no. Most vehicle systems require an existing functioning remote to “clone” the frequency. However, some newer smart garage systems allow direct Wi-Fi pairing via a smartphone app, bypassing the traditional RF cloning process entirely.
2. How many garage doors can I program into my car?
Most HomeLink systems support up to three distinct channels. This allows you to program your primary home garage, a detached workshop, and even a community gate or office parking facility simultaneously.
3. Will programming my car erase my existing handheld remotes?
No. Programming a vehicle transmitter adds a new device to the opener’s memory. It does not delete previously paired remotes or keypads unless you specifically perform a factory reset on the garage door motor itself.
4. Is it safe to program the door while the engine is running?
Yes, and it is often recommended. Some vehicles require the engine to be running to provide sufficient power to the transmitter module. Additionally, having the engine on prevents battery drain if the programming process takes longer than expected. Just ensure the garage is well-ventilated.
5. What if my garage door opener is older than 1996?
Openers manufactured before 1996 typically use fixed-code dip switches rather than rolling codes. These require matching physical switch positions inside the remote and the motor unit. Many modern vehicles are not backward compatible with these legacy systems without an adapter.
6. How do I know if my system uses rolling code technology?
Check the manufacturing date on the motor unit label. If it was made after 1996, it almost certainly uses rolling code. You can also identify it by the color of the Learn button; yellow, purple, and orange buttons typically indicate rolling code systems, while green or black buttons may indicate older fixed-code technology.
Conclusion
Mastering how to program your car to your garage door opener is a valuable skill that enhances your home’s functionality and your personal convenience. By understanding the difference between HomeLink and universal systems, prioritizing safety, and following the precise three-phase programming method, you can eliminate the frustration of fumbling for remotes forever. Remember that patience is key; if the first attempt fails, revisit the troubleshooting section before calling a professional.
Now that your vehicle is synced and your daily entry is seamless, why not help a neighbor or friend who might be struggling with the same issue? Share this guide on social media to spread the knowledge and make garage access easier for everyone in your community. Safe driving and happy parking!
Leave a Reply