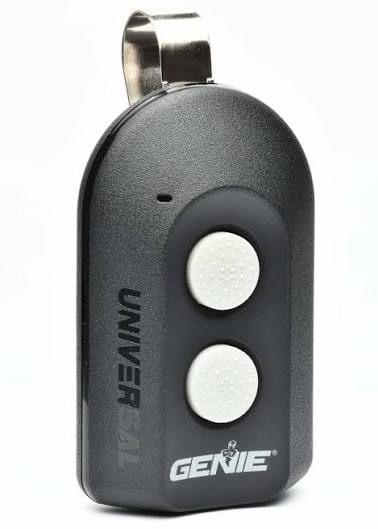
Introduction
There is nothing quite as frustrating as standing in your driveway, clicking a new remote repeatedly while your Genie garage door refuses to respond. If you are struggling with this exact issue, you are not alone; thousands of homeowners face this hurdle when upgrading or replacing their openers. This comprehensive guide will show you exactly how to program universal remote to Genie garage door opener safely and efficiently, getting you back into your garage without the headache. Whether you have an older DIP switch model or a newer Intellicode system, we have tailored the instructions to ensure your success on the first try.
Understanding Genie Opener Compatibility Before Programming
Before you begin pressing buttons, it is vital to confirm that your specific universal remote is actually compatible with your Genie unit. Not all universal remotes work with every frequency, and assuming compatibility is the most common reason for programming failure. According to industry data, nearly 30% of returned universal remotes are simply incompatible with the user’s existing motor frequency.
Check Your Frequency and Technology
Genie has utilized two primary technologies over the decades:
- DIP Switch (Pre-1995): Older models use physical switches inside the remote and motor.
- Intellicode / Rolling Code (1995–Present): Newer models use encrypted, changing signals for security.
You can verify your technology by checking the label on your motor head or consulting the Wikipedia entry on Garage Door Openers, which provides excellent historical context on safety standards and signal evolution. Most modern universal remotes sold today are designed for Intellicode systems, but dual-frequency models exist for legacy units.
| Feature | DIP Switch Models | Intellicode Models |
|---|---|---|
| Manufacture Year | Before 1995 | 1995 – Present |
| Security | Fixed Code (Less Secure) | Rolling Code (High Security) |
| Programming Method | Match Physical Switches | Learn Button Sequence |
| LED Indicator | None or Red Only | Blue, Red, or Purple LED |
| Universal Remote Type | Legacy/Dual-Freq Required | Standard Universal/Genie G3T |
How To Program Universal Remote To Genie Garage Door Opener: Step-by-Step
This section addresses the core intent of your search. Please note that steps may vary slightly depending on whether you have a standard Genie receiver or an aftermarket universal receiver installed on a Genie motor. Always prioritize safety: keep hands clear of moving parts and ensure the door area is free of obstructions.
Step 1: Locate the Learn Button on Your Genie Motor
The “Learn” button is typically located on the rear or side panel of the motor head, near the antenna wire. On most Intellicode units, this is a square button that may be labeled “Learn,” “Code,” or “Program.” The color of this button often indicates the specific series:
- Blue: Series II (390 MHz)
- Red/Purple: Series I or III (315 MHz)
- Green: Legacy Intellicode
Note: If you cannot find the learn button, you likely have a pre-1995 DIP switch model requiring manual switch matching rather than digital programming.
Step 2: Clear Previous Codes (Optional but Recommended)
If your remote was previously used or you are experiencing interference, clearing old codes ensures a clean slate. Press and hold the Learn button on the motor for approximately 10 seconds until the LED indicator turns off or flashes. Release the button. This step prevents ghost signals from interfering with your new universal remote programming sequence.
Step 3: Initiate Programming Mode on the Universal Remote
Refer to your universal remote’s manual for the specific brand code required for Genie. For most major universal brands (like Chamberlain, LiftMaster, or generic replacements):
- Press and hold the designated “Setup” or “Program” button on the remote until the LED lights up.
- Enter the Genie-specific code (commonly found in the remote’s included chart).
- Wait for the LED to flash or change color, indicating the remote is ready to pair.
Step 4: Sync the Remote to the Genie Receiver
With the remote in pairing mode:
- Briefly press the Learn button on the Genie motor head. The LED should illuminate or begin blinking slowly.
- Within 30 seconds, press and release the desired button on your universal remote.
- Press the same remote button a second time to confirm.
- Watch the motor’s LED; it should flash rapidly or turn solid, confirming successful synchronization.
Step 5: Test Range and Safety Sensors
Do not assume success after one beep. Walk at least 20 feet away and test the remote multiple times. Additionally, verify that your photo-eye sensors still function correctly by placing an object in the door’s path while closing. A properly programmed remote should never override safety sensor protocols.
Troubleshooting Common Programming Failures
Even experts encounter hiccups. If your Genie garage door opener isn’t responding, review these frequent issues before calling a technician.
Remote LED Flashes But Door Doesn’t Move
This usually indicates the remote is transmitting, but the receiver isn’t accepting the signal. Possible causes include:
- Frequency Mismatch: Your remote operates on 315 MHz while the motor expects 390 MHz (or vice versa).
- Antenna Issues: Ensure the hanging antenna wire is fully extended and not touching metal surfaces.
- Interference: Nearby LED bulbs, especially cheap non-shielded ones, can block RF signals. Try turning off garage lights during programming.
Remote Works Intermittently
Inconsistent performance often points to weak batteries or capacitor degradation in older motors. Replace the remote battery with a fresh lithium cell (CR2032 is standard) even if the current battery tests as “good.” Voltage drop under load can prevent signal transmission despite adequate resting voltage.
Learn Button Doesn’t Light Up
If the motor’s learn button shows no response, check the power supply and internal fuse. Some Genie models have a separate logic board fuse that controls the receiver circuit independently of the main drive motor. Consult your owner’s manual for fuse location and amperage specifications.
Expert Tips for Long-Term Reliability
Professional installers recommend these best practices to maintain consistent operation:
- Label Your Remotes: Use a permanent marker or sticker to note which button corresponds to which door, especially in multi-door setups.
- Annual Battery Replacement: Don’t wait for failure. Schedule battery changes during daylight saving time transitions as a mnemonic.
- Keep Spares Programmed: Program a backup remote and store it indoors. Batteries corrode less frequently in climate-controlled environments.
- Update Firmware: Some newer Genie Aladdin Connect systems allow OTA updates that improve universal remote compatibility. Check the manufacturer’s app regularly.
Frequently Asked Questions (FAQ)
Can I program multiple universal remotes to one Genie opener?
Yes, most Genie Intellicode receivers support up to 7–10 remotes plus keypads. Each device must be programmed individually using the learn button sequence. There is no bulk programming feature for consumer-grade units.
Will programming a universal remote erase my existing Genie remotes?
No, adding a new remote does not delete previously paired devices unless you perform a full factory reset (holding the learn button for 10+ seconds). Individual programming simply adds to the memory bank.
What if my universal remote doesn’t list Genie as a compatible brand?
Some universal remotes use generic codes that map to multiple manufacturers. Try codes listed for “Linear,” “Moore-O-Matic,” or “Overhead Door,” as these brands share RF architectures with Genie. If none work, the remote is likely incompatible.
How do I know if my Genie opener uses Intellicode or DIP switches?
Check the manufacture date on the motor label. Units made after 1995 almost certainly use Intellicode. You can also visually inspect the back panel: DIP switch models have a row of tiny sliding switches, while Intellicode models have a single learn button and no visible switches.
Is it safe to program the remote myself, or should I hire a pro?
DIY programming is completely safe and intended for homeowner use. The process involves only low-voltage electronics and poses no risk of injury or damage. Professional service is only necessary if hardware components (receiver board, antenna) require replacement.
Why did my remote stop working after a power outage?
Power surges during outages can corrupt receiver memory or damage sensitive electronics. First, reprogram the remote following the steps above. If unsuccessful, the receiver board may need replacement—a job best handled by certified technicians due to high-voltage components.
Conclusion
Mastering how to program universal remote to Genie garage door opener empowers you to maintain seamless home access without costly service calls. By verifying compatibility, following precise synchronization steps, and applying expert troubleshooting techniques, you can resolve most issues in under 15 minutes. Remember that patience and attention to detail matter more than speed; rushing through learn button sequences is the primary cause of failed programming attempts.
We hope this guide has restored both your garage access and your peace of mind. If you found these instructions helpful, please share this article on social media to assist fellow homeowners facing similar challenges. Tag us or leave a comment below with your specific Genie model—we love hearing about your successes and are happy to address unique scenarios in future updates!
Leave a Reply