Introduction
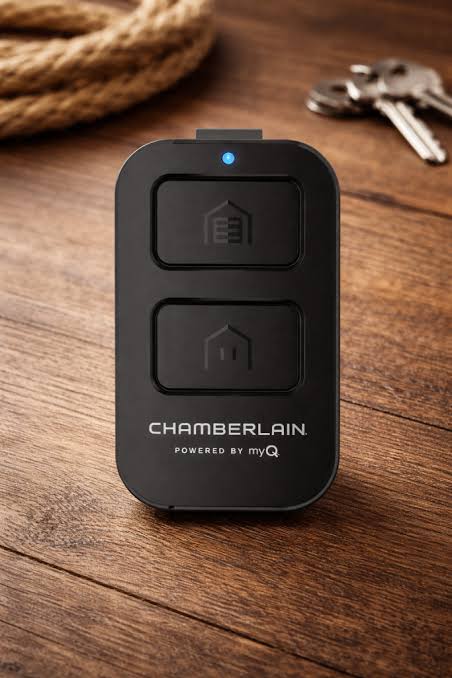
There are few things more frustrating than standing in your driveway, pressing a button repeatedly, and watching your garage door remain stubbornly closed. If you have recently purchased a new home, replaced an old remote, or simply want a backup for family members, figuring out how to program universal remote to Chamberlain garage door opener is likely at the top of your to-do list. We understand that dealing with garage door technology can feel intimidating, but rest assured that this process is designed to be user-friendly. In this comprehensive guide, we will walk you through every step with clarity and patience, ensuring you get back into your garage safely and quickly without needing to call a technician.
Understanding Compatibility Before You Start
Before diving into the physical programming steps, it is vital to confirm that your specific universal remote is actually compatible with your Chamberlain unit. Not all remotes speak the same language, even if they look similar. Chamberlain has utilized several different radio frequencies and security protocols over the decades, ranging from older DIP switch systems to modern Security+ 2.0 rolling code technology.
According to industry standards, most universal remotes manufactured after 2015 are backward compatible with Chamberlain openers produced from 1993 onward. However, verifying this prevents wasted time. Check the packaging of your universal remote or the manufacturer’s website for a compatibility list. Additionally, locate the “Learn” button on your Chamberlain motor head; its color (yellow, purple, orange, red, or green) often dictates which programming method you must use. This preliminary check is the foundation of successful synchronization and aligns with best practices recommended by garage door safety organizations and technical resources found on Wikipedia.org.
Step-by-Step: How To Program Universal Remote To Chamberlain Garage Door Opener
This section provides the core tutorial. Please read all steps before beginning to ensure safety and accuracy. Most modern universal remotes follow a similar “Learn Button” sequence, but always defer to your specific remote’s manual if these general steps differ slightly.
Step 1: Locate the Learn Button on the Motor Unit
Grab a sturdy stepladder and safely access the garage door opener motor mounted on the ceiling. Look for the “Learn” or “Smart” button. It is typically located on the back or side panel near the antenna wire. The button may be yellow, purple, orange, red, or green. Note: Do not confuse this with the limit adjustment screws.
Step 2: Clear Previous Codes (Optional but Recommended)
If you are programming a used remote or experiencing interference, press and hold the Learn button on the motor unit for approximately 6 to 10 seconds until the LED light turns off. This clears the memory. Release the button and wait for the light to stop flashing. This ensures a clean slate for your new universal remote.
Step 3: Activate Programming Mode on the Universal Remote
On your universal remote, identify the button you wish to assign to the garage door. Press and hold this button for 3 to 5 seconds until the remote’s LED begins to flash slowly. Some universal remotes require you to enter a specific brand code first (e.g., holding buttons 1 and 3 simultaneously). Consult your remote’s quick-start card for the exact Chamberlain/LiftMaster code if applicable.
Step 4: Sync the Remote to the Opener
Within 30 seconds of activating the remote, go back to the motor unit and press the Learn button once. The indicator light on the motor should illuminate steadily or begin blinking rapidly, indicating it is in pairing mode. Immediately return to your remote and press the designated button again firmly. Hold it for 1 to 2 seconds, then release.
Step 5: Test and Verify Operation
Press the programmed button on your remote. The garage door should activate, and the motor unit’s lights may flash or click to confirm successful pairing. Test the remote from various distances (10 feet, 20 feet, and outside the garage) to ensure consistent signal strength. If the door does not respond, repeat Steps 3 and 4, ensuring timing is precise.
Troubleshooting Common Programming Failures
Even when following instructions perfectly, technology sometimes hiccups. Here are solutions to the most frequent issues users encounter when learning how to program universal remote to Chamberlain garage door opener:
| Symptom | Likely Cause | Solution |
|---|---|---|
| Remote LED flashes but door doesn’t move | Frequency mismatch or dead battery | Replace battery with fresh CR2032; verify compatibility |
| Learn button light doesn’t turn on | Power issue or burnt-out LED | Check GFCI outlet; test wall console functionality |
| Remote works only within 2 feet | Signal interference or weak battery | Reposition antenna wire away from metal; replace battery |
| Door opens but won’t close via remote | Safety sensor misalignment | Clean sensor lenses; ensure nothing blocks infrared beam |
| Programming resets after power outage | Capacitor failure or logic board issue | Professional inspection may be required for older units |
Expert Tip: If your Chamberlain opener was manufactured before 1993, it likely uses DIP switches rather than a Learn button. Universal remotes for these vintage models require manually matching tiny switch positions inside both the remote and the motor unit. This is less common today but critical for historic home owners to recognize.
Safety Considerations During Programming
Garage doors are heavy mechanical devices, and safety must never be compromised during setup. Always keep fingers and tools clear of moving parts while testing. Never bypass or disable the photoelectric safety sensors located near the floor; these prevent the door from closing on people, pets, or objects. The U.S. Consumer Product Safety Commission mandates these sensors on all openers made after 1993, and tampering with them violates federal safety standards.
Additionally, ensure your stepladder is stable and rated for your weight plus any tools. Working alone at height carries risk; having a spotter is advisable. After successful programming, test the auto-reverse feature by placing a 2×4 piece of wood flat on the floor under the door’s path. The door should reverse immediately upon contact. If it does not, discontinue use and contact a certified technician.
Frequently Asked Questions (FAQ)
Can I program multiple universal remotes to one Chamberlain opener?
Yes, most Chamberlain openers can store between 8 and 20 remote codes depending on the model and year. Simply repeat the programming steps for each additional remote. Be aware that exceeding memory capacity may cause older codes to be overwritten, so reprogram essential remotes if you notice inconsistent behavior after adding many devices.
Why does my universal remote work intermittently after successful programming?
Intermittent operation usually stems from three causes: low battery voltage, radio frequency interference from nearby LED bulbs or transformers, or a damaged antenna wire. Start by replacing the battery with a premium brand. Next, temporarily turn off LED bulbs in the garage to test for interference. Finally, inspect the thin antenna wire hanging from the motor; if it is coiled tightly against metal or severed, straighten or repair it carefully.
Is there a difference between Chamberlain and LiftMaster programming?
No practical difference exists for end users. LiftMaster is Chamberlain’s professional-grade line sold through dealers, while Chamberlain-branded units are retail versions. They share identical internal technology, frequencies, and programming protocols. A universal remote listed as compatible with one brand will work identically with the other, simplifying your search for replacement parts.
What if my Chamberlain opener doesn’t have a Learn button?
Openers manufactured before 1993 lack Learn buttons and instead use 9-position DIP switches. You must open both the remote and motor housing to match switch positions exactly. Universal remotes for these legacy systems are still available but increasingly rare. Given the age and lack of modern safety features, upgrading to a current Chamberlain/LiftMaster unit is strongly recommended for safety and reliability.
How long does the entire programming process take?
For most users with compatible equipment, programming takes 5 to 10 minutes including setup and testing. First-timers or those troubleshooting compatibility issues should budget 20–30 minutes. If you exceed 30 minutes without success, pause and consult your remote’s manual or contact customer support rather than forcing repeated attempts, which can sometimes lock out the receiver temporarily.
Will programming a universal remote erase my existing keyless entry pad code?
Generally, no. Remotes and keyless entry pads occupy separate memory channels in Chamberlain openers. However, performing a full factory reset (holding Learn button for 10+ seconds) will erase all devices including keypads. Only perform a full reset if you intend to reprogram everything from scratch. Standard single-remote programming leaves your keypad intact and functional.
Conclusion
Mastering how to program universal remote to Chamberlain garage door opener empowers you with convenience, security, and independence from costly service calls. By understanding compatibility, following precise steps, prioritizing safety, and knowing how to troubleshoot, you transform a potentially stressful task into a manageable DIY victory. Remember that patience and attention to detail matter more than speed—every successful sync reinforces your confidence as a homeowner.
We hope this guide has resolved your garage door challenges and restored seamless access to your space. If you found this article helpful, please share it on social media with friends, family, or neighbors who might be struggling with their own garage door remotes. Your share could save someone hours of frustration and keep their household running smoothly. Thank you for trusting us as your resource for reliable, expert-backed home maintenance guidance!
Leave a Reply