Introduction
There is nothing quite as frustrating as standing in your driveway, pressing a remote button repeatedly, and watching your garage door remain stubbornly closed. If you own an older home or have inherited a legacy system, figuring out how to program universal garage door opener with dip switches can feel like deciphering an ancient code without a manual. We understand that dealing with tiny mechanical switches is far less intuitive than modern “smart” syncing, but getting this right restores both convenience and security to your daily routine. This comprehensive guide will walk you through the process safely and accurately, ensuring your universal remote communicates perfectly with your existing motor unit.
What Are DIP Switches and Why Do They Matter?
Before diving into the programming steps, it is vital to understand what you are actually adjusting. DIP stands for “Dual In-line Package.” These are small, manual toggle switches found inside both your garage door motor unit and your universal remote. Unlike modern rolling-code technology that generates billions of unique codes automatically, DIP switch systems rely on a fixed binary code.
According to technical documentation archived by Wikipedia, these electromechanical components were the industry standard for garage door openers manufactured between the 1960s and early 1990s. The position of each switch (up or down) creates a specific frequency pattern. If the pattern on your remote does not match the pattern on the motor unit exactly, the door will not respond. Understanding this mechanical relationship is the first step toward successful synchronization.
Fixed Code vs. Rolling Code: A Critical Distinction
Many homeowners attempt to program a universal remote only to fail because they have mismatched technologies. It is essential to verify your system type before proceeding.
| Feature | DIP Switch (Fixed Code) | Rolling Code (Modern) |
|---|---|---|
| Era | Pre-1993 | Post-1993 |
| Programming Method | Manual switch matching | “Learn” button sync |
| Security Level | Low (256–4,096 combinations) | High (Billions of combinations) |
| Remote Type | Sliding toggles inside case | Solid-state chip |
| Vulnerability | Susceptible to code grabbing | Encrypted & secure |
Note: If your motor unit has a colored “Learn” button instead of a panel of switches, stop reading this guide. You require rolling-code programming instructions.
Safety First: Preparing Your Workspace
Working with garage door openers involves electricity and heavy moving parts. Before you learn how to program universal garage door opener with dip switches, please adhere to these safety protocols:
- Disconnect Power When Inspecting Wiring: While changing switches on the remote is safe, if you need to open the motor housing to view the receiver switches, ensure the unit is unplugged or the breaker is off to prevent shock.
- Secure the Door: Ensure the garage door is fully closed and locked, or use vice grips on the track below a roller to prevent accidental movement while you are working near the springs.
- Use Proper Lighting: DIP switches are tiny. Use a flashlight or headlamp rather than relying on dim garage lighting to avoid misreading switch positions.
- Ladder Safety: Motor units are typically mounted 7+ feet high. Use a stable stepladder, never a chair or unstable surface.
Step-by-Step: Matching the DIP Switch Pattern
This is the core tutorial section. Follow these concrete steps precisely. Rushing this process is the most common cause of failure.
Step 1: Access the Motor Unit’s Receiver Panel
Locate the back or side panel of your garage door motor unit. You may need to remove a light lens cover or a plastic housing to access the DIP switch bank. There are typically 8, 9, or 12 switches arranged in a row.
- Action: Carefully note the exact position of every switch.
- Tip: Take a high-resolution photo with your phone flash on. This serves as your backup reference if you accidentally bump a switch during cleaning or inspection.
Step 2: Open Your Universal Remote
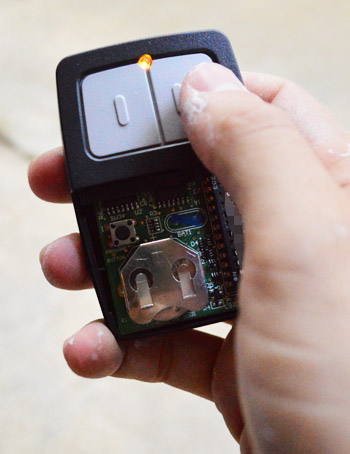
Remove the battery compartment cover and the batteries themselves. Look for a small sliding panel or a set of miniature switches inside the battery cavity. Some universal remotes require you to remove a screw to access the internal circuit board where the DIP switches reside.
- Check Compatibility: Verify that the number of switches on your remote matches the motor unit. An 8-switch remote cannot properly operate a 12-switch receiver.
Step 3: Match the Binary Pattern Exactly
Using a small flathead screwdriver, pen tip, or fingernail, adjust the switches on the universal remote to mirror the motor unit exactly.
- Precision Matters: “Up” must mean up. “Down” must mean down. Even one switch being slightly centered or ambiguous will break the circuit.
- Clean Contacts: If the switches look dusty or corroded, gently slide them back and forth several times to clean the internal contacts before setting the final position. Oxidation is a frequent silent killer of signal transmission in older units.
Step 4: Reassemble and Test Signal Range
Reinsert the batteries and close the remote housing. Stand at least 15 feet away from the door (to test range, not just proximity) and press the button firmly.
- Success Indicator: The door should activate immediately.
- Partial Success: If the motor hums but the door doesn’t move, the code is correct, but you may have a mechanical issue unrelated to programming.
- Failure: If nothing happens, re-verify every single switch position against your reference photo.
Troubleshooting: When the Door Still Won’t Open
If you have matched the switches perfectly and the system still fails, consider these expert-level diagnostics:
1. Frequency Mismatch
DIP switches control the code, not the frequency. Older openers operated on various frequencies (e.g., 288 MHz, 300 MHz, 310 MHz, 390 MHz). If your universal remote is designed for 315 MHz but your opener uses 288 MHz, no amount of switch matching will work. Check the label on your motor unit for the specific MHz rating and ensure your universal remote packaging lists compatibility with that exact frequency.
2. Weak Battery Voltage
Universal remotes often require higher voltage to transmit the stronger signal needed for older receivers. Even if a battery tests at 1.4V, it may lack the amperage to drive the transmitter. Always use brand-new alkaline batteries when testing programming; do not rely on partially used cells.
3. Interference from LED Bulbs
A relatively new problem affecting old systems: LED light bulbs installed in the garage door opener fixture can emit radio frequency interference that blocks DIP switch signals.
- Test: Unscrew the light bulb entirely and try the remote again. If it works, replace the bulb with an RF-shielded LED specifically rated for garage door openers or revert to incandescent.
4. Receiver Board Failure
If the unit is over 30 years old, the receiver board itself may have failed. Capacitors degrade over time. If you have confirmed frequency compatibility, fresh batteries, correct switch alignment, and no interference, the receiver may need replacement or professional servicing.
Pros and Cons of Maintaining DIP Switch Systems
While we focus on how to program universal garage door opener with dip switches, responsible SEO content must address whether you should keep using this technology.
Advantages:
- Simplicity: No complex pairing sequences or Wi-Fi dependencies.
- Cost: Replacement remotes are inexpensive ($10–$20).
- Longevity: Mechanical switches rarely suffer software corruption.
Disadvantages:
- Security Risk: Fixed codes can be intercepted or brute-forced. Neighbors with similar switch settings could accidentally open your door.
- Limited Compatibility: Newer vehicles with built-in transmitters (like HomeLink) often do not support fixed-code DIP systems without a conversion kit.
- Wear and Tear: Physical switches eventually fail after decades of use.
Expert Insight: Security professionals recommend upgrading to a rolling-code system if your home is in a densely populated area. However, for rural properties or secondary structures where budget is paramount, properly maintained DIP systems remain functional. Always weigh convenience against security based on your specific environment.
Frequently Asked Questions (FAQ)
Can I use a modern smart remote with my old DIP switch opener?
Generally, no. Most smart remotes and vehicle-integrated systems use rolling-code technology. However, you can purchase a universal receiver conversion kit that installs alongside your old motor. This kit provides a modern “Learn” button receiver that translates new signals to your old motor, effectively bridging the gap without replacing the entire opener.
How many possible codes does a 9-position DIP switch have?
A 9-position switch offers 512 possible combinations (2^9). An 8-position offers 256, and a 12-position offers 4,096. This limited pool is why security experts advise upgrading; in a neighborhood with 100 homes using 8-switch openers, statistical probability suggests multiple homes share identical codes.
Why did my programmed remote stop working after six months?
Three common culprits: (1) Battery corrosion leaking onto the switch contacts, (2) Vibration from the motor causing a switch to shift position over time, or (3) Environmental humidity causing oxidation on the switch internals. Clean the switches with electronic contact cleaner and ensure batteries are removed during long storage periods.
Is it legal to own a DIP switch garage door opener?
Yes, ownership is legal. However, manufacturing and selling fixed-code openers was banned in the United States after January 1, 1993, due to safety and security concerns under federal consumer protection regulations. Existing units are grandfathered in, but replacement parts are becoming increasingly scarce.
Can I change my DIP switch code to improve security?
Absolutely, and you should. Change the pattern on both the motor unit and all remotes simultaneously to a random configuration. Avoid patterns like all-up, all-down, or alternating sequences, as these are commonly tested first by opportunistic intruders. Document your new code securely.
What if my remote has more switches than my opener?
Extra switches on the remote are typically unused and should be left in the default position specified by the remote manufacturer (usually all “down” or “off”). Consult your universal remote’s manual for specific guidance on handling surplus switches. Never assume extra switches can be ignored without verification.
Conclusion
Mastering how to program universal garage door opener with dip switches is a valuable skill for any homeowner maintaining a legacy property. By understanding the mechanical nature of fixed codes, following precise matching procedures, and troubleshooting systematically, you can restore reliable operation without expensive service calls. Remember to prioritize safety, verify frequency compatibility, and honestly assess whether your aging system still meets your security needs.
If this guide helped you get your garage door working again, we’d love for you to share it! Post this article on Facebook, Pinterest, or your neighborhood Nextdoor group to help fellow homeowners tackle their own DIP switch challenges. Your share might save someone else a frustrating evening in the driveway. Have questions not covered here? Drop a comment below—our community of DIY enthusiasts and professionals is always ready to help. Stay safe, stay secure, and keep those doors opening smoothly!
Leave a Reply