Have you ever pulled into your driveway, pressed your car’s HomeLink button, and watched in frustration as nothing happened? You’re not alone. Many homeowners struggle when trying to sync their vehicle’s built-in transmitter with their Genie garage door opener. Whether you’ve just bought a new car or installed a fresh Genie unit, getting these two systems to communicate can feel like solving a puzzle without the picture on the box. But don’t worry—learning how to program HomeLink to Genie garage door opener is simpler than you think, and we’re here to walk you through every single step.
Why Does HomeLink Need Special Programming for Genie Openers?
Before diving into the steps, it helps to understand why this process isn’t always plug-and-play. HomeLink is a universal radio frequency (RF) transmitter built into many modern vehicles from brands like Ford, Toyota, Honda, BMW, and Mercedes-Benz. It mimics your original handheld remote by sending signals to your garage door opener.
However, Genie openers use specific rolling code technology for security. This means each time you press the button, the code changes to prevent hackers from intercepting and reusing it. Because of this advanced encryption, simple “copy-paste” programming doesn’t work. You must follow a precise sequence to pair your car’s HomeLink system with your Genie receiver properly.
According to industry standards, over 80% of modern garage door openers now use rolling code technology. Learn more about rolling code security protocols on Wikipedia. Understanding this background helps you appreciate why patience and precision matter during setup.
Step-by-Step Guide: How to Program HomeLink to Genie Garage Door Opener
Programming your HomeLink involves three main phases: clearing old codes, training the HomeLink button, and syncing with the Genie motor head. Let’s break it down.
Step 1: Clear Existing HomeLink Codes (If Necessary)
If your HomeLink buttons have been used before, they might still hold old codes. Start fresh to avoid conflicts.
- Sit in your car with the ignition turned to the “On” or “Accessory” position.
- Press and hold the two outer HomeLink buttons simultaneously.
- Keep holding them for about 20–30 seconds until the indicator light begins to flash rapidly.
- Release the buttons. The rapid flashing confirms that all previous codes are erased.
Pro Tip: If you only want to clear one specific button, consult your vehicle’s owner manual, as some models allow individual button resets.
Step 2: Train the HomeLink Button
Now, you’ll teach your car to recognize the signal from your Genie remote.
- Take your original Genie handheld remote.
- Hold it 1–3 inches away from the HomeLink buttons in your car.
- Press and hold the desired HomeLink button in your car.
- While holding the car button, press and hold the button on your Genie remote.
- Keep both buttons pressed until the HomeLink indicator light changes from slow blinking to rapid flashing. This usually takes 10–20 seconds.
- Release both buttons.
At this point, your car has learned the basic signal structure. However, because Genie uses rolling codes, you’re not done yet.
Step 3: Sync with the Genie Motor Head (The “Learn” Button)
This is the most critical step. You must complete the handshake between your car and the actual garage door motor.
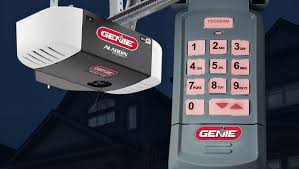
- Locate the “Learn” or “Program” button on your Genie garage door opener motor unit. This is typically found on the back or side of the hanging unit in your garage ceiling. It may be colored purple, red, or green depending on the model.
- Press and release the Learn button. The LED light on the motor will turn on or start blinking. You usually have 30 seconds to complete the next action.
- Return to your car immediately.
- Press and hold the programmed HomeLink button for 2–3 seconds, then release.
- Wait a few seconds, then press and hold it again for 2–3 seconds.
- Repeat this press-release cycle up to three times.
- Watch the garage door. If it moves (opens or closes), the programming was successful!
| Action | Expected Result |
|---|---|
| Clear Old Codes | Rapid flashing light on HomeLink panel |
| Train with Remote | Light changes from slow to rapid blink |
| Press Learn Button | LED on motor unit activates |
| Press HomeLink in Car | Garage door responds physically |
Troubleshooting Common Issues
Even with careful following, things can go wrong. Here are solutions to frequent problems users face when learning how to program HomeLink to Genie garage door opener.
The Garage Door Doesn’t Respond
If the door doesn’t move after pressing the Learn button:
- Check Distance: Ensure you are within range. Sometimes, being too far inside the car blocks the signal. Try opening the window or stepping out slightly while pressing the button.
- Battery Check: Weak batteries in your Genie handheld remote can interfere with the initial training phase. Replace them if they are older than a year.
- Timing: Did you wait too long after pressing the Learn button? You only have a 30-second window. If it expires, press the Learn button again and retry quickly.
The Light Flashes But Nothing Happens
This often indicates a compatibility issue or an incomplete rolling code sync.
- Repeat the Sync Process: Go back to Step 3. Some Genie models require you to press the HomeLink button twice in quick succession rather than holding it. Experiment with short presses instead of long holds.
- Interference: Other electronic devices nearby (like LED bulbs or Wi-Fi routers) can cause RF interference. Try turning off nearby electronics temporarily during setup.
HomeLink Works Intermittently
If it works sometimes but not others:
- Reprogram: Clear the code and start over. Interference during the initial setup can create a weak connection.
- Check Antenna: Ensure the antenna wire on your Genie motor unit is hanging down freely and not wrapped around metal brackets.
Differences Between Genie Models
Not all Genie openers are identical. Knowing your model helps tailor the approach.
- Genie Intellicode (Older Models): These use dip switches or simple rolling codes. They are generally easier to program and may not require the strict “press-release” method in Step 3.
- Genie Aladdin Connect / Modern Intellicode: These newer smart models have stricter security. They almost always require the full three-step process described above. If you have a smart Genie opener connected to Wi-Fi, ensure the firmware is updated via the Aladdin Connect app before attempting HomeLink pairing.
FAQ Section
1. Can I program multiple cars to one Genie opener?
Yes! Your Genie opener can store multiple remote codes. Simply repeat the entire programming process for each vehicle. Most Genie units support up to 8–10 different remotes or HomeLink systems.
2. Do I need my original Genie remote to program HomeLink?
In most cases, yes. The original remote is required for Step 2 (Training the HomeLink Button). If you’ve lost your remote, you may need to buy a replacement universal remote compatible with Genie or contact Genie support for alternative programming methods involving the keypad.
3. Why does my HomeLink work only when I’m very close to the garage?
This suggests a weak signal transmission. Check your car’s battery health, as low voltage can affect RF power. Also, ensure there are no large metal objects blocking the line of sight between your car and the garage sensor. Reprogramming often fixes signal strength issues.
4. Is it safe to use HomeLink with rolling code technology?
Absolutely. Rolling code technology is designed specifically for security. Each time you press the button, a new unique code is generated. This prevents “code grabbing” theft techniques. HomeLink is certified to meet these high-security standards.
5. What if my car doesn’t have HomeLink?
If your vehicle lacks built-in HomeLink, you can purchase an aftermarket universal garage door remote that clips onto your visor. These devices function similarly to HomeLink but are external additions. Brands like Genie, LiftMaster, and Chamberlain offer compatible visor clips.
Conclusion
Mastering how to program HomeLink to Genie garage door opener transforms your daily routine. No more fumbling for remotes in the rain or worrying about losing small devices. By following the three key steps—clearing old codes, training with your handheld remote, and syncing with the motor’s Learn button—you ensure a secure and reliable connection.
Remember, patience is key. If it doesn’t work the first time, double-check your timing and battery levels. With a bit of persistence, you’ll enjoy the seamless convenience of driving straight into your garage with just the push of a button.
Did this guide help you get your garage door working? Share this article with friends or family who might be struggling with their own Genie setups! Don’t forget to bookmark this page for future reference.
Leave a Reply