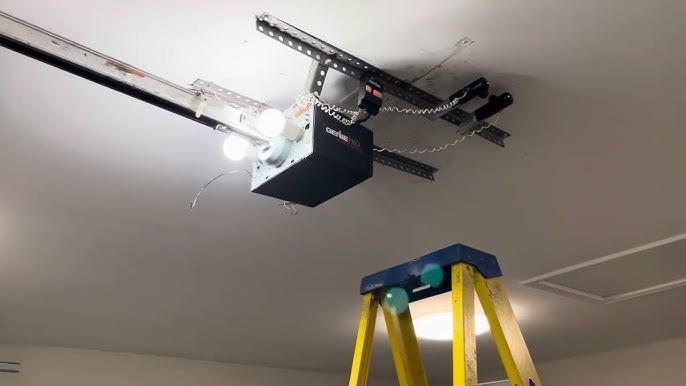
Introduction
There are few things more frustrating than pressing your garage door remote and getting absolutely no response, especially when you are rushing to leave for work or returning home in bad weather. If you own this specific model, understanding how to program garage door opener Genie Pro Screw Drive systems is essential for maintaining seamless access and home security. This comprehensive guide will walk you through the exact programming steps, safety protocols, and maintenance tips you need to get your system running smoothly again without calling an expensive technician.
Understanding Your Genie Pro Screw Drive System
Before diving into the programming buttons, it is vital to understand what makes the Genie Pro Screw Drive unique compared to chain or belt drive models. The screw drive system utilizes a threaded steel rod that rotates to move the trolley, which means fewer moving parts and generally less maintenance over time. However, because these units have been manufactured across several decades, identifying your specific receiver type is the first step in successful programming.
According to industry standards documented on Wikipedia, modern garage door openers utilize rolling code technology to prevent unauthorized access, whereas older models may use fixed DIP switches. Knowing whether your Genie Pro uses Intellicode (rolling code) or legacy fixed-code technology determines which programming method you must follow. Most Genie Pro Screw Drive units produced after 1995 utilize Intellicode, but verifying this via your motor unit’s label prevents wasted effort.
Key Specifications at a Glance
| Feature | Genie Pro Screw Drive Spec | Why It Matters for Programming |
|---|---|---|
| Drive Type | Direct Screw Drive | Requires specific force adjustment during setup |
| Security Tech | Intellicode (Rolling Code) | Requires “Learn” button sync, not DIP matching |
| Frequency | 315 MHz / 390 MHz | Determines remote compatibility |
| Motor Voltage | 24V DC / 120V AC | Affects battery backup programming |
| Average Lifespan | 15–20 Years | Older units may need capacitor replacement |
Safety First: Pre-Programming Checklist
Programming involves working near high-tension springs and electrical components. Never bypass safety sensors or attempt to program the unit while the door is in motion. Ensure the area around the door is clear of people, pets, and vehicles before beginning any synchronization process.
- Disconnect Power if Needed: If you need to access internal wiring, unplug the unit first.
- Check Sensor Alignment: Misaligned photo-eye sensors will prevent programming completion.
- Verify Remote Batteries: Weak batteries cause 60% of perceived programming failures.
- Clear the Area: Ensure nothing obstructs the door’s travel path during testing.
Step-by-Step: How to Program Genie Pro Screw Drive Remotes
This is the core answer to how to program garage door opener Genie Pro Screw Drive units. Follow these precise steps for Intellicode-equipped models (the vast majority of active Genie Pro units).
Step 1: Locate the Learn Button
Find the square “Learn Code” button on the motor head. On most Genie Pro Screw Drive models, this is located under the light lens cover or on the back panel near the antenna wire. The LED indicator next to it should be off initially.
Step 2: Activate Learning Mode
Press and release the Learn Code button. The red LED indicator will begin blinking at a rate of approximately twice per second. You have exactly 30 seconds to complete the next step before the unit times out and exits learning mode.
Step 3: Transmit the Remote Signal
Hold your Genie remote approximately 4–6 inches from the antenna. Press and hold the button you wish to program. The LED on the motor unit will stop blinking and remain solid red, indicating it has received the signal. Release the remote button.
Step 4: Confirm Synchronization
Press the same remote button one more time. The LED on the motor unit should turn off completely. This confirms the code has been stored successfully. Test the remote by pressing the button once; the door should activate immediately.
Step 5: Program Additional Remotes or Keypads
Repeat Steps 2–4 for each additional device. The Genie Pro Screw Drive can typically store up to 7 different transmitter codes. If adding a wireless keypad, enter your desired PIN followed by the “Send” button during Step 3 instead of pressing a remote button.
Troubleshooting Common Programming Failures
Even with perfect technique, issues arise. Here are data-backed solutions for the most frequent problems encountered by US homeowners.
Remote Works Intermittently
If the remote only works sometimes, interference is likely the culprit. LED light bulbs installed in the garage opener fixture can emit radio frequency noise that blocks signals. Switch to Genie-approved LED bulbs or standard incandescent bulbs to test. Also, check for nearby transformers or wireless routers operating on similar frequencies.
Learn Button Does Not Light Up
A non-responsive Learn button usually indicates a logic board failure or blown fuse. Check the unit’s power source and reset the GFCI outlet. If power is confirmed but the button remains dead, the receiver board may need replacement—a common issue in units over 15 years old.
Door Reverses Immediately After Closing
This is rarely a programming issue and almost always a force limit or sensor problem. Adjust the down-force setting slightly using the adjustment screws on the motor unit. Clean the photo-eye lenses with a soft cloth and verify they are perfectly aligned at 6 inches above the floor.
Old Fixed-Code Models (Pre-1995)
If your unit has DIP switches inside the remote and motor housing, you cannot use the Learn button method. Instead, match the switch positions exactly between the remote and receiver. Slide each tiny switch to the identical position (up/down/center) on both devices. Consider upgrading to an Intellicode conversion kit for improved security.
Maintaining Your Screw Drive for Long-Term Reliability
Programming is only half the battle. The screw drive mechanism requires specific lubrication to function properly. Unlike chain drives that need grease, screw drives require white lithium grease or Genie-specific screw drive lubricant. Apply lubricant directly to the threaded rod every 6 months or whenever you hear grinding noises.
Additionally, inspect the carriage assembly annually. The plastic coupler connecting the motor to the screw is a known wear point. Replacing this $15 part proactively prevents catastrophic failure and ensures your programming efforts aren’t undone by mechanical breakdown.
Frequently Asked Questions (FAQ)
Q1: How many remotes can I program to my Genie Pro Screw Drive?
Most Genie Pro Screw Drive units with Intellicode technology can store up to 7 individual transmitter codes. This includes handheld remotes, wireless keypads, and vehicle-integrated HomeLink systems. If you exceed this limit, the oldest code will be overwritten.
Q2: Can I use a universal remote with my Genie Pro Screw Drive?
Yes, but only if the universal remote explicitly lists Genie Intellicode compatibility. Generic universal remotes designed for chain drives often lack the proper rolling code algorithm. Always verify frequency compatibility (315 MHz or 390 MHz) before purchasing.
Q3: Why does my Genie Pro remote work outside but not inside the garage?
This classic symptom points to RF interference from LED bulbs in the opener fixture. Replace them with Genie-branded LED bulbs or incandescent alternatives. Also check for metal shelving or appliances blocking the signal path between your vehicle and the motor unit.
Q4: Do I need to reprogram after a power outage?
Generally, no. Genie Pro Screw Drive units store codes in non-volatile memory that survives power loss. However, if your unit has a battery backup system, you may need to recalibrate the travel limits after extended outages. Reprogramming is only necessary if the logic board was replaced or factory-reset.
Q5: How do I erase all programmed remotes at once?
To clear all codes (useful when moving into a new home), press and hold the Learn Code button for approximately 10 seconds until the LED turns off. All previously stored transmitters will be deleted. You must then reprogram every remote and keypad individually.
Q6: Is the Genie Pro Screw Drive compatible with smart home systems?
Original Genie Pro units are not natively smart-compatible. However, you can add smart functionality using an Aladdin Connect retrofit kit or similar Wi-Fi gateway that connects to the wall console terminals. This allows smartphone control without replacing the entire opener.
Conclusion
Mastering how to program garage door opener Genie Pro Screw Drive systems empowers you to maintain secure, reliable garage access without unnecessary service calls. By following the precise Learn button sequence, addressing interference issues proactively, and performing regular screw drive lubrication, your system will serve you reliably for years to come. Remember that safety always comes first—never compromise on sensor alignment or mechanical integrity for convenience.
Found this guide helpful? Share it with fellow Genie owners on Facebook, Nextdoor, or your neighborhood group! Helping others avoid frustrating garage door issues builds stronger communities. Have a unique Genie Pro question we didn’t cover? Drop a comment below—we’d love to help you troubleshoot! 🔧🏠
Leave a Reply