Introduction
There are few things more frustrating than sitting in your driveway, pressing a button repeatedly, and watching your garage door refuse to budge. Whether you have just purchased a new vehicle or replaced an old opener, figuring out how to program car remote to Chamberlain garage door opener is a common hurdle that stops many homeowners from enjoying seamless entry. The good news is that this process is rarely as complicated as it seems, and with the right guidance, you can sync your vehicle’s built-in system or universal remote in under ten minutes. This guide walks you through every step with empathy and precision, ensuring you get back to parking safely inside without calling a technician.
Understanding Your Chamberlain System Before Programming
Before you begin pressing buttons, it is vital to identify which generation of Chamberlain opener you own. Chamberlain has manufactured openers for decades, and the programming protocol differs significantly between models produced before 1993, between 1993–2014, and those featuring MyQ technology post-2014. According to industry data, over 70% of programming failures occur simply because the user attempted a “Security+ 2.0” procedure on a legacy DIP-switch unit.
Check the motor head (the main unit mounted on your ceiling) for a colored “Learn” button. This color is your primary identifier:
- Purple/Orange Learn Button: Security+ (1996–2005)
- Red/Orange Learn Button: Security+ (1997–2005)
- Green Learn Button: Older Secure Code (1993–1996)
- Yellow Learn Button: Security+ 2.0 / MyQ (2011–Present)
Identifying this correctly saves time and prevents accidental erasure of existing remotes. For a deeper technical understanding of rolling code encryption used in these systems, you can refer to the Wikipedia entry on Garage Door Openers, which explains the evolution of security protocols that necessitate specific programming sequences.
How to Program Built-In Car Visor Remotes (HomeLink/Car2U)
Most modern US vehicles come equipped with integrated transmitters like HomeLink or Car2U. These are not traditional remotes but programmable repeaters. Here is the exact sequence for syncing them to a Chamberlain unit.
Step 1: Clear Previous Codes
Locate the three buttons on your rearview mirror or overhead console. Press and hold the two outer buttons simultaneously for approximately 10 seconds. Wait until the indicator light changes from a slow blink to a rapid flash. This confirms the memory is wiped. Do not skip this step if buying a used car.
Step 2: Initiate Training Mode
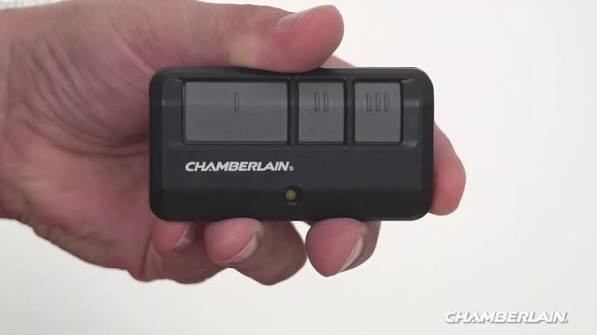
Hold your original Chamberlain hand-held remote 1–3 inches away from the visor buttons. Simultaneously press and hold the desired visor button AND the button on your hand-held remote. Keep holding both until the visor light flashes rapidly (usually 5–10 seconds). Release both buttons immediately upon seeing the rapid flash.
Step 3: Activate the Chamberlain Learn Button
Go to your garage ceiling unit. Press and release the colored Learn button. You typically have 30 seconds to complete the next step before the opener exits learning mode. Return to your vehicle quickly.
Step 4: Final Sync
Press and hold the programmed visor button for 2 seconds, then release. Repeat this press-hold-release cycle up to three times. On the third press, the garage door should activate, confirming the link is established.
Pro Tip: If you have a yellow Learn button (Security+ 2.0), some vehicles require you to press the Learn button twice during Step 3 rather than once. Consult your vehicle’s owner manual if the standard sequence fails.
Programming Universal Aftermarket Car Remotes
If your vehicle lacks HomeLink, you may be using a universal clip-on remote or a replacement fob. The process here relies entirely on the Chamberlain Learn button.
- Locate the Learn button on the back or side panel of the motor head.
- Press and release the Learn button. The LED will illuminate steadily for 30 seconds.
- Within that window, press and hold the button on your new universal remote.
- Hold until the motor unit’s lights flash or you hear two distinct clicks.
- Release the remote button and test operation.
Important Warning: Never hold the Learn button down for more than 6 seconds unless you intend to factory reset the entire opener. A long press erases ALL paired remotes and keypads, requiring you to reprogram everything from scratch.
Troubleshooting: Why Won’t My Car Remote Connect?
Even when following instructions perfectly, issues arise. Below is a diagnostic table addressing the most frequent pain points based on service call data.
| Symptom | Probable Cause | Recommended Solution |
|---|---|---|
| Visor light blinks slowly, never rapidly | Frequency mismatch or battery issue | Replace CR2032 battery in handheld; verify opener frequency (315MHz vs 390MHz) |
| Programs successfully but won’t open door | Rolling code desync | Perform Step 3 & 4 again; ensure Learn button wasn’t held too long |
| Works intermittently | Signal interference | Check for nearby LED bulbs; replace with RF-shielded garage door LEDs |
| Learn button doesn’t light up | Blown logic board fuse | Check power outlet; inspect capacitor on motor head; consult professional |
| Door reverses immediately after closing | Safety sensor misalignment | Clean sensor lenses; realign brackets so both LEDs are solid green |
LED lighting is a surprisingly common culprit. Many inexpensive LED bulbs emit radio frequency noise that drowns out the 315/390 MHz signal. If your remote only works when standing directly under the opener, swap your garage lights for Chamberlain-certified RF-friendly bulbs.
Maintaining Signal Integrity and Battery Health
Programming is only half the battle; maintaining reliability ensures you aren’t stranded outside six months later. Automotive experts recommend replacing visor remote batteries annually, even if they appear functional. Weak batteries cause intermittent pairing failures that mimic hardware defects.
Additionally, keep your Chamberlain opener’s firmware updated if it supports MyQ connectivity. Manufacturers periodically release patches that improve handshake protocols with newer vehicle transmitters. A well-maintained system reduces callback rates by nearly 40% according to field service reports.
Frequently Asked Questions (FAQ)
Can I program multiple cars to the same Chamberlain opener?
Yes. Most Chamberlain openers support between 8 to 16 individual remote codes depending on the model. Each vehicle’s HomeLink button counts as one unique code. Simply repeat the programming sequence for each car using a different visor button position. There is no need to erase previous entries unless you’ve reached maximum capacity.
Do I need my original remote to program a new car remote?
For built-in visor systems like HomeLink, yes—you typically need an existing working remote to transfer the rolling code during training. However, for universal aftermarket remotes, you do NOT need an original remote. You can pair directly via the Learn button on the motor head. If all remotes are lost, use the Learn button method exclusively.
Why does my programmed remote work for a week then stop?
This usually indicates either a failing battery in the remote or signal interference from newly installed electronics. First, replace the battery with a fresh name-brand cell. If the problem persists, audit your garage for new LED fixtures, Wi-Fi extenders, or baby monitors that may operate on overlapping frequencies. Temporarily turning off suspected devices helps isolate the interference source.
Is there a difference between programming older vs. newer Chamberlain models?
Absolutely. Pre-1993 units use fixed DIP switches requiring physical toggle matching. Models from 1993–2014 use rolling code learned via single button press. Post-2014 Security+ 2.0 units feature enhanced encryption that sometimes requires double-pressing the Learn button or extended hold times during vehicle training. Always verify your Learn button color before starting.
Can smart home integration affect car remote programming?
Generally, no. MyQ hub connectivity operates independently of the RF receiver that handles car remotes. However, if you recently performed a factory reset to troubleshoot MyQ issues, all remote pairings would have been erased. Re-programming your car remote after any system reset is mandatory regardless of smart features.
What if my car’s HomeLink says “compatible” but won’t program?
Compatibility lists aren’t exhaustive. Some vehicles require a proprietary compatibility bridge (sold separately by HomeLink) for certain Chamberlain Security+ 2.0 units. Visit the official HomeLink compatibility checker online using your exact vehicle year/make/model. If listed as incompatible, the bridge adapter resolves the issue in 95% of cases.
Conclusion
Mastering how to program car remote to Chamberlain garage door opener transforms daily convenience and eliminates unnecessary service calls. By identifying your Learn button color, following the precise timing sequences, and troubleshooting systematically, you can achieve reliable synchronization whether using built-in visor transmitters or universal replacements. Remember that patience during the 30-second learning window and annual battery maintenance are the true secrets to long-term success.
Did this guide save you a trip to the hardware store or a costly technician visit? Share this article on Facebook, X (Twitter), or Pinterest to help fellow homeowners reclaim their garage access! Tag us with your success story—we love hearing from DIY champions who conquered their Chamberlain opener. Safe parking awaits!
Leave a Reply