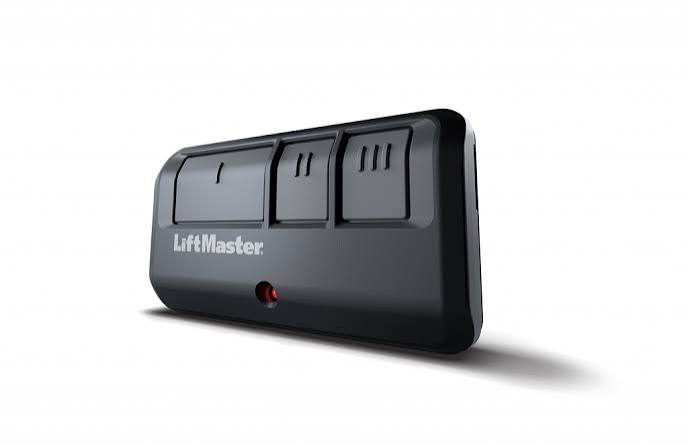
Introduction
There is nothing quite as frustrating as standing in your driveway, pressing a button repeatedly, and watching your garage door remain stubbornly shut. Whether you have lost your original opener, moved into a new home with mismatched hardware, or simply want a spare for a family member, figuring out how to program a universal remote control for garage door systems is an essential homeowner skill. This guide will walk you through the process with empathy and precision, ensuring you get back inside your garage safely and quickly without needing to call an expensive technician.
Understanding Universal Remote Compatibility
Before you attempt to sync any device, you must understand that “universal” does not mean “compatible with everything.” According to industry data from major manufacturers like Chamberlain and Genie, over 85% of garage door openers manufactured after 1993 utilize rolling code technology, while older models use fixed DIP switches. Identifying which system you have is the first critical step in learning how to program a universal remote control for garage door units successfully.
Rolling Code vs. Fixed Code Systems
Understanding the difference prevents hours of wasted effort. Here is a quick comparison to help you identify your system:
| Feature | Fixed Code (DIP Switch) | Rolling Code (Security+) |
|---|---|---|
| Era | Pre-1996 | 1996–Present |
| Security | Low (Static Signal) | High (Changes Every Use) |
| Programming | Match physical switches | Press “Learn” button on motor |
| Remote Type | 9-12 tiny internal switches | Single button sync |
| Compatibility | Older universal remotes | Modern universal remotes |
Expert Insight: Always check the manufacturing date sticker on your garage door motor head. If the unit was made after 1996, it almost certainly uses rolling code technology. Attempting to program a fixed-code remote to a rolling-code opener will fail 100% of the time.
For a deeper technical understanding of how these signals work, you can refer to the Garage Door Opener entry on Wikipedia.org, which details the evolution of radio frequency protocols and safety standards in residential automation.
Preparation: What You Need Before Starting
Success in programming relies heavily on preparation. Gather the following items before climbing the ladder:
- The Universal Remote: Ensure it explicitly lists your opener brand (LiftMaster, Genie, Craftsman, etc.) on the packaging.
- A Stable Ladder: Safety is paramount; never stand on chairs or unstable surfaces.
- Fresh Batteries: Weak batteries are the #1 cause of programming failure. Use high-quality alkaline batteries.
- Your Opener’s Manual: Or at least a photo of the model number plate.
- A Pen and Paper: To record settings or error codes.
Note: Always disconnect power to the opener if you need to access internal wiring, though most modern programming only requires external button presses.
Step-by-Step: How to Program a Rolling Code Universal Remote
This is the most common scenario for US homeowners. Follow these precise steps to ensure a successful sync.
Step 1: Locate the Learn Button
Find the “Learn” or “Smart” button on your garage door opener motor unit. It is typically located on the back or side panel near the antenna wire. The color matters:
- Yellow: Security+ 2.0 (2011–Present)
- Purple: Security+ (2006–2014)
- Red/Orange: Security+ (1997–2005)
- Green: Older rolling code (1993–1996)
Step 2: Clear Previous Codes (Optional but Recommended)
If this is a used remote or you are troubleshooting, hold the Learn button for 6–10 seconds until the LED goes out. This clears old memory. Warning: This erases ALL remotes and keypads; reprogram them afterward.
Step 3: Initiate Programming Mode
Press and release the Learn button. The LED will light up solid or begin blinking, indicating the unit is in pairing mode. You typically have 30 seconds to complete the next step before the window closes.
Step 4: Transmit the Signal
On your universal remote, press and hold the designated button. Watch the opener’s LED:
- Solid Light + Click: Success. Release the remote button.
- Blinking Light: Signal received but not accepted. Check battery or compatibility.
- No Response: Wrong frequency or incompatible protocol.
Step 5: Test Thoroughly
Test the remote from various distances (5ft, 15ft, 30ft). Verify that the door opens, closes, and stops correctly. Never assume it works perfectly after one test cycle.
Troubleshooting Common Programming Failures
Even professionals encounter issues. If you are still asking how to program a universal remote control for garage door devices because the above steps failed, consult this diagnostic list:
- LED Flashes But Door Doesn’t Move: The remote is paired, but the travel limits may need resetting. Consult your opener manual for limit adjustment procedures.
- Remote Works Only When Very Close: Replace batteries immediately. If new batteries don’t help, the opener’s logic board antenna may be damaged.
- Intermittent Operation: Check for LED bulb interference. Some cheap LED bulbs emit RF noise that blocks remote signals. Swap to garage-door-rated LEDs.
- Nothing Happens at All: Verify the universal remote supports your specific opener color-coded Learn button. Not all universals support Yellow Security+ 2.0 systems.
- Door Reverses Immediately: Safety sensors are misaligned or obstructed. This is a safety feature, not a programming error. Clean sensor lenses and realign brackets.
Frequently Asked Questions (FAQ)
Can I program a universal remote without the original remote?
Yes, absolutely. Universal remotes are designed specifically for this scenario. You program directly from the motor unit’s Learn button, bypassing the need for any existing transmitter. The original remote is irrelevant to the pairing process.
Why won’t my universal remote work with my Genie opener?
Genie uses proprietary Intellicode technology that some generic universals cannot replicate. Ensure your universal remote packaging explicitly states “Genie Compatible.” Also, verify you are using the correct button sequence; Genie often requires a double-press during programming.
Is it safe to program a garage remote myself?
Yes, programming is entirely safe as it involves only low-voltage button presses. However, installing or repairing the opener mechanism involves high-tension springs and electrical components that should be left to certified technicians. Stick to remote programming for DIY safety.
How long does programming take?
The actual syncing process takes less than 60 seconds. However, including preparation, testing, and potential troubleshooting, budget 15–20 minutes for your first attempt. Experienced users can complete it in under two minutes.
Will programming a new remote erase my car’s built-in opener?
No. Each device (handheld remote, keypad, car visor transmitter) operates independently. Adding a new universal remote does not affect previously programmed devices unless you intentionally clear the opener’s memory by holding the Learn button for extended periods.
My remote worked yesterday but stopped today—what happened?
Sudden failure usually indicates dead batteries, signal interference from new electronics, or a tripped GFCI outlet powering the opener. Check power first, then batteries, then reprogram as a last resort. Environmental changes (new neighbors, construction) can also introduce RF interference.
Conclusion
Mastering how to program a universal remote control for garage door systems empowers you to maintain your home’s security and convenience independently. By understanding your opener type, preparing properly, and following systematic steps, you can resolve access issues in minutes rather than waiting days for service calls. Remember that safety always comes first—if something feels wrong or exceeds your comfort level, professional help is just a phone call away.
Found this guide helpful? Share it with friends, family, or neighbors who might be stuck outside their own garages! Tag us on social media with your success stories or lingering questions—we love hearing from our community of DIY homeowners. Your share could save someone else a cold evening in the driveway. 🏠🔧
Leave a Reply