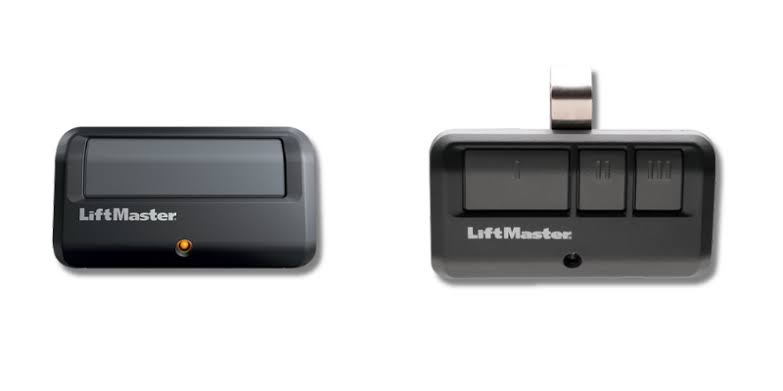
Introduction
There are few things more frustrating than standing in your driveway with groceries in hand, only to realize your garage door remote isn’t responding. Whether you’ve just moved into a new home, replaced an old remote, or reset your system, knowing how to program a remote to LiftMaster garage door opener is an essential homeowner skill that saves both time and service fees. This comprehensive guide walks you through every step with clarity and confidence, ensuring you get back to seamless access without the guesswork.
Programming a LiftMaster remote is generally straightforward, but the process varies slightly depending on the age and model of your opener. By following this expert-backed tutorial, you will not only solve your immediate problem but also understand the underlying technology, helping you troubleshoot future issues independently. Let’s get your garage door working perfectly again.
Understanding Your LiftMaster System Before Programming
Before pressing any buttons, it is critical to identify which type of LiftMaster system you own. LiftMaster has evolved significantly over the decades, and using the wrong programming method can lead to frustration or even security vulnerabilities.
According to industry data, LiftMaster (a brand under The Chamberlain Group) holds a significant share of the North American residential garage door opener market. Their systems generally fall into three categories based on the color of the “Learn” button located on the motor unit:
- Yellow Learn Button (Security+ 2.0): Found on models manufactured after 2011. Uses rolling code technology with enhanced encryption.
- Purple, Orange, or Red Learn Buttons (Security+): Common in models from 1997–2011. Also uses rolling codes but with earlier frequency standards.
- Green or No Learn Button (DIP Switch): Legacy models pre-1993. These use fixed codes and require matching physical switches inside the remote and motor.
Expert Note: Always check the manufacturer label on the back or side of your motor unit for the exact model number. Cross-referencing this with the official manual prevents compatibility issues. For a deeper understanding of how rolling code technology prevents signal theft, you can refer to the Wikipedia entry on Rolling Code, which explains the cryptographic principles behind modern garage door security.
Step-by-Step: How to Program a Remote to LiftMaster Garage Door Opener
This section covers the universal method applicable to most Security+ and Security+ 2.0 units (Yellow, Purple, Orange, Red Learn buttons). This answers the primary query of how to program a remote to LiftMaster garage door opener for the vast majority of users.
Step 1: Locate the Learn Button
Find the “Learn” button on the back or side panel of the garage door opener motor. It is typically colored yellow, purple, orange, or red. You may need to remove the light lens cover to access it on some older models.
Step 2: Clear Previous Codes (Optional but Recommended)
If you are programming a used remote or suspect interference, press and hold the Learn button for approximately 6 seconds until the LED indicator turns off. This erases all previously stored remotes and keypads. Note: You will need to reprogram all devices after doing this.
Step 3: Initiate Programming Mode
Press and release the Learn button once. The LED indicator will light up steadily or begin blinking, indicating the unit is in pairing mode. You typically have 30 seconds to complete the next step before the system times out.
Step 4: Sync the Remote
Within the 30-second window, press and hold the button on your remote that you wish to program. Hold it for 1–2 seconds, then release. Repeat this press-and-release action two more times (three presses total) to ensure the signal is captured.
Step 5: Confirm Success
Watch the motor unit’s lights. They should flash twice or emit two distinct clicks. This confirms the remote has been successfully programmed. Test the remote immediately from a safe distance to verify operation.
Quick Reference Table: Learn Button Colors & Compatibility
| Learn Button Color | Technology Era | Remote Compatibility | Programming Method |
|---|---|---|---|
| Yellow | 2011–Present | Security+ 2.0 (890MAX, 891LM) | Standard Learn Sequence |
| Purple | 2005–2014 | Security+ (971LM, 973LM) | Standard Learn Sequence |
| Orange/Red | 1997–2005 | Security+ (970 Series) | Standard Learn Sequence |
| Green | Pre-1997 | Fixed Code / DIP Switch | Match Physical Switches |
Troubleshooting: Why Won’t My Remote Program?
Even when you know how to program a remote to LiftMaster garage door opener, things don’t always go smoothly. Here are the most common failure points and their solutions:
- Dead Batteries: This accounts for nearly 60% of failed programming attempts. Always install fresh, high-quality alkaline batteries before starting. Avoid rechargeable batteries as they often lack the voltage spike needed for initial syncing.
- LED Not Lighting Up: If the Learn button doesn’t illuminate, check the power supply to the opener. Ensure the unit is plugged in and the circuit breaker hasn’t tripped.
- Remote Flashes But Door Doesn’t Move: The remote may be paired, but the travel limits could be misaligned. Consult your manual to recalibrate the open/close force settings.
- Interference Issues: LED light bulbs in the opener fixture can sometimes interfere with radio frequencies. Try removing the bulb temporarily during programming to test if this resolves the issue.
- Incompatible Remote: Verify that your remote’s frequency matches your opener. A Security+ 2.0 remote will not work with a green-button DIP switch opener, regardless of programming attempts.
Safety First: Critical Precautions During Programming
Garage doors are heavy mechanical systems. While programming is low-risk, always adhere to these safety standards:
- Keep Clear of Moving Parts: Never stand directly under the door while testing. Stand to the side where you have a clear view but are out of the door’s path.
- Test Safety Sensors: After programming, wave an object (like a broomstick) under the door while it closes. The door must reverse immediately upon breaking the sensor beam. If it doesn’t, do not use the opener until sensors are realigned.
- Secure Your Remote: Treat your garage remote like a house key. Don’t leave it visible in unlocked vehicles, as thieves often target them to gain home access.
- Disconnect Power for Hardware Work: If you need to open the motor housing for any reason beyond accessing the Learn button, unplug the unit first to prevent electrical shock.
Frequently Asked Questions (FAQ)
Q1: Can I program multiple remotes to the same LiftMaster opener?
Yes. Most LiftMaster openers can store between 8 to 32 remote controls depending on the model. Simply repeat the standard programming sequence for each additional remote. There is no need to clear existing codes unless you’ve reached the memory limit or want to remove lost remotes.
Q2: Do I need to reprogram my remote after changing the battery?
Generally, no. Modern LiftMaster remotes retain their coding in non-volatile memory. However, if the battery was dead for an extended period or if you performed a factory reset on the opener, reprogramming will be necessary. Always test the remote after a battery swap before assuming it needs re-syncing.
Q3: What if my LiftMaster opener doesn’t have a Learn button?
Openers without a Learn button typically use DIP switches (small sliding toggles inside both the remote and motor unit). To program these, open both casings and match the switch positions exactly. This technology is obsolete and less secure; upgrading to a modern Security+ 2.0 system is strongly recommended for improved safety and convenience.
Q4: How far away can I be when programming the remote?
You should be within 5 to 10 feet of the motor unit during programming to ensure a strong signal handshake. Once programmed, test the remote from your typical parking distance (usually 20–50 feet) to confirm reliable range. If range is poor, check for antenna damage or RF interference sources nearby.
Q5: Is it safe to program a remote myself, or should I hire a professional?
Programming a remote is a safe DIY task that requires no tools or electrical work. However, if you’re uncomfortable identifying your model, adjusting travel limits, or testing safety sensors, hiring a certified technician is wise. Professional service typically costs $75–$150 and includes a full safety inspection.
Conclusion
Mastering how to program a remote to LiftMaster garage door opener empowers you to maintain one of your home’s most-used entry points independently. By identifying your Learn button color, following the precise sync sequence, and observing safety protocols, you can restore seamless access in under five minutes. Remember to keep spare batteries on hand and test your safety sensors regularly to ensure ongoing reliability and security.
Did this guide help you get your garage door working again? Share this article on social media to help fellow homeowners avoid costly service calls! Tag a friend who’s been struggling with their remote, and let’s make DIY garage maintenance accessible for everyone. Your successful programming story might be exactly what someone else needs today.
Leave a Reply