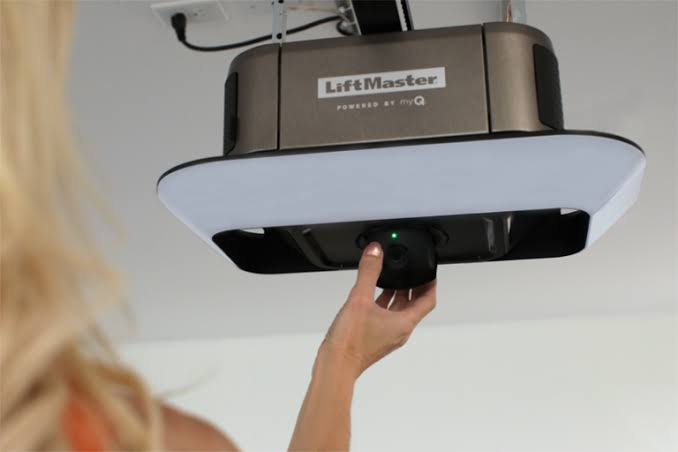
Fumbling for a bulky remote every time you pull into your driveway is incredibly frustrating, especially when your vehicle already has a built-in system. If you are wondering how to program a Liftmaster garage door opener to car, you are in the right place to solve this daily hassle. Let’s get your vehicle synced up seamlessly so you can drive in with just the push of a button!
How To Program A Liftmaster Garage Door Opener To Car
Before we dive into the physical steps, it is important to understand the technology you are working with. The system inside your vehicle is typically known as HomeLink (learn more about HomeLink on Wikipedia). This universal transceiver is designed to communicate directly with your garage door motor.
According to a recent industry report by the Door and Access Systems Manufacturers Association (DASMA), over 75% of US homeowners now prioritize integrated smart-home access. Syncing your car not only adds convenience but also improves your home security by removing the need for easily stolen visor clips.
Here is the exact, step-by-step process to get your system working perfectly.
Step 1: Clear Previous Vehicle Memory
If you bought a used car or previously programmed a different door, you must wipe the old data.
- Locate the HomeLink buttons on your rearview mirror or overhead console.
- Press and hold the two outer buttons simultaneously.
- Hold them for exactly 20 seconds.
- Release the buttons only when the indicator LED begins to flash rapidly.
Step 2: “Train” the Car to the Remote
You will need your original handheld Liftmaster remote for this step.
- Sit in the driver’s seat with the ignition turned to the “Accessory” position.
- Hold your handheld remote 1 to 3 inches away from the HomeLink button you wish to use.
- Press and hold both the handheld remote button and the chosen HomeLink button.
- Wait for the HomeLink LED to change from a slow blink to a rapid flash. This can take up to 45 seconds.
- Release both buttons once the rapid flash begins. Your car now knows the remote’s frequency.
Step 3: Sync the Liftmaster Motor Unit
Now you need to introduce your newly trained car to the actual garage door motor.
- Locate the “Learn” button on your Liftmaster motor unit (usually hanging from the ceiling). It is typically red, orange, purple, or yellow.
- Press and release the Learn button. An LED light will turn on or begin blinking.
- You now have a strict 30-second window to complete the next step.
Step 4: Finalize the Connection
- Quickly return to your vehicle.
- Press and hold the programmed HomeLink button for 2 seconds, then release.
- Repeat this press-and-hold process up to three times until the garage door begins to move.
- Expert Tip: If your Liftmaster has a yellow Learn Button (Security+ 2.0), you may need to press the car button repeatedly (up to 6 times) to complete the rolling-code handshake.
What You Need Before Programming
Preparation is the secret to a smooth DIY project. Gather these items before grabbing your ladder:
- A sturdy step ladder to safely reach the motor unit.
- Your original handheld remote (required for older models to bridge the frequency).
- Your vehicle owner’s manual (to locate the exact position of your car’s transceiver).
- A fresh battery in your handheld remote to ensure a strong signal during training.
Understanding Rolling Code Technology
Modern Liftmaster openers use “rolling code” technology. This means the access code changes every single time you use the remote, preventing thieves from “grabbing” your signal and opening your garage later.
When you learn how to program a Liftmaster garage door opener to car, you are essentially introducing your car to this secure sequence. If the sync fails, it is usually because the 30-second timing window was missed, or the rolling code handshake did not complete.
Built-In Car Systems vs. Traditional Visor Remotes
To help you understand the value of this setup, here is a quick text-infographic comparing the two methods:
Pros of Built-In Car Systems (HomeLink)
- Aesthetics: Keeps your car interior clean and clutter-free.
- Security: Cannot be easily spotted or stolen by thieves looking through windows.
- Power: Draws power directly from the vehicle, meaning no dead batteries.
- Integration: Often works with smart-home systems to turn on house lights upon arrival.
Cons of Built-In Car Systems
- Setup: Requires a one-time 10-minute programming process.
- Compatibility: Older vehicles may require an external compatibility repeater.
- Vehicle Bound: You cannot easily take the remote with you if you rent a car or drive a spouse’s vehicle.
Troubleshooting Common Programming Issues
Even with perfect instructions, technology can sometimes be stubborn. Here is how to solve the most frequent problems US homeowners face.
The LED flashes, but the door won’t open This usually indicates a frequency mismatch or a rolling-code error. Try replacing the battery in your handheld remote and repeating Step 2. Ensure you are holding the remote exactly 1 to 3 inches away from the car’s button.
The system worked yesterday, but not today If the power went out in your home, the Liftmaster motor might have lost its memory. You will need to repeat Step 3 and Step 4 to re-establish the link between the motor and your car.
My Liftmaster has a Yellow Learn Button Yellow buttons indicate Security+ 2.0 technology. Some older vehicles cannot communicate directly with this high-security frequency. If your car is pre-2015, you might need to purchase a HomeLink Compatibility Bridge (repeater) to act as a middleman between your car and the Liftmaster motor.
Frequently Asked Questions (FAQ)
Q1: Can I program a Liftmaster opener to my car without a remote? Yes, but only if your vehicle supports direct-to-motor Wi-Fi syncing or if your Liftmaster is equipped with MyQ smart technology. Otherwise, the handheld remote is required to “bridge” the initial radio frequency to your car’s computer.
Q2: How many cars can I program to a single Liftmaster opener? Most standard Liftmaster motors can store up to five distinct remote controls or vehicle systems in their memory. If you add a sixth, the oldest programmed device will be erased.
Q3: Do I need to reprogram my car if I change the garage door opener battery? No. The memory is stored in the motor’s logic board, not the battery. However, if you unplug the motor or experience a severe power surge, a quick re-sync (Steps 3 and 4) might be necessary.
Q4: Why does my HomeLink light flash rapidly but the door won’t move? A rapid flash means the car has successfully learned the remote’s signal, but the motor hasn’t accepted the car yet. You likely missed the 30-second window in Step 3. Simply press the Learn button on the motor again and press your car button immediately.
Q5: Is it safe to use a universal visor clip alongside my built-in car system? It is perfectly safe, but it is redundant. We highly recommend removing the visor clip once you know how to program a Liftmaster garage door opener to car. Visor clips are the number one target for “smash-and-grab” burglaries in residential US neighborhoods.
Conclusion
Learning how to program a Liftmaster garage door opener to car is a highly rewarding weekend project that instantly upgrades your daily routine. By following these precise steps, you eliminate the annoyance of lost remotes and boost your home’s overall security profile.
Did this guide help you finally sync your vehicle? Share this article on your favorite social media platforms like Facebook or Pinterest to help your friends and family conquer their own garage door tech struggles!
Leave a Reply