Introduction
There is nothing quite as frustrating as standing in your driveway with a new remote, only to realize your older garage door opener lacks the modern “learn” button found on newer units. If you are searching for how to program a garage door opener without learn button, you likely own a pre-1993 model that relies on manual DIP switches or fixed-frequency coding rather than rolling code technology. Do not worry; this is a common scenario for homeowners with vintage LiftMaster, Genie, or Craftsman systems, and the solution is entirely mechanical rather than digital.
In this comprehensive guide, we will walk you through the exact process of matching physical switches and frequencies to get your door working safely. We understand that dealing with older machinery can feel intimidating, but with the right steps, you can restore access without replacing your entire system.
Why Doesn’t My Garage Door Opener Have a Learn Button?
Before diving into the programming steps, it is vital to understand why your unit looks different. The absence of a learn button typically indicates your opener was manufactured before 1993. According to historical safety standards documented by Wikipedia, the U.S. Consumer Product Safety Commission mandated photoelectric sensors and rolling code technology after 1993 to prevent entrapment accidents.
Openers made prior to this regulation use fixed-code technology. Instead of a digital handshake initiated by a button press, these units rely on physical hardware configurations to establish a connection. Understanding this distinction is crucial because attempting to force a “sync” mode on these units will fail; you must instead match physical settings.
Fixed Code vs. Rolling Code: A Quick Comparison
| Feature | Fixed Code (No Learn Button) | Rolling Code (With Learn Button) |
|---|---|---|
| Era | Pre-1993 | Post-1993 |
| Programming Method | Manual DIP Switch Matching | Digital “Learn” Button Press |
| Security Level | Low (3–8 bits, easily copied) | High (Billions of combinations) |
| Remote Type | Slide-switch or solder-pad | Smart button / visor clip |
| Compatibility | Only matches same frequency/switch type | Brand-specific encryption |
How Do I Identify My Older Garage Door Opener Model?
To successfully program your device, you must first confirm the specific type of fixed-code system you have. There are generally two categories of openers without learn buttons:
- DIP Switch Models: These have tiny sliding switches inside both the motor head and the remote. They usually feature 8, 9, or 12 switches.
- Fixed-Frequency Solder Pad Models: Common in very early Genie units, these require physically moving a wire or changing a resistor position rather than flipping switches.
Action Step: Locate the model number plate on the back or side of your motor unit. Write down the exact model number and manufacturer. For example, a LiftMaster Model 1000 or Genie Excelerator requires vastly different approaches. If the label is faded, look for a row of tiny black sliders inside the battery compartment of your old remote; this confirms a DIP switch system.
Step-by-Step: Programming DIP Switch Openers
This is the most common method for answering how to program a garage door opener without learn button. Follow these precise steps to ensure synchronization.
Step 1: Access the Motor Unit Switches
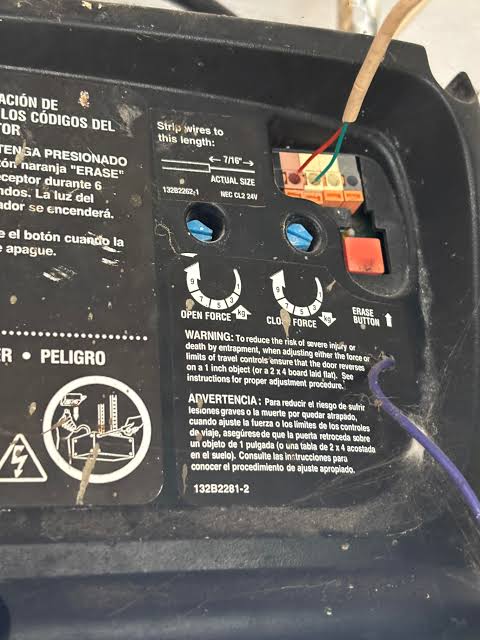
Use a sturdy stepladder to safely reach the garage door opener motor mounted on the ceiling. Remove the light lens cover or the main housing cover (depending on the model) to expose the internal circuit board. Look for a block of small sliding switches labeled “DIP” or numbered 1 through 8/12.
⚠️ Safety Warning: Always disconnect power to the opener before removing housing covers to avoid electrical shock. Reconnect power only when testing functionality.
Step 2: Set Your Desired Code Pattern
Decide on a unique pattern for your switches. Avoid setting all switches to “ON” or “OFF,” as these default patterns are susceptible to interference from neighbors’ openers. Create a random alternating pattern (e.g., Up-Down-Up-Up-Down-Up-Down-Up).
- Use a small flathead screwdriver or pen tip to slide each switch firmly into position.
- Ensure each switch makes full contact; a half-set switch will cause intermittent failures.
- Write down your chosen pattern for reference.
Step 3: Match the Remote Transmitter
Open the battery compartment of your new compatible remote. You should see an identical set of DIP switches. Replicate the exact pattern you set on the motor unit. Every single switch must match perfectly. If the motor unit has 8 switches and your remote has 9, consult the remote’s manual; often the 9th switch controls frequency selection rather than the security code.
Step 4: Test and Fine-Tune
Restore power to the opener. Stand clear of the door path and press the remote button.
- If the door activates: Congratulations! You have successfully programmed the unit.
- If the light blinks but door doesn’t move: Check the travel limit adjustments on the side of the motor unit.
- If nothing happens: Verify battery orientation, re-check every switch alignment, and ensure the remote frequency (e.g., 315 MHz vs. 390 MHz) matches the motor unit’s receiver.
What If My Opener Uses Solder Pads Instead of Switches?
Some vintage openers, particularly older Genie and Stanley models, lack sliding switches entirely. Instead, they use solder pads or jumper wires.
- Identify the Pads: Look for numbered metal contacts on the circuit board connected by small wires or solder bridges.
- Change Configuration: To change the code, you must desolder the existing connection and resolder it to a different pad position, or move a physical jumper cap.
- Match Remote: The remote will have corresponding solder pads or jumpers that must mirror the motor unit’s configuration exactly.
Note: This method requires basic soldering skills. If you are uncomfortable with electronics, consider purchasing a universal conversion kit designed for solder-pad openers.
Troubleshooting Common Programming Failures
Even with perfect switch alignment, issues can arise. Here are solutions to frequent problems:
- Intermittent Operation: Dirty switches are the #1 culprit. Spray electrical contact cleaner into the DIP switch block and toggle them back and forth 20 times to clean internal contacts.
- Range Issues: Old antennas degrade over time. Ensure the hanging antenna wire is at least 6 inches long and not coiled. Replace if corroded.
- Neighbor Interference: If your door opens randomly, your code pattern may conflict with a nearby unit. Change to a completely new random pattern on both motor and remote.
- Battery Voltage: Fixed-code remotes are sensitive to voltage drops. Use fresh alkaline batteries; rechargeable batteries often provide insufficient voltage for older transmitters.
Frequently Asked Questions (FAQ)
Can I use a modern universal remote with my old opener without a learn button?
Yes, but only if the universal remote specifically supports DIP switch programming or fixed-code frequencies. Many modern “universal” remotes only support rolling-code learn-button systems. Always check packaging for “compatible with pre-1993 openers” or “DIP switch capable” before purchasing.
Is it safe to continue using a garage door opener without a learn button?
While functional, pre-1993 openers lack auto-reverse safety sensors required by modern law. They pose entrapment risks, especially to children and pets. We strongly recommend upgrading to a modern opener with photoelectric eyes and rolling code security. If keeping the old unit, install aftermarket safety sensors as a minimum precaution.
How many possible codes does a DIP switch opener have?
An 8-switch system offers only 256 possible combinations (2⁸). A 12-switch system provides 4,096 combinations. This extremely limited pool is why fixed-code openers are vulnerable to code grabbing and neighbor interference, unlike modern rolling-code systems with billions of combinations.
Why did my programmed remote stop working after months of use?
DIP switches can drift due to vibration, temperature changes, or oxidation. Clean the switches as described above. Also check for corrosion on remote battery terminals and verify the motor unit’s capacitor hasn’t degraded, which can weaken signal reception over time.
Can I convert my old opener to use a learn button system?
Not directly. However, you can install an external universal receiver wired to your opener’s push-button terminals. This external receiver acts as a bridge, accepting modern rolling-code remotes while triggering your vintage motor. This preserves your existing opener while adding modern convenience and security.
Conclusion
Learning how to program a garage door opener without learn button empowers you to maintain older equipment safely and effectively. By understanding DIP switch mechanics, matching patterns precisely, and troubleshooting systematically, you can restore reliable access without unnecessary replacement costs. Remember that while these vintage systems are repairable, they lack critical safety features of modern units—plan for eventual upgrades to protect your household.
Found this guide helpful? Share it with fellow homeowners tackling vintage garage door projects on Facebook, Pinterest, or your neighborhood Nextdoor group! Your share could save someone hours of frustration and keep perfectly good equipment out of landfills. 🔧🏡
Leave a Reply