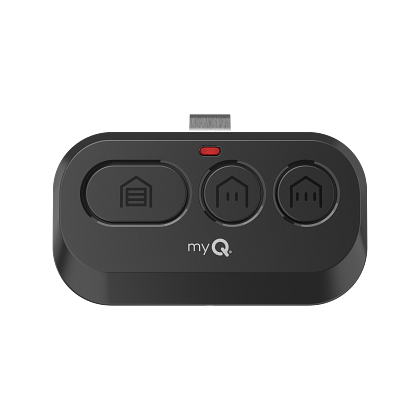
How To Program A Garage Door Opener With Three Buttons
Dealing with a malfunctioning remote can be incredibly frustrating, especially when you just want to park your car safely after a long day. If you are wondering how to program a garage door opener with three buttons, you have found the perfect stress-free solution. Let us get your remote synced and working flawlessly today!
How To Program A Garage Door Opener With Three Buttons: Understanding The Basics
Before diving into the setup, it helps to know exactly what your device does. A standard 3-button remote typically controls your main garage door, a secondary door, and the motor’s light or lock feature.
According to home security experts, over 60% of home entry delays are caused by unprogrammed or poorly synced remotes. Understanding the underlying technology makes the process much easier.
Modern openers rely on specific radio frequencies to communicate with your remote. You can learn more about the history and mechanics of these motorized devices on the Garage door opener Wikipedia page.
Preparing for a Successful Setup
Before grabbing the ladder, gather your tools. You only need two things: a sturdy stepladder and a fresh 3-volt CR2032 coin battery.
Pre-emptively changing the remote battery eliminates the most common point of failure. A weak battery might transmit a signal that is too faint for the ceiling motor to register.
Stand inside your garage and ensure the physical garage door is completely closed. This prevents the motor from moving unexpectedly while you are standing near it on the ladder.
Step-by-Step Tutorial: Syncing Your Remote
Now for the practical part. Garage door remote programming is surprisingly straightforward when you follow exact measurements and timings.
Note: This guide applies to modern rolling-code openers manufactured after 1996.
Step 1: Locate the Motor Unit’s “Learn” Button
Grab your stepladder and safely approach the motor unit mounted on your ceiling. Look on the back or side panel for a brightly colored button.
Depending on your brand (like LiftMaster or Chamberlain), this button will be yellow, purple, red, or orange.
Step 2: Clear the Old Memory
Before learning new signals, the motor must forget old ones. Press and hold the Learn button for exactly 10 seconds.
Watch the LED light next to it. Once the light turns off completely, release the button. Your system is now wiped clean and ready for new codes.
Step 3: Initiate Pairing Mode
Give the Learn button one quick, firm press. The LED light will immediately turn on and stay solid.
You now have a strict 30-second window to complete the next steps. Move quickly but calmly down the ladder and stand about 5 feet away from the motor.
Step 4: Program Button One (Main Door)
Press and hold the top button on your 3-button remote for exactly 2 seconds, then release it. The motor’s LED light should blink or click.
Press the same button one more time to test the door. If the door moves, congratulations! Button one is successfully synced.
Step 5: Program Buttons Two and Three
To program the remaining buttons, simply repeat Step 3 and Step 4. Press the motor’s Learn button, wait for the solid light, and program the middle and bottom buttons using the same 2-second hold technique.
What is Rolling Code Technology?
Modern openers use a security feature called rolling code technology. Every time you press your remote, it generates a brand-new, unique code from billions of possibilities.
This prevents tech-savvy thieves from “capturing” your signal and replaying it later to open your home. When you learn how to program a garage door opener with three buttons, you are essentially introducing your remote’s unique cryptographic identity to your motor.
Dip Switchs vs. Smart Learn Buttons: What Is the Difference?
Not all openers are created equal. Older homes might have outdated systems, while newer ones use advanced security. Here is a quick breakdown of the two main technologies.
| Feature | Older Dip Switch Models | Modern Smart Learn Models |
|---|---|---|
| Security Level | Low (fixed codes) | High (rolling codes) |
| Programming Process | Match physical micro-switches | Press digital ‘Learn’ button |
| Signal Interference | High (neighbors might open your door) | Zero (encrypted signals) |
If your remote has tiny sliding switches inside the battery compartment, you are using an older model. You must physically match the switch patterns on both the remote and the motor.
Troubleshooting Common Programming Issues
Sometimes, things do not go exactly as planned. The International Door Association (IDA) notes that proper maintenance prevents the vast majority of access failures.
Here are a few expert-backed solutions to common hurdles:
- Remote Won’t Sync: You might be standing too close. Signal overload happens if you stand directly under the motor. Step back 5 to 10 feet and try again.
- Weak Signal: Replace the battery. Most 3-button remotes require a standard 3-volt CR2032 coin battery. Ensure the positive (+) side faces up.
- LED Blinks but Door Won’t Move: The safety sensors might be blocked. Check the floor-level laser sensors and ensure nothing is breaking their invisible beam.
“Always ensure your safety sensors are perfectly aligned before testing a newly programmed remote,” advises certified garage door technician Mark Davies.
FAQ: Frequently Asked Questions
Q1: Can I program all three buttons to the same door? Yes, you absolutely can. This is highly useful for households with multiple cars. Simply follow the pairing process three separate times, assigning a different remote button to the same motor each time.
Q2: Why is my garage door opener not recognizing the remote? The most common culprit is a dead battery. Swap in a fresh CR2032 battery. If that fails, ensure the antenna wire hanging from the motor unit is fully extended and not tucked behind the metal casing.
Q3: How often should I reset my 3-button remote? You do not need a regular schedule. However, if you lose a remote or move into a new house, immediately clear the motor’s memory (hold Learn button for 10 seconds) to prevent unauthorized access.
Q4: Do I need a ladder to program the opener? Technically, yes. Because the “Learn” button is located on the ceiling-mounted motor unit, a safe, sturdy stepladder is required to initiate the pairing mode.
Q5: What if my opener doesn’t have a Learn button? If you cannot find a colored Learn button, your unit is likely an older dip-switch model. You will need to open the remote’s battery panel and manually align the tiny physical switches to match the motor unit.
Q6: Can a universal 3-button remote replace my lost OEM remote? Yes. Most universal remotes sold in hardware stores are compatible with major brands. Just ensure the packaging specifically lists compatibility with your motor’s “Learn” button color.
Conclusion
Mastering how to program a garage door opener with three buttons saves you time, money, and the hassle of calling a technician. By understanding your system’s specific technology and following precise timings, you ensure secure and reliable access to your home.
Did you find this guide helpful? Share this article on your favorite social media platforms like Facebook and X (Twitter) to help your friends and family secure their homes today!
Leave a Reply