
Have you ever stood in the rain, frantically pressing your garage door remote, only to watch it sit there stubbornly closed? It is a frustrating experience that many homeowners face, often due to a simple loss of synchronization between the remote and the motor unit. If you are wondering how to program a garage door opener with a remote, you are in the right place. This guide will walk you through the process safely and efficiently, saving you the cost of a professional service call.
Why Does My Garage Door Remote Stop Working?
Before diving into the programming steps, it is helpful to understand why remotes lose their connection. Most modern garage door openers use rolling code technology for security. This means the code changes every time you press the button. Occasionally, the remote and the opener can fall out of sync, especially after a power outage or if the remote battery dies.
According to industry standards, most residential garage door openers have a lifespan of 10–15 years. However, the electronic components, including the receiver board, may need reprogramming much sooner. Understanding this helps you realize that reprogramming is a normal maintenance task, not necessarily a sign of broken equipment.
Safety First: Preparing for Programming
Safety is paramount when working with garage door mechanisms. These doors are heavy and operate under high tension. Before you begin any programming or troubleshooting:
- Clear the Area: Ensure no people, pets, or objects are in the path of the garage door.
- Check the Springs: Never attempt to adjust or repair the torsion springs yourself. This is dangerous and should be left to professionals.
- Locate the Manual: If you have it, keep your owner’s manual nearby. Different brands have slight variations in their programming sequences.
Step-by-Step Guide: How to Program a Garage Door Opener With a Remote
While every brand has its nuances, the general process for most major manufacturers (such as LiftMaster, Chamberlain, Genie, and Craftsman) follows a similar pattern. Here is a universal approach to getting your remote back in action.
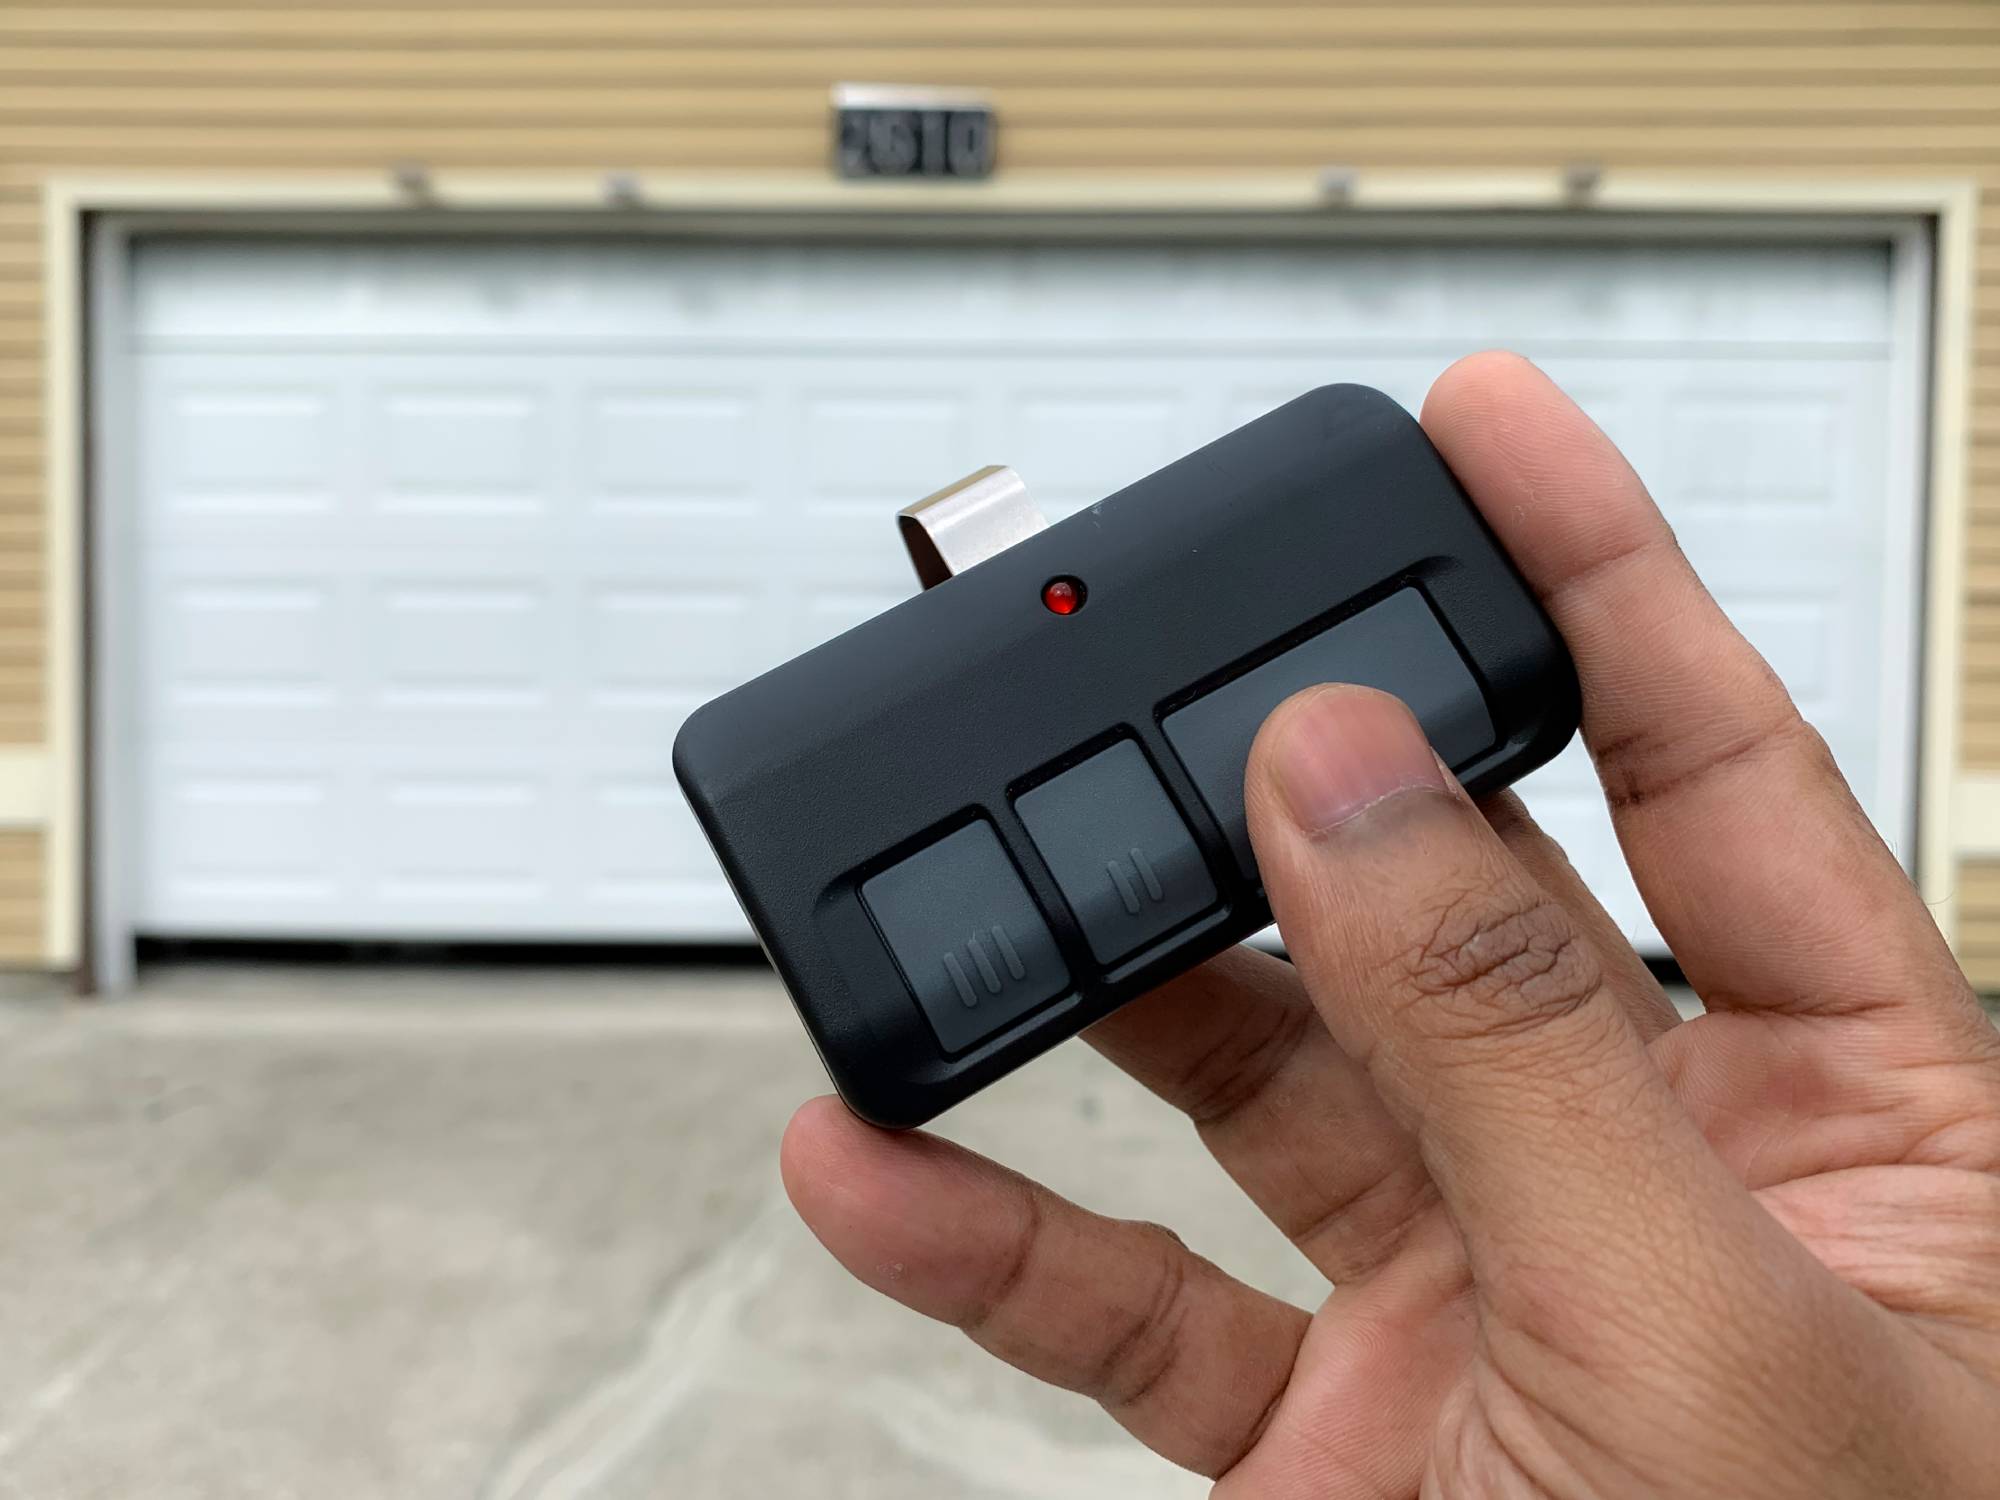
Step 1: Locate the “Learn” Button
The first step is finding the Learn button on your garage door opener motor unit. This unit is mounted on the ceiling of your garage.
- Look for a small button, usually colored yellow, purple, orange, or red.
- It is often located near the hanging antenna wire.
- You may need a sturdy ladder to reach it safely.
Pro Tip: If you cannot find the button, check the back or side of the motor housing. Some older models hide it behind a light lens cover.
Step 2: Clear Old Codes (Optional but Recommended)
If you are having persistent issues, or if you have lost a remote and want to ensure it can no longer open your garage, you should clear the memory first.
- Press and hold the Learn button for about 6–10 seconds.
- Wait until the indicator light next to the button turns off.
- Release the button.
This action erases all previously programmed remotes and keypads. You will need to reprogram all your devices after this step.
Step 3: Program the New Remote
Now that the system is ready, follow these steps to pair your remote:
- Press the Learn Button: Briefly press and release the Learn button on the motor unit. The indicator light will either turn on solid or start blinking, depending on the model. You typically have 30 seconds to complete the next step.
- Press the Remote Button: Within those 30 seconds, go to your remote control. Press and hold the button you wish to use for three seconds.
- Confirm Success: Watch the motor unit. The light should blink or turn off, indicating the code has been accepted. You may also hear a click from the motor.
Step 4: Test the Connection
Stand at a safe distance and press the remote button. The garage door should activate. If it does not, repeat Step 3, ensuring you are within range and the batteries are fresh.
Brand-Specific Nuances: What You Need to Know
While the steps above work for most units, some brands have specific requirements. Below is a quick comparison of popular brands.
| Brand | Common Learn Button Color | Special Notes |
|---|---|---|
| LiftMaster | Yellow, Purple, Orange | Often requires pressing the remote button twice for older models. |
| Chamberlain | Yellow, Purple | Similar to LiftMaster (same parent company). Check for a “Smart” button. |
| Genie | Purple, Red, Green | May require holding the remote button for up to 5 seconds. |
| Craftsman | Yellow, Red | Older models may use dip switches instead of a learn button. |
For more detailed technical specifications on rolling code security protocols, you can refer to Wikipedia’s entry on Garage Door Openers, which provides historical context on how these security features evolved.
Troubleshooting Common Programming Issues
Even with careful following of instructions, things can go wrong. Here are the most common issues and how to fix them.
The Light Blinks But the Door Doesn’t Move
If the motor light blinks but the door remains stationary, check the safety sensors. These are the small eyes near the floor on either side of the door.
- Ensure they are aligned. A misaligned sensor will prevent the door from closing.
- Clean the lenses with a soft cloth. Dust and spider webs can block the beam.
- Check for obstructions in the door’s path.
The Remote Works Intermittently
If your remote works sometimes but not others, the issue is likely battery-related or interference.
- Replace Batteries: Even if the light on the remote turns on, the signal strength may be too weak. Use fresh alkaline batteries.
- Check for Interference: LED light bulbs in the garage can sometimes emit frequency interference. Try turning off the garage lights and testing the remote. If it works, consider switching to incandescent bulbs or shielded LEDs.
The Learn Button Won’t Respond
If pressing the Learn button does nothing, the motor unit’s logic board may be faulty.
- Check if the unit is plugged in securely.
- Reset the circuit breaker for the garage.
- If the unit is over 15 years old, it may be time to consider a replacement rather than repair.
Frequently Asked Questions (FAQ)
1. Can I program a universal remote to my garage door opener?
Yes, most universal remotes are designed to work with major brands like LiftMaster, Chamberlain, and Genie. You will need to follow the specific instructions included with the universal remote, which usually involve setting dip switches or entering a code sequence before pressing the Learn button on the motor.
2. How many remotes can I program to one garage door opener?
Most modern garage door openers can store between 8 to 15 remote codes. However, check your specific model’s manual for the exact limit. If you reach the limit, you must clear old codes before adding new ones.
3. Do I need to reprogram my keypad if I reprogram my remote?
If you only added a new remote without clearing the memory (Step 2 above), your existing keypad will continue to work. However, if you cleared all codes to start fresh, you must reprogram your keypad as well using the same Learn button process.
4. Why does my garage door remote work close up but not from the driveway?
This is typically a sign of weak batteries or antenna issues. Try replacing the batteries first. If that fails, check the antenna wire on the motor unit. It should hang down freely and not be wrapped around the motor or tucked behind metal beams, which can block the signal.
5. Is it safe to buy a used garage door remote?
It is generally not recommended. Used remotes may still be linked to the previous owner’s system, posing a security risk. Additionally, older remotes may use fixed codes rather than rolling codes, making them less secure. Always buy new remotes from authorized dealers.
6. What if my garage door opener doesn’t have a Learn button?
If your opener is very old (pre-1990s), it may use dip switches. These are small switches inside both the remote and the motor unit. To program it, you must match the switch positions on the remote to exactly match the positions on the motor unit.
Conclusion
Learning how to program a garage door opener with a remote is a valuable skill that saves time and money. By following the steps outlined above—locating the Learn button, clearing old codes if necessary, and syncing your remote—you can restore convenience to your daily routine. Remember to prioritize safety, keep your sensors clean, and replace batteries regularly to maintain optimal performance.
If you found this guide helpful, please share it with friends or neighbors who might be struggling with their own garage door remotes. A little knowledge goes a long way in keeping our homes running smoothly!
Leave a Reply