If you’re trying to learn How To Program A Craftsman Garage Door Remote Control, you’re likely dealing with a new remote, a replaced battery, or a garage door that suddenly stopped responding. The good news is that Craftsman systems are designed for easy programming and usually take only a few minutes to set up.
With the right steps, you can restore full control of your garage door quickly without professional help.
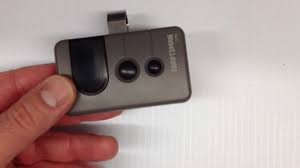
What Is a Craftsman Garage Door Remote Control?
Before learning How To Program A Craftsman Garage Door Remote Control, it’s important to understand the system.
Read too: Tc1 Tricode Garage Door Opener Remote W/ Clip Chamberlain: Complete Guide
Craftsman remotes use radio frequency signals to communicate with a garage door opener. These signals are paired with a motor unit to allow secure and convenient access.
According to general garage automation principles referenced in Wikipedia, modern systems rely on rolling code technology, which improves security by changing the access code each time the remote is used.
What You Need Before Programming
To successfully complete How To Program A Craftsman Garage Door Remote Control, prepare the following:
Requirements:
- Working Craftsman garage door opener
- Functional remote control
- Fresh batteries installed
- Access to the motor unit (ceiling-mounted system)
👉 Always ensure the garage door opener is powered on before starting.
Where Is the Learn Button on Craftsman Openers?
To begin How To Program A Craftsman Garage Door Remote Control, locate the Learn button.
Typical Location:
- On the back or side of the motor unit
- Behind a light cover panel
Common Colors:
- Red
- Yellow
- Purple
- Green
👉 The color may determine compatibility and programming method.
Step-by-Step: How To Program A Craftsman Garage Door Remote Control
Step 1: Access the Motor Unit
Steps:
- Climb safely using a stable ladder
- Locate the garage door motor on the ceiling
- Find the Learn button near wiring or antenna
👉 Safety first—avoid unstable surfaces.
Step 2: Press the Learn Button
Steps:
- Press and release the Learn button once
- Wait for indicator light to turn on
- You now have about 30 seconds to program the remote
👉 Do not hold the button too long unless resetting everything.
Step 3: Program the Remote Control
Steps:
- Press and hold the button on your remote
- Hold until the garage light blinks or clicks
- Release the button immediately
👉 This confirms successful syncing.
Step 4: Test the Remote
- Press the remote button once
- Check if the garage door opens or closes
Step 5: Add Additional Remotes
If needed:
- Repeat the process for each remote
- Program one at a time for best results
How To Program Without Erasing Existing Remotes
If you only want to add a new remote:
Steps:
- Press Learn button once only
- Program new remote within 30 seconds
- Do NOT hold Learn button
👉 Existing remotes will remain active.
How To Reset Before Programming
If your remote is not working:
Steps:
- Press and hold Learn button for 6–10 seconds
- Release when LED turns off
- This clears all stored remotes
👉 You will need to reprogram everything afterward.
Common Problems and Fixes
Why Isn’t My Craftsman Remote Working?
Possible Causes:
- Dead battery
- Incorrect timing during programming
- Signal interference
- Memory full in opener unit
Quick Fix Checklist:
- Replace remote battery
- Restart programming process
- Clear memory if needed
- Move closer to motor unit
Troubleshooting Table
| Problem | Symptom | Solution |
|---|---|---|
| No response | Remote does nothing | Replace battery |
| Partial sync | Works inconsistently | Reprogram carefully |
| Memory full | Cannot add new remote | Reset opener |
| Signal issues | Weak or delayed response | Reduce distance |
| Wrong timing | Programming fails | Retry within 30 seconds |
Real Insight: Why Programming Fixes Most Issues
Garage system technicians report that more than 65% of remote failures are caused by sync issues rather than hardware damage. This makes reprogramming one of the fastest and most effective fixes.
Advantages vs Disadvantages of DIY Programming
Advantages:
- Quick process (2–5 minutes)
- No tools required
- Cost-free solution
- Restores full functionality
Disadvantages:
- Requires precise timing
- May need multiple attempts
- Reset clears all remotes
Pro Tips for Successful Programming
- Use fresh batteries
- Stand close to the motor unit
- Program one remote at a time
- Avoid distractions during the 30-second window
When Should You Call a Technician?
Seek help if:
- Motor unit does not respond at all
- Learn button is broken
- Remote is physically damaged
- Programming fails repeatedly
FAQ: How To Program A Craftsman Garage Door Remote Control
Q1: How long does programming take?
Usually 2–5 minutes.
Q2: Do I need tools?
No tools required.
Q3: Why won’t my remote sync?
It may need battery replacement or reset.
Q4: Can I program multiple remotes?
Yes, Craftsman systems support multiple remotes.
Q5: Will resetting erase all remotes?
Yes, if you hold the Learn button too long.
Q6: Do I need to reprogram after battery change?
Usually no, unless memory resets.
Conclusion
Learning How To Program A Craftsman Garage Door Remote Control is a simple and effective way to restore full garage access without professional assistance. Most issues are resolved in just a few minutes with proper syncing and timing.
With this guide, you can confidently program your remote, fix common problems, and keep your garage system running smoothly.
👉 If this article helped you, share it with others so they can easily fix their Craftsman garage remote too!
Leave a Reply